Repairing these armrests instead of replacing them can provide significant cost savings and also offer an opportunity to customize the repair to match specific office decor. This guide delves into the nuances of vinyl as a material, explores common problems associated with vinyl office chair armrests, and provides step-by-step instructions on how to address these issues effectively.
Understanding Vinyl as a Material in Office Chairs
Vinyl is favored in office environments for its ability to withstand significant use while maintaining a presentable appearance. It’s a plastic resin manufactured from ethylene and chlorine, which when processed, forms Polyvinyl Chloride or PVC—commonly referred to as vinyl. This material is not only durable but also resistant to moisture and easy to clean, making it ideal for high-traffic areas like offices.
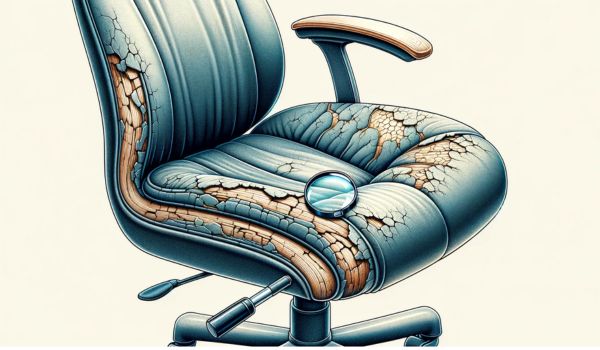
However, despite its robust nature, vinyl office chair armrests are susceptible to certain types of damage. Cracks can appear from the stress of regular use, especially in colder climates where the material becomes less pliable. Tears are another common issue, often a result of sharp objects or the edge of a desk piercing the vinyl. Over time, the color of vinyl armrests can also fade or become discolored due to exposure to sunlight or the wear and tear of daily use.
Preparation for Repairing Vinyl Office Chair Armrests
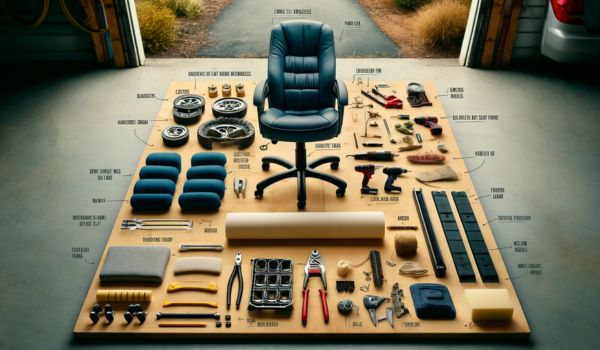
Before embarking on the repair of a vinyl office chair armrest, it’s essential to assemble all the necessary tools and materials. Preparing adequately ensures the repair process is smooth, efficient, and safe.
Gathering Necessary Tools and Materials
The success of your repair job heavily depends on having the right tools and materials at your disposal. Here’s what you’ll need:
- Vinyl Repair Kit: This is the cornerstone of your repair process, containing adhesive, application tools, and sometimes colorant to match the vinyl.
- Sandpaper: Used to smooth out the surface after applying the vinyl repair compound, helping it blend seamlessly with the surrounding area.
- Cleaning Supplies: Having a clean surface is crucial for effective repairs. Use mild soap and water or a vinyl cleaner to remove any dirt or oils that could interfere with adhesion.
- Adhesive: In some cases, additional adhesive may be required, especially if dealing with larger tears that need extra security.
- Patch Material: For tears, having a piece of vinyl that matches the existing material helps create a discreet repair.
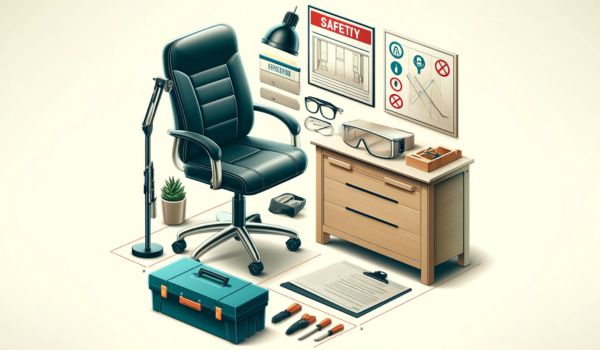
Safety Precautions
When repairing vinyl, it’s important to work in a well-ventilated area as adhesives and colorants can emit fumes. Wearing gloves can protect your skin from harsh chemicals, and safety glasses are advised to guard against accidental splashes.
Assessing the Damage
Before proceeding with any repairs, a thorough assessment of the damage is crucial. Look over the armrest to determine the extent and type of damage:
- Cracks often appear on the surface and might not affect the entire thickness of the vinyl, making them easier to fill.
- Tears require careful examination to ensure the patch will adequately cover and bond to the damaged area.
- Wear and Discoloration might need a color restoration process if the original hue has faded significantly.
By accurately assessing the damage, you can choose the most effective repair methods and ensure that you don’t undertake unnecessary work. This step-by-step preparation sets the foundation for a successful repair, extending the life and beauty of your office chair armrest.
Related Post
Step-by-Step Repair Process for Vinyl Office Chair Armrests
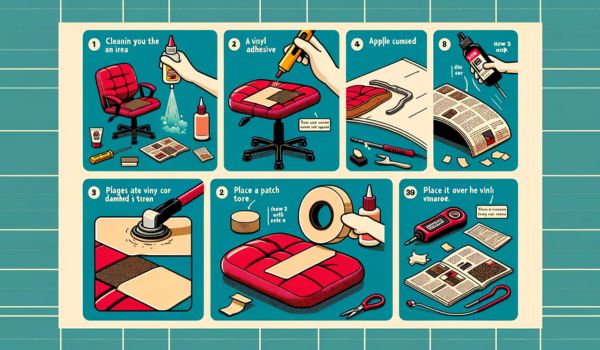
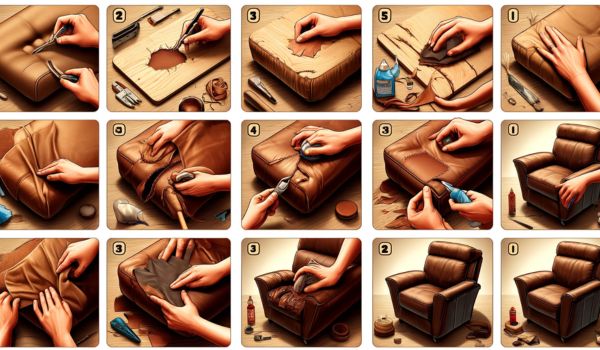
Repairing a vinyl office chair armrest requires meticulous attention to detail and careful handling of materials. This section outlines a practical approach to restoring your chair’s armrest to near-original condition.
Cleaning the Armrest
Removing Dirt and Debris: Begin by wiping down the armrest with a dry cloth to remove any loose dirt or debris. This step prevents scratching or further damage during the cleaning process.
Using Appropriate Cleaners: Apply a mild soap mixed with water or a specialized vinyl cleaner using a soft cloth. It’s crucial to avoid harsh chemicals that can damage the vinyl. Thoroughly clean the area to ensure the repair materials adhere properly.
Repairing Small Cracks and Tears
Using a Vinyl Repair Kit: Select a repair kit that closely matches the color and texture of your vinyl. These kits typically include a compound that is used to fill in cracks and small tears.
Applying Adhesive: Carefully apply the adhesive or compound to the damaged area. For small cracks, you may use the tip of the application tool to gently press the compound into the crack.
Smoothing the Surface: Once the compound is in place, use a flat tool or your finger (while wearing a glove) to smooth it out, ensuring it is level with the surrounding surface. Allow it to dry according to the instructions provided with the kit.
Repairing Large Tears or Holes
Cutting and Preparing a Vinyl Patch: Measure and cut a piece of vinyl that is slightly larger than the tear or hole. This patch should come from a hidden section of the chair or a matching piece of vinyl.
Applying the Patch: Place the vinyl patch underneath the damaged area and use a vinyl adhesive to secure the edges underneath the existing vinyl. Ensure the adhesive is applied evenly for a strong bond.
Blending the Patch with the Original Material: Once the patch is secured and the adhesive has dried, apply a thin layer of vinyl repair compound over the patch to blend it into the original material. Color it if necessary to match the surrounding area.
Finishing Touches
Sanding and Smoothing Repaired Areas: After the repairs have dried completely, gently sand any uneven surfaces with fine-grit sandpaper. This helps to create a smooth, seamless appearance.
Applying a Protective Coating: To protect the repair and the surrounding vinyl, apply a clear vinyl sealant or protector. This coating will also enhance the shine and provide a layer of resistance against future wear and tear.
Ensuring a Seamless Look: Finally, inspect the armrest to ensure that the repair blends in well with the rest of the chair. The goal is to make the repaired areas virtually undetectable.
Following these steps will help you effectively repair and restore the vinyl armrests of your office chair, ensuring continued comfort and maintaining a professional appearance in your workspace.
Related Post
Alternative Repair Methods for Vinyl Office Chair Armrests
When the standard repair methods don’t quite fit the bill, or if you’re looking for a different approach, there are alternative techniques you can consider for repairing vinyl office chair armrests.
Using Liquid Vinyl Repair Compounds
Liquid vinyl is an excellent option for seamless repairs, especially for minor abrasions or small holes. This compound is applied directly to the damaged area, and it dries to form a solid, flexible seal that mimics the look and feel of the original vinyl.
Sewing or Stitching the Tear
For a more hands-on repair, stitching can be effective, particularly for clean tears that haven’t frayed. Using a strong, color-matched thread, carefully sew the tear closed. This method is more visible but adds a level of durability to the repair, reinforcing the damaged area against further stress.
Replacing the Armrest Covers
If the damage is extensive or if the armrests are excessively worn, replacing the vinyl covers might be the most straightforward solution. This method ensures a brand-new appearance and can be more cost-effective in the long run, especially if repairs are becoming a frequent necessity.
Preventative Maintenance Tips
Maintaining your office chair can significantly extend its lifespan and reduce the need for repairs. Here are some preventative maintenance tips:
Regular Cleaning and Conditioning
Clean your vinyl armrests regularly with suitable cleaners to prevent dirt accumulation that can cause abrasion and wear. Use a vinyl conditioner occasionally to keep the material supple and prevent cracks.
Using Protective Covers
Consider using removable covers that can be washed and replaced as needed. These covers protect the armrests from direct wear and tear while providing an opportunity to update the chair’s look without a full replacement.
Avoiding Excessive Pressure or Weight
Vinyl armrests are durable but can deform or crack under excessive weight. Avoid leaning heavily on them or using them as supports when standing up or sitting down.
Troubleshooting Common Issues
Even with careful application, you might encounter issues during the repair process. Here are some tips for common problems:
Adhesive Not Sticking
Ensure the surface is thoroughly cleaned and dried before applying adhesive. If the adhesive still fails to stick, try a different brand or a specialized vinyl adhesive, which may offer a better bond.
Patch Material Not Blending
If the patch material stands out, you may need to custom-cut a piece from a hidden area of the chair or from a matching vinyl sheet. Consider using a tinted vinyl repair compound to better match the surrounding area.
Repaired Area Looking Uneven
If the repaired area appears uneven after drying, carefully sand it down with fine-grit sandpaper and apply a thin layer of repair compound to smooth it out. Finish with a coat of clear vinyl sealant for a polished look.
By understanding these alternative methods, preventative strategies, and troubleshooting tips, you can ensure your vinyl office chair armrests remain in excellent condition, providing comfort and aesthetic appeal in your office space.
Cost-Benefit Analysis of Repairing vs. Replacing Vinyl Office Chair Armrests
When deciding whether to repair or replace vinyl office chair armrests, considering both the immediate and long-term financial implications as well as environmental factors is crucial.
Cost Comparison Between Repair and Replacement
The cost of a vinyl repair kit and other necessary materials generally ranges from $10 to $50, depending on the extent of the damage and the quality of the materials purchased. In contrast, replacing an entire office chair, or even just the armrests, can cost anywhere from $50 to several hundred dollars. Therefore, repairing is often the more economical choice for minor to moderate damages.
Long-term Benefits of Repair
Repairing armrests can extend the furniture’s lifespan, delaying the need for full replacement and thus providing better value over time. Regular maintenance and timely repairs can keep chairs looking new and fully functional, which is especially beneficial in professional environments where appearance matters.
Environmental Impact of Repair vs. Replacement
Choosing to repair instead of replace has significant environmental benefits. It reduces waste by prolonging the life of the current materials and minimizes the demand for new raw materials needed to manufacture new chairs. This, in turn, contributes to less landfill waste and a lower carbon footprint associated with production and transportation.
Conclusion
This guide has covered the essential steps and methods for how to repair vinyl office chair armrests, from understanding the material to detailed repair processes and maintenance tips. Repairing your office furniture not only saves money but also helps in sustaining the environment. I encourage you to consider these DIY repairs to not only extend the life of your office furniture but also maintain its aesthetic value and functionality. Remember, a well-maintained office environment reflects professionalism and care, which can have a positive impact on your work culture.
Frequently Asked Questions
How to repair armrest on office chair?
To repair an armrest on an office chair, first identify if the issue is structural or cosmetic. For structural repairs, tighten any loose screws or replace broken parts. For cosmetic issues, use upholstery foam or fabric to patch up.
Can vinyl chairs be repaired?
Yes, vinyl chairs can be repaired. Small tears or holes can be fixed with a vinyl repair kit, which includes adhesive and patch material that closely matches the chair’s original color and texture.
How to repair torn vinyl?
To repair torn vinyl, clean the area around the tear thoroughly, then apply a vinyl adhesive beneath the edges of the tear. Press the edges together and apply a vinyl patch over the area if necessary. Allow it to dry completely.
How do you fix a broken chair arm?
Fixing a broken chair arm involves first determining the type of break. If the arm is wooden, glue and clamp the broken pieces together. For metal arms, you might need to weld or use a strong adhesive.
Can you repair torn vinyl seat?
A torn vinyl seat can be repaired using a vinyl repair kit. Clean the area around the tear, apply the adhesive, and place a patch over the area. Ensure the patch blends well with the existing material.
Can peeling vinyl be repaired?
Peeling vinyl can be repaired by reapplying adhesive to secure the peeling sections back in place. If the damage is extensive, consider using a vinyl paint or replacing the affected area with a new piece of vinyl.

Julie D. Williams is a seasoned chair connoisseur with a decade in the furniture realm. She combines her keen eye for design and deep knowledge of ergonomics to provide readers with reviews and guides, ensuring comfort and style in every recommendation. Each piece is a fusion of aesthetics and function, tested and approved by Julie. A believer in the power of the perfect seat to transform spaces, she’s your go-to source for impeccable finds. When not reviewing chairs, Julie is on the hunt for vintage décor, weaving comfort and beauty into every aspect of life.
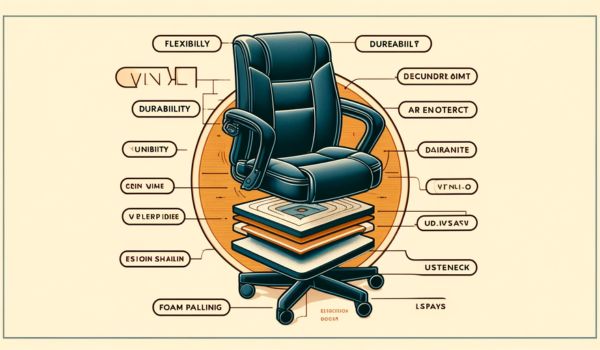
Understanding the significance of a supportive office chair isn’t just about comfort—it affects productivity and overall health. In this article, we will cover everything from identifying the problems with your armrests to assessing the damage and deciding on the best course of action.
Recognizing the Tell-Tale Signs of Armrest Wear and Tear
How do you know it’s time to fix your office chair armrest foam? The first step is identifying the problem, which often manifests through visible cracks or tears in the foam. If the armrests have lost their original shape or have started to flatten, causing your elbows and forearms to feel uncomfortable pressure points, these are clear indicators that the foam is no longer performing as it should.
But what causes these issues? It could be the regular wear and tear from daily use, exposure to sunlight or heat, or simply the use of poor-quality materials in the chair’s construction.
Assessing the Damage to Armrest Foam
After recognizing the issues, the next step in how to fix office chair armrest foam is to assess the damage thoroughly. This means examining whether the foam deterioration is just on the surface or if it has penetrated deeper into the armrest. Surface-level damage might be fixable with simple solutions like patching or adding a cover, while deep foam deterioration could require a more comprehensive approach, such as replacing the foam entirely.
Making this determination is crucial because it informs whether a repair will suffice or if a full replacement is necessary to restore the armrest to its original comfort level.
Deciding Between Repair or Replacement
Deciding whether to repair or replace the foam in your office chair armrests can seem daunting. However, understanding the extent of the damage and considering how much longer you intend to keep the chair can help make this decision easier. Minor issues might be addressable with DIY fixes, which we will explore in the following sections.
However, if the foam has severely deteriorated, replacing it might be the only way to ensure your chair can provide the support and comfort needed for optimal productivity.
Gathering Necessary Materials and Tools

Before you can start the repair or replacement process, gathering all necessary materials and tools is crucial. Here’s what you’ll need to fix office chair armrest foam effectively:
- Replacement foam: Ensure you choose high-density foam for durability and comfort.
- Fabric or upholstery material: This will cover the new foam, giving your armrests a fresh, new look.
- Adhesive: Options include spray adhesive or glue, depending on your preference and the materials you’re working with.
- Optional: Additional foam padding or batting can be used for extra comfort and cushioning.
As for the tools required, make sure you have:
- Scissors to cut the fabric and foam.
- Staple gun for securing the fabric to the armrest.
- Screwdriver to detach the armrest from the chair.
- Measuring tape to ensure your foam and fabric are the correct size.
- Utility knife to precisely cut the replacement foam to size.
Related Post
Removing the Armrest
The first physical step in how to fix office chair armrest foam is removing the armrest from the chair. Follow these steps to ensure a safe and efficient removal:
- Identify the Screws or Attachments: Flip the chair to access the underside of the armrest. Look for any screws, bolts, or clips that hold the armrest in place.
- Safely Removing the Armrest: Using the appropriate screwdriver, carefully remove the screws or attachments. Keep all screws and attachments in a small container to avoid losing any pieces. Gently lift the armrest away from the chair frame.
With the armrest detached and all necessary materials and tools ready, you’re set to move on to repairing or replacing the office chair armrest foam. This will ensure that your chair not only looks good but also provides the necessary support and comfort for everyday use.
Removing the Old Foam
To ensure your repair is effective, you must thoroughly remove the old, deteriorated foam from the office chair armrest. Here’s a step-by-step guide on how to accomplish this:
- Using a Utility Knife or Scissors: Start by carefully cutting into the old foam. If the foam is glued down, use a utility knife to slice through it. Scissors are useful for peeling off the foam layers once they are loose.
- Cleaning the Surface: Once all the old foam is removed, clean the underlying surface of the armrest to remove any residual glue or debris. A clean surface will help the new foam adhere better.
Related Post
Cutting and Shaping New Foam
Once the old foam is removed and the surface is prepped, the next step in fixing your office chair armrest foam involves cutting and shaping the new foam:
- Measuring the Armrest for Correct Foam Dimensions: Use a measuring tape to measure the length, width, and desired thickness of the new foam. It’s essential to get accurate measurements to ensure the foam fits perfectly.
- Cutting Foam to Size: With your measurements in hand, mark the dimensions on your new foam. Use a utility knife for precise cuts. Ensure the blade is sharp to avoid tearing the foam.
- Techniques for Clean Cuts: For the cleanest cuts, make a shallow first pass with your knife to create a guideline, then make deeper cuts along this line until you’ve cut through the foam.
- Shaping the Foam for Ergonomic Comfort: If necessary, trim the edges of the foam to create a contoured shape that matches the original ergonomic design of the armrest.
Attaching the New Foam
The final step in how to fix office chair armrest foam is attaching the new foam securely:
- Applying Adhesive to Secure the Foam: Choose a suitable adhesive (spray adhesive works well for foam applications). Spray or apply the glue evenly on both the armrest surface and the bottom side of the new foam.
- Even Distribution of Adhesive: Make sure the adhesive covers the entire surface area to avoid unevenness or bubbling in the foam.
- Ensuring Strong Adhesion: Place the new foam onto the armrest, pressing down firmly and evenly. Allow the adhesive to cure according to the manufacturer’s instructions, ensuring a strong bond and preventing the foam from shifting during use.
By carefully following these steps to remove old foam, cut and shape new foam, and attach it securely, you will have successfully repaired the foam in your office chair armrest, restoring comfort and functionality to your workspace.
Covering the Foam with Fabric
Once your new foam is securely attached, the next step is to cover it with fabric or upholstery material. When selecting your fabric, consider durability and comfort, as the armrest will undergo frequent use and pressure. Choose a material that complements the aesthetic of your office chair while providing resilience and ease of maintenance. After selecting the fabric:
- Cutting Fabric to Size: Measure the dimensions of the armrest, adding extra fabric on all sides to allow for wrapping around the foam and under the armrest where it will be secured.
- Securing the Fabric Around the Foam: Lay the cut fabric flat and place the foam-covered armrest face down onto the fabric. Pull the fabric tightly over the edges, ensuring it is even and smooth.
- Using a Staple Gun for Tight and Secure Attachment: Secure the fabric to the underside of the armrest using a staple gun. Make sure the staples are spaced evenly and penetrate deeply to hold the fabric in place.
- Ensuring a Smooth, Wrinkle-Free Finish: As you staple, adjust the tension in the fabric to avoid wrinkles and ensure a smooth, professional-looking finish.
Reattaching the Armrest
With the fabric now securely in place, it’s time to reattach the armrest to the chair:
- Aligning Screw Holes: Carefully align the armrest with the screw holes on the chair frame. This may require slight adjustments as the new foam and fabric can shift the alignment.
- Securing Screws Tightly: Once aligned, reinsert and tighten the screws to secure the armrest back onto the chair. Ensure they are tight to prevent any wobbling or instability.
Final Adjustments and Tips
After reattaching the armrest, make some final adjustments to ensure everything is properly aligned and secure. Here are some tips for maintaining your office chair armrest foam:
- Regular Cleaning: Clean the armrest regularly to prevent dirt build-up that can degrade the fabric and foam.
- Avoiding Excessive Pressure or Weight: Do not exert excessive pressure on the armrests to prolong their life.
- Using Protective Covers: Consider using removable covers that can be washed and replaced, offering additional protection against wear and tear.
Conclusion
This comprehensive guide has walked you through the steps involved in fixing office chair armrest foam, from identifying and removing old foam to securing new fabric and reattaching the armrest. By tackling this repair, you not only extend the life of your office chair but also enhance your comfort, making long hours at your desk more enjoyable. Feel free to share your feedback or ask questions if you need further assistance with your office chair repairs. Your comfort at work is worth the effort!
Frequently Asked Questions
How to fix office chair armrest?
To fix an office chair armrest, tighten any loose screws or bolts with a screwdriver or Allen wrench. If the armrest is damaged, consider replacing it with a new one from the manufacturer.
What kind of glue to repair office chair?
For repairing office chairs, use a strong adhesive like epoxy or super glue. Ensure the surfaces are clean and dry before application for best results.
How to lock office chair armrest?
Some office chair armrests can be locked by adjusting a knob or lever usually found underneath the armrest. Check your chair’s manual for specific locking mechanisms.
How to raise office chair armrests?
To raise the armrests, locate the adjustment button or lever on the side or underneath the armrest. Press or lift it while pulling the armrest to the desired height.
How do you fix a broken chair arm?
To fix a broken chair arm, realign the broken parts and use wood glue or a suitable adhesive. Clamp the arm until the glue dries completely, then reinforce with screws if needed.
Why is my armrest loose?
A loose armrest typically results from worn-out screws or bolts. Tighten them with the appropriate tools. If they’re damaged, replace them with new hardware.
Julie D. Williams is a seasoned chair connoisseur with a decade in the furniture realm. She combines her keen eye for design and deep knowledge of ergonomics to provide readers with reviews and guides, ensuring comfort and style in every recommendation. Each piece is a fusion of aesthetics and function, tested and approved by Julie. A believer in the power of the perfect seat to transform spaces, she’s your go-to source for impeccable finds. When not reviewing chairs, Julie is on the hunt for vintage décor, weaving comfort and beauty into every aspect of life.
In this guide, we’ll walk through the steps to identify and fix common armrest issues, ensuring your chair is as supportive as your work ethic.
The Importance of a Functional Office Chair
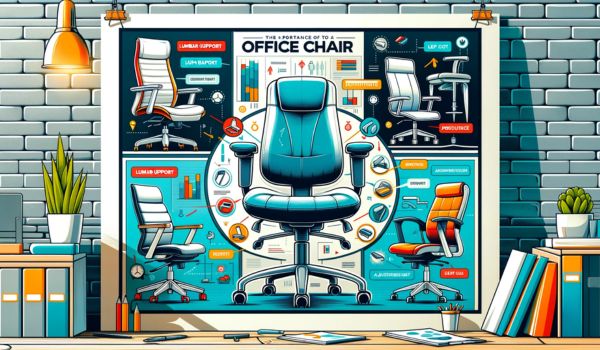
A functional office chair is pivotal for maintaining posture and preventing strain during long hours of sitting. The armrests particularly play a crucial role in supporting your arms and ensuring that your shoulders are not unduly stressed. When these are compromised, it can lead to discomfort and long-term issues like repetitive strain injuries.
Therefore, understanding how to fix the armrest on your office chair is essential for anyone looking to maintain a healthy and productive workspace.
Common Issues with Office Chair Armrests
Office chair armrests can face a variety of issues ranging from being loose or completely broken to simply being uncomfortable. Each issue requires a different approach, which we will cover in detail.
By the end of this guide, you’ll be equipped with the knowledge needed to tackle any armrest issue.
Tools and Materials Needed to Fix an Armrest

Essential Tools
To effectively fix the armrest on your office chair, you will need a set of basic tools. These include:
- Screwdrivers: Both Phillips and flat-head, depending on your chair’s screws.
- Allen wrenches: Often required for tightening bolts on modern office chairs.
- Adjustable wrench: Useful for larger nuts and bolts.
Necessary Materials
You might also need some materials depending on the nature of the repair:
- Replacement parts: These could be specific to your chair model, like new armrests or mounting hardware.
- Screws: Various sizes, as they may have worn out or gone missing.
- Glue: Strong adhesive can be helpful for reinforcing broken parts.
Related Post
Safety Precautions Before You Begin
Before diving into the repair, it’s crucial to prioritize safety. Ensure your chair is on a stable surface and that you have good lighting to see what you’re doing. If you’re using glue or any chemical adhesives, work in a well-ventilated area. Always check that the tools are suitable for the job to avoid damaging your chair further or injuring yourself.
Diagnosing the Problem with the Armrest
Identifying Common Armrest Issues
The first step in how to fix the armrest on your office chair is to diagnose the problem. Common issues include:
- Loose armrests, which might just need tightening or new screws.
- Broken armrests, which could require replacement parts or a bit of DIY to put pieces back together.
- Uncomfortable armrests, possibly needing additional padding or adjustment for better ergonomics.
Assessing Repair or Replacement Needs
Once you’ve identified the issue, assess whether the armrest can be repaired or if it needs to be replaced. This decision largely depends on the severity of the damage and the availability of replacement parts. Sometimes, a simple tightening of screws or adding some padding is enough, while other times, more comprehensive measures are necessary.
Step-by-Step Repair Guide for Office Chair Armrests
Fixing the armrest on your office chair is a practical way to enhance comfort and functionality. Here’s a detailed, step-by-step guide covering how to address loose, broken, and uncomfortable armrests.
Fixing a Loose Armrest
Tightening Screws and Bolts
Start by identifying any loose screws or bolts in the armrest. Use the appropriate screwdriver or Allen wrench to tighten them. This simple step often resolves the issue and prevents further looseness.
Using Thread-Locking Adhesive for Stability
For screws that frequently loosen, applying a thread-locking adhesive can provide long-term stability. This adhesive prevents the screws from loosening under vibration and regular movement, securing the armrest firmly in place.
Replacing Worn-Out Screws or Bolts
If the screws or bolts are stripped or worn out, replace them with new ones that match the size and thread. This not only secures the armrest but also ensures that the fittings do not damage the chair’s frame.
Related Post
Repairing a Broken Armrest
Assessing the Damage
Examine the armrest for any cracks or broken parts. The type of damage will determine the repair method. Simple cracks might be mendable, whereas completely broken pieces may require more extensive repairs.
Using Epoxy or Plastic Weld for Minor Cracks
For minor cracks, using a strong epoxy glue or plastic weld can be an effective solution. Ensure the area is clean and dry before applying the adhesive. Hold the crack together tightly as the adhesive sets to ensure a strong bond.
Replacing the Entire Armrest if Necessary
If the armrest is extensively damaged, replacing it might be the only option. Check with the manufacturer for replacement parts or look for compatible armrests that fit your office chair model.
Improving an Uncomfortable Armrest
Adding Padding or Cushion
If the armrest is hard or uncomfortable, adding additional padding can make a significant difference. Use foam padding or memory foam cut to size, and cover it with fabric that matches your chair for a seamless look.
Replacing the Armrest Pad
Some armrests come with removable pads that can be replaced when worn out or uncomfortable. Purchase a replacement pad that fits your armrest’s dimensions and attach it according to the manufacturer’s instructions.
Adjusting the Height and Position
Adjust the armrest’s height and position if your chair allows it. Properly positioned armrests support your arms naturally without causing shoulder strain or forcing your posture out of alignment.
Replacing the Armrest on Your Office Chair
When your office chair’s armrest is beyond repair, replacing it is the next best step. Here’s how to ensure you choose the right parts and install them correctly for a seamless transition.
Finding Compatible Replacement Parts
To find a compatible replacement armrest, start by checking the manufacturer’s website using your chair’s model number. If direct replacements aren’t available, measure your current armrest to match the size and attachment points with a universal armrest designed for similar models.
Removing the Old Armrest
Carefully unscrew the existing armrest from the chair’s frame. Keep all screws and bolts in case the new armrest can use them. Inspect the attachment area for any damage or wear that might affect the new installation.
Installing the New Armrest
Align the new armrest with the chair’s attachment points and secure it with screws or bolts. If the new armrest comes with its own fittings, use those instead for the best fit. Tighten all connections to ensure the armrest is stable and won’t move under weight.
Ensuring Proper Fit and Stability
Once installed, sit in the chair to test the armrest’s position and stability. Adjust if necessary to ensure it’s comfortable and doesn’t shift or wobble when in use.
Preventative Maintenance for Office Chair Armrests
Maintaining your chair’s armrests is key to prolonging their lifespan and functionality.
Regular Checks and Tightening
Regularly inspect the armrests for loose screws or bolts, especially if you frequently lean on them. Tighten them as needed to prevent wear and potential breakage.
Cleaning and Maintenance
Keep the armrests clean by wiping them down with a suitable cleaner for the material, whether it’s fabric, leather, or plastic. This prevents build-up of grime which can degrade the materials over time.
Tips for Prolonging Armrest Lifespan
Avoid excessive pressure on the armrests and use them as intended to reduce stress on the fittings and material. This helps maintain their structural integrity and comfort level.
Troubleshooting Common Armrest Issues
If you encounter issues like squeaking or creaking, apply a suitable lubricant to the moving parts. Address wobbling by tightening all connections. If discomfort persists despite repairs or replacements, consider adding additional cushioning or adjusting the armrest’s position.
Conclusion
Throughout this guide, we’ve covered everything from how to fix the armrest on your office chair to replacing it entirely, along with maintenance tips to keep them in top condition. Addressing armrest issues promptly prevents further damage and maintains the functionality of your chair. Remember, a well-maintained office chair contributes to a comfortable and productive working environment. Keep these tips in mind to ensure your chair serves you well into the future.
Frequently Asked Questions
How do you lock the armrest on an office chair?
To lock the armrest on an office chair, locate the locking mechanism which typically consists of a knob or lever under the armrest. Turn or press this mechanism until the armrest secures in the desired position.
How to raise office chair armrests?
To raise the armrests on an office chair, find the button or lever on the side or underside of the armrest. Press or lift it while pulling the armrest upward to your preferred height, then release to lock it in place.
How do you fix a loose office chair?
To fix a loose office chair, tighten all visible screws and bolts using an appropriate tool, typically an Allen wrench or screwdriver. Check the base and the seat connection points, as well as the casters.
Where should armrests be on office chair?
Armrests on an office chair should be positioned so that your arms can rest naturally with your shoulders relaxed and elbows at a 90-degree angle. They should not cause you to shrug your shoulders or reach too far to use them.
How to use arm rests?
Use arm rests by adjusting them so they support your forearms when you are typing or using a mouse, without causing you to elevate your shoulders. This helps reduce strain on your shoulders and neck.
Do I need arm rests on my office chair?
Whether you need arm rests on your office chair depends on your personal comfort and ergonomic needs. Arm rests can reduce strain on your neck and shoulders, but should be properly adjusted or removable to fit your body.
Let’s dive into why you might consider this transformation and outline the key steps to achieve it.
Assessing the Suitability of Your Dining Chair for Office Use

When eyeing that dining chair to double as an office seat, several factors need to be weighed to ensure it’s up to the task. The sturdiness of the chair is paramount; it must withstand regular use and the shifting weight as you move. Size also plays a critical role—too big and it might not fit your desk setup; too small, and it could be uncomfortable for extended use.
The material of the chair affects its durability and comfort, with options ranging from wood and metal to plastic.
Considering the common types of dining chairs, not all are suited for office conversion. Traditional wooden chairs can be sturdy and stylish but may lack the necessary comfort without modifications. On the other hand, modern designs that feature more cushioning and adjustable components might be easier to transition into office use.
Ergonomic Considerations for a DIY Office Chair
Understanding ergonomics is crucial when converting a dining chair into an office chair. An ergonomic office chair usually features adjustability, adequate lumbar support, and armrests—all essential for maintaining good posture and comfort during long hours of work.
To determine if your dining chair can meet these ergonomic needs, start by assessing the height and support it offers. The chair should allow your feet to rest flat on the floor while keeping your knees at an angle of approximately 90 degrees. If the chair lacks lumbar support, consider adding a cushion to help maintain the natural curve of your spine. Armrests are trickier; if your chair doesn’t have them, you might need to get creative with DIY solutions or assess whether you can work comfortably without them.
Materials Needed for the Conversion
Before you embark on your project to make a dining chair into an office chair, gathering the right tools and materials is essential. Here’s what you’ll need to ensure a smooth transformation:
Necessary Tools
- Screwdrivers: Essential for assembling and disassembling parts.
- Drill: For creating holes, particularly useful if you’re adding components like casters.
- Staple Gun: A must-have for affixing fabric tightly over cushioning.
- Measuring Tape: To measure spaces accurately for a perfect fit.
- Scissors or Fabric Cutter: For cutting upholstery fabric and foam padding.
Types of Materials Required
- Foam Padding: To enhance comfort on the seat and backrest.
- Upholstery Fabric: Choose a durable and appealing fabric to cover the foam.
- Casters: Necessary for adding mobility to the chair.
- Adjustment Mechanisms: For features like height or tilt adjustments.
Sources for Purchasing Materials
Materials and tools can be sourced from local hardware stores or online marketplaces. Websites like Amazon, eBay, or local fabric stores often have a wide range of options. For specialized components like ergonomic adjustment mechanisms, suppliers like McMaster-Carr or even office furniture outlets might be necessary.
Related Post
Step-by-Step Guide to Conversion
Transforming your dining chair into an office chair involves a series of steps, each crucial to achieving both comfort and functionality.
Adding Cushioning
- Remove Existing Upholstery (if any): Carefully take off the old fabric and padding.
- Cut New Foam to Size: Measure and cut the foam padding to fit the seat and backrest.
- Attach Foam Padding: Use spray adhesive to secure the foam to the chair.
- Cover with Upholstery Fabric: Drape your fabric over the foam, pulling it taut.
- Secure Fabric with Staple Gun: Staple the fabric to the underside of the chair, ensuring it is tight and even.
Installing Adjustable Mechanisms
- Select the Right Mechanism: Depending on your chair’s design, choose a suitable height or tilt adjustment mechanism.
- Attach the Mechanism: Follow the manufacturer’s instructions to install, which might involve drilling into the chair base.
Attaching Casters
- Prepare the Chair Legs: If your chair has wooden legs, you may need to install a base that can hold casters.
- Install the Casters: Attach the casters to the new or existing base, securing them with screws.
Optional Modifications
- Adding Armrests: Attach armrests either by securing them directly to the sides of the chair or by installing a bracket system.
- Additional Lumbar Support: If more support is needed, consider adding a separate lumbar cushion that can be attached with straps or velcro.
By following these steps, you can transform an ordinary dining chair into a fully functional office chair that not only looks great but also supports your posture during long work hours.
Styling Your New Office Chair
Now that you’ve converted your dining chair into an office chair, it’s time to give it a personal touch that complements your office decor. Styling is not just about aesthetics; it’s about creating an environment that stimulates creativity and enhances productivity.
Tips for Choosing Fabrics and Materials
- Coordinate with Office Colors: Select upholstery fabric that matches or complements the existing color scheme of your office.
- Consider Durability: Opt for materials that can withstand daily use, like microfiber, leather, or heavy cotton.
- Texture and Pattern: Add a touch of sophistication with textured fabrics or a bold statement with patterned materials that can hide stains and wear.
Ideas for Customizing the Look of the Chair
- Paint the Frame: Give the chair a fresh look by painting the frame in a color that stands out or blends with your office decor.
- Add Decorative Elements: Consider adding decorative nails or piping along the edges of the upholstery for a more finished and custom appearance.
- Mix and Match: Use contrasting colors for the seat and backrest or different materials for a contemporary look.
Safety Checks and Maintenance
Ensuring your newly modified office chair is safe and keeping it in good condition are crucial for extending its life and functionality.
How to Ensure the Modified Chair is Safe to Use
- Stability Test: Regularly check that all screws and fittings are tight and that the chair does not wobble.
- Weight Capacity: Verify that the chair, especially if it includes new components like casters or an adjustable base, can support your weight safely.
- Inspection of Components: Examine casters, adjustment mechanisms, and armrests periodically to ensure they are functioning properly without any signs of wear or damage.
Maintenance Tips to Keep the Chair in Good Condition
- Regular Cleaning: Wipe down the chair with appropriate cleaners for the type of material used. For fabric upholstery, vacuum regularly to remove dust and allergens.
- Immediate Stain Removal: Attend to spills on fabric immediately to prevent stains from setting.
- Lubricate Moving Parts: If your chair has swivel capabilities or adjustable components, lubricate them occasionally to maintain smooth operation.
By focusing on both style and safety, your new office chair will not only be a centerpiece of your workspace but also a comfortable and safe seating option that reflects your personal style and enhances your productivity.
Case Studies and Examples
Many enthusiasts have successfully transformed their ordinary dining chairs into stylish and functional office chairs. Here are a couple of real-life examples:
Example 1: The Vintage Revival
- Before: A classic wooden dining chair with a worn-out seat and no armrests.
- After: The chair was revitalized with new foam padding, a vibrant red velvet fabric for the upholstery, and sleek black armrests. The addition of a swivel base and casters transformed it into a practical office chair with a vintage charm.
Example 2: Modern Minimalist Makeover
- Before: A simple, modern dining chair made from molded plastic.
- After: After adding a cushioned seat covered in a high-quality faux leather and installing a height-adjustable mechanism, the chair became a minimalist yet comfortable office chair suitable for long working hours.
These transformations not only saved money but also allowed for a creative outlet to design a unique piece of furniture that added character and comfort to the office.
Conclusion
Converting a dining chair into an office chair offers numerous benefits—it’s cost-effective, promotes recycling, and gives you the chance to create a piece of furniture that’s both unique and personal.
This project is not just about crafting a new office chair; it’s about injecting personality and style into your workspace.
Whether you’re a seasoned DIYer or a novice looking to start a new project, customizing your own office chair can be a rewarding endeavor. Embrace the challenge and make your office space truly your own!
Frequently Asked Questions
Can I use a dining chair as an office chair?
While you can use a dining chair as an office chair, it may not provide the necessary support for extended periods of desk work. Office chairs are specifically designed for comfort and posture support during long hours of use.
How to convert a chair to an office chair?
To convert a dining chair into an office chair, consider adding a cushion for comfort and attaching casters to the legs for mobility. Additionally, using adjustable back supports can help improve ergonomics.
How to make a dining chair ergonomic?
Making a dining chair ergonomic involves adding a supportive seat cushion and a lumbar support pillow. Adjust the chair’s height by using a seat cushion if needed, and ensure your feet rest flat on the floor.
What is the difference between a desk chair and a dining chair?
The main difference between a desk chair and a dining chair is the design focus. Desk chairs are optimized for long sitting periods, featuring adjustable settings and ergonomic support, unlike most dining chairs.
Can I use dining table as office desk?
Yes, you can use a dining table as an office desk. Ensure the height is appropriate for your seating and that you have enough space for your work essentials.
Can you use a dining room as an office?
Certainly, a dining room can be converted into an office space. Ensure there is sufficient lighting, minimal distractions, and adequate storage solutions to create an effective work environment.
Julie D. Williams is a seasoned chair connoisseur with a decade in the furniture realm. She combines her keen eye for design and deep knowledge of ergonomics to provide readers with reviews and guides, ensuring comfort and style in every recommendation. Each piece is a fusion of aesthetics and function, tested and approved by Julie. A believer in the power of the perfect seat to transform spaces, she’s your go-to source for impeccable finds. When not reviewing chairs, Julie is on the hunt for vintage décor, weaving comfort and beauty into every aspect of life.
In this guide, we’ll explore the different types of office chairs and armrests commonly encountered, paving the way for a safe and efficient removal process.
Safety and Preparation Before You Start
Embarking on the task of removing the armrests from your office chair requires a bit more than just enthusiasm. It’s crucial to start by thoroughly reading the manufacturer’s instructions—this can’t be overstated.
Each chair model has its specific assembly and disassembly methods which, if not followed, could lead to damage or a frustrating experience.
Necessary Tools for the Job
Before you dive in, ensure you have the right tools on hand. Typically, a set of screwdrivers (both Phillips and flat-head) and a wrench or an Allen key are necessary. These tools will help you loosen and remove the bolts or screws that secure the armrests to the chair.
Precautions to Avoid Injury
Safety first! Make sure the chair is stable before you begin working on it. It’s wise to perform this task on a flat, uncluttered surface to prevent the chair from shifting unexpectedly. Also, consider wearing protective gloves to safeguard your hands from sharp edges or small components.
Setting Up Your Workspace
Choosing an ideal spot for this undertaking is as important as having the right tools. A spacious area will give you ample room to maneuver around the chair. To protect your flooring and the chair itself from scratches, lay down a soft cloth or a piece of carpet where you’ll be working.
This setup not only prevents damage but also keeps screws and bolts from rolling away.
Identifying the Type of Armrest
Recognizing the type of armrest on your office chair is the first step in determining the best approach for removal. Armrests can vary widely, not just in comfort and aesthetics but also in their structural design and attachment to the chair. Here’s a breakdown of the most common types you’ll encounter.
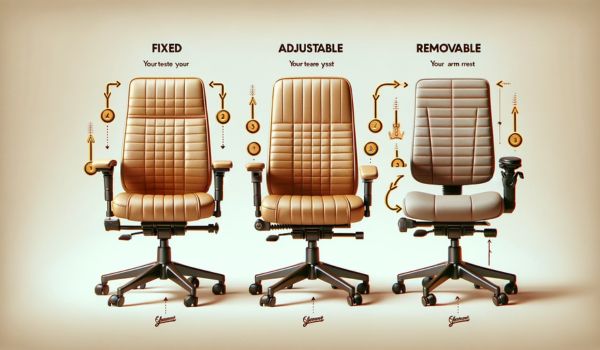
Fixed Armrests
Fixed armrests are typically bolted or welded directly to the frame of the chair, offering a sturdy and non-adjustable support. The main characteristic of these armrests is their immobility—they do not offer any mechanism for adjustment, which can be a downside for those seeking flexibility.
Challenges in Removal
The primary challenge with removing fixed armrests lies in their secure attachment. If bolts are used, they may require specific tools like wrenches or Allen keys to remove. When welded, professional tools or assistance might be necessary, as this type is not designed to be detachable by the user.
Adjustable Armrests
Adjustable armrests, unlike their fixed counterparts, come with various mechanisms that allow for height, width, or even angle adjustments. This flexibility can significantly enhance comfort and ergonomic support.
Differences in Removal
The removal process for adjustable armrests can differ greatly from fixed armrests due to their complex mechanisms. Typically, adjustable armrests are attached with screws and can be detached by loosening these screws. The process is usually straightforward but requires careful handling to avoid damaging the adjustment mechanism.
Special Types of Armrests
Some office chairs feature less common armrest designs that cater to specific needs, such as flip-up and retractable armrests.
Flip-Up Armrests
Flip-up armrests are hinged to allow the armrest to be flipped vertically when not in use or when more seat accessibility is required. These are particularly useful in collaborative workspaces where mobility and space maximization are crucial.
Retractable Armrests
Retractable armrests can slide in or out based on the user’s preference, providing a customizable arm position that can be adapted to various tasks or user body sizes.
Understanding these differences not only aids in the removal process but also helps in maintaining the functionality and longevity of the chair. Each type of armrest offers unique benefits and challenges, and knowing which type you’re working with ensures a smoother customization of your workspace.
Related Post
Step-by-Step Removal Process
When you’re ready to alter your office chair by removing the armrests, it’s essential to approach the task methodically. This section will guide you through the tools and steps required for each type of armrest, ensuring you can proceed with confidence and care.
Tools and Materials Needed
The tools required can vary slightly depending on the type of armrest, but here’s a general list to get you started:
- Screwdrivers: A set including both Phillips and flat-head screwdrivers.
- Wrench or Allen Key: Needed for bolts that are typically found on fixed armrests.
- Protective Gloves: To keep your hands safe from sharp edges and debris.
- Soft Cloth or Padding: To protect the floor and the chair from damage during the process.
- Pliers: Useful for removing any clips or pins.
Removing Fixed Armrests
Step-by-Step Guide:
- Prepare Your Workspace: Lay down a soft cloth or padding and place the chair on it.
- Locate the Bolts or Screws: Check where the armrests are attached to the seat or backrest.
- Loosen the Bolts: Using the appropriate wrench or Allen key, carefully loosen and remove the bolts. Keep all hardware in a safe place.
- Detach the Armrest: Once all bolts are removed, gently lift the armrest away from the chair frame.
- Inspect and Clean: Look at the areas where the armrests were attached for any sharp edges or debris, and clean accordingly.
Removing Adjustable Armrests
Detailed Instructions:
- Preparation: As with fixed armrests, prepare your workspace with a soft surface.
- Access the Adjustment Mechanism: Identify the mechanism used for adjustment, typically involving a screw or lever.
- Unfasten Screws or Levers: Use a screwdriver to loosen any screws. If levers are present, they may need to be turned or moved to release the armrest.
- Remove the Armrest: Carefully slide or lift the armrest off the chair, paying attention not to damage the adjustment mechanism.
- Clean the Area: After removal, clean any exposed parts of the chair where the armrest was connected.
Handling Special Cases
Instructions for Unique Armrest Designs:
- Flip-Up Armrests:
- Identify the hinge or pivot point.
- Check for a locking mechanism that may need to be released.
- Gently flip the armrest up and check for any screws or bolts that secure it in place. Remove these to detach the armrest.
- Retractable Armrests:
- Extend the armrest to its fullest to expose the attachment points.
- Unscrew or unfasten any connections using the appropriate tools.
- Slide the armrest out of its mount or track, being cautious of any wires or mechanisms.
By following these detailed steps for each type of armrest, you can successfully modify your office chair to better meet your needs, whether it’s for comfort, space, or aesthetics. Remember to handle all parts with care to maintain the integrity and functionality of your chair.
Post-Removal
After you’ve successfully removed the armrests from your office chair, it’s important to ensure the chair remains in good condition and safe to use. This next section will guide you through inspecting the chair for any potential issues and how to address any residual signs of the armrests.
Inspecting the Chair
Checking for Damage
- Examine the Frame: Look at where the armrests were attached. Check for any cracks, sharp edges, or structural weaknesses that may have been caused by the removal process.
- Assess Exposed Parts: With the armrests gone, some parts of the chair might now be exposed. Make sure there are no protruding screws or rough patches that could snag clothing or scratch skin.
Finishing Touches
Covering Leftover Holes or Marks
- Use Plugs or Caps: You can find plugs or decorative caps that fit into the leftover holes, which not only cover them up but can also prevent dust from collecting.
- Touch-Up Paint: If there are scratches or exposed areas, a small touch-up with matching paint can help conceal these spots.
Maintaining the Chair Without Armrests
- Regular Checks: Periodically check the chair for any loose screws or weakening joints, especially around areas previously covered or supported by the armrests.
- Cleaning: Keep the chair clean, paying special attention to any new crevices or exposed areas where dust and debris might accumulate.
Alternatives to Removal
If you’re contemplating modifications to your chair but are unsure about removing the armrests completely, consider these alternatives that can enhance comfort without permanent changes.
Adjustments Instead of Removal
Improving Comfort with Adjustments
- Repositioning: Many chairs allow for the adjustment of armrest height, width, or angle. Experiment with different settings to find a configuration that offers optimal support and comfort.
- Adding Cushioning: If discomfort is an issue, try adding cushioned covers to the armrests to provide extra padding.
Replacement Options
Finding Suitable Replacements
- Upgraded Armrests: If the current armrests are not meeting your needs, look into replacing them with ones that offer better ergonomics or functionality, like padded or fully adjustable models.
- Consulting Manufacturers: Some manufacturers offer replacement armrests that are specifically designed to fit certain models of chairs, ensuring compatibility and ease of installation.
Exploring these alternatives can provide the benefits of a customized chair without the need to permanently remove any parts. Whether you choose to remove, adjust, or replace the armrests, each option has the potential to enhance your seating experience, contributing to better posture and comfort throughout your workday.
Conclusion
In this guide, we’ve explored the various aspects of how to remove armrests from an office chair, including safety and preparation, identifying the type of armrest, and the detailed removal process for different armrest designs.
We also discussed how to inspect and finish the chair post-removal, and alternatives to removal such as adjustments and replacements. Removing or adjusting armrests can significantly enhance ergonomic comfort by allowing for a more tailored fit to individual needs, improving accessibility, and potentially alleviating discomfort caused by poorly positioned armrests.
Whether you choose to remove, adjust, or replace, modifying armrests is a viable option for optimizing your workspace for better posture and comfort.
Frequently Asked Questions
How to remove office chair arm rest?
To remove an office chair armrest, first check for screws or bolts under the armrest. Use an appropriate screwdriver or wrench to loosen and remove these fasteners. Once removed, the armrest should come off easily.
Should I take the armrests off my chair?
Removing armrests from your chair can offer more freedom of movement and may be beneficial if they cause discomfort or restrict your seating position. Consider your personal comfort and the chair’s design.
How to remove armrest from Aeron chair?
To remove an armrest from an Aeron chair, locate the screws at the base of the armrest. Use an Allen wrench to unscrew these. Carefully pull the armrest away from the chair frame once the screws are removed.
How to adjust office chair arm rest?
Adjusting an office chair armrest typically involves loosening a knob or lever under the armrest to allow movement. Adjust the height and width to your comfort, then tighten the knob or lever to secure it in place.
Are armrests necessary for office chair?
Armrests are not essential for an office chair but can provide significant comfort and support, reducing shoulder and wrist strain. Their necessity largely depends on personal preference and ergonomic needs.
Can you disassemble an office chair?
Yes, you can disassemble an office chair. Start by removing adjustable components like the armrests and backrest. Use tools like screwdrivers or wrenches to detach parts held by screws or bolts. Ensure to keep track of all components for reassembly.
Julie D. Williams is a seasoned chair connoisseur with a decade in the furniture realm. She combines her keen eye for design and deep knowledge of ergonomics to provide readers with reviews and guides, ensuring comfort and style in every recommendation. Each piece is a fusion of aesthetics and function, tested and approved by Julie. A believer in the power of the perfect seat to transform spaces, she’s your go-to source for impeccable finds. When not reviewing chairs, Julie is on the hunt for vintage décor, weaving comfort and beauty into every aspect of life.
This guide will explore how to assess and repair the damage caused by your feline friends, ensuring your office chair can serve its purpose for years to come.
Common Types of Cat-Induced Damage
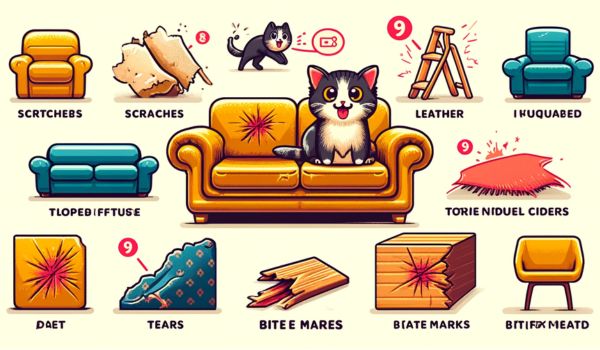
Cats can cause various types of damage to office chairs, from the cosmetic to the structural. The most frequent encounters include scratches on the fabric or leather, tears, and even some parts possibly breaking due to the cat jumping on or off the chair too vigorously.
Understanding these common damages can help you decide the necessary repairs to maintain both functionality and aesthetics.
The Importance of Timely Repairs
Why should you bother to repair cat office chair damage? First and foremost, addressing the damages promptly prevents them from worsening, which can lead to more costly repairs or even the need for a complete replacement.
Moreover, repairing your office chair not only extends its lifespan but also maintains the professional look of your workspace, which can be crucial if you’re working from home and have video conferences to attend.
Understanding the Extent of the Damage

Before you can repair cat office chair damage, it’s crucial to assess the severity and type of the damage. This will guide your repair process and help you determine whether a DIY approach is sufficient or if professional services are needed. Let’s delve into the different types of damage:
- Scratches: Usually surface-level and can be treated with leather or fabric repair kits.
- Tears: These might require patching or stitching, depending on the size and location.
- Structural Damage: If the cat has damaged the structure of the chair, such as the wheels or the frame, this might require replacement parts or professional help.
Assessing the damage involves a careful examination of the chair. Look for any loose parts, check the stability of the chair, and determine the extent of the material damage. Once you have a clear understanding of what you’re dealing with, you can move on to choosing the right repair solutions.
Related post
- how to fix a peeling office chair
- how to fix ripped leather office chair
- how to repair torn leather office chair
Tools and Materials Needed for Repairing Cat Office Chair Damage
Essential Tools Required
Repairing a cat-damaged office chair will require a few essential tools that are commonly found in a household toolkit:
- Scissors: To cut fabric, thread, or trimming excess material.
- Staple Gun: Useful for reattaching fabric securely to the chair base.
- Sandpaper: Needed to smooth out any rough surfaces, especially if there’s wooden or plastic damage.
- Screwdriver: To tighten or replace screws that may have loosened.
Types of Materials Needed
The materials you might need depend on the nature of the damage:
- Replacement Fabric: To replace or patch damaged areas of the chair.
- Foam Padding: If the cushioning is damaged, additional foam may be required to restore comfort.
- Thread: Necessary for sewing repairs, preferably in a color that matches the existing chair fabric.
- Leather or Fabric Repair Kits: These kits typically include patches, adhesives, and sometimes paint or dye to cover scratches.
Repair Techniques for Different Types of Damage
For Minor Scratches
Minor scratches can often be dealt with using simple DIY solutions:
- Scratch Concealers: These are specially formulated to hide scratches on leather and some fabrics.
- Polish: Applying a matching polish can help blend scratches into the surrounding area, making them less noticeable.
For Fabric and Upholstery Tears
Repairing tears in fabric or upholstery requires a bit more finesse:
- Sewing Minor Tears: Use a needle and thread that matches the fabric. Start by threading the needle and knotting the end. Stitch the tear from one end to the other, ensuring the fabric is aligned correctly. A simple stitch like a ladder stitch can effectively conceal the tear.
- Patching Larger Areas: Measure the damaged area and cut a piece of matching fabric that covers it completely. Use fabric glue or a staple gun to secure the patch in place. Make sure the edges are flat and smooth against the original material.
- Professional Reupholstery: If the damage is extensive or the chair is expensive, consider professional reupholstery. This ensures a perfect match to the original material and a long-lasting repair.
For Structural Damage
Structural repairs may involve several steps, depending on the damage:
- Tightening or Replacing Screws and Bolts: Use a screwdriver to tighten any loose screws. Replace missing or damaged bolts with new ones that match the original size and length.
- Fixing or Replacing Damaged Armrests or Base: Examine the armrests and base for any breaks or cracks. Small cracks can sometimes be repaired with strong adhesives, while more significant damage may require ordering replacement parts from the chair manufacturer.
By equipping yourself with the right tools and materials and following these techniques, you can effectively repair the damage caused by your cat and restore your office chair to its former glory.
Preventing Future Damage to Your Office Chair
Strategies to Deter Cats from Scratching the Chair
Preventing cats from damaging your office chair can save a lot of hassle:
- Double-Sided Tape: Cats dislike sticky surfaces, so applying this on the chair’s most targeted areas can deter them.
- Citrus-Based Sprays: These are natural deterrents, as cats tend to avoid citrus smells. Apply regularly to keep cats away.
Recommended Protective Covers and Barriers
Protecting your chair can be as simple as using a cover:
- Fitted Chair Covers: These can shield your chair from claws and are easily washable.
- Plastic Protectors: Specifically designed for the arms and back of chairs, these prevent claws from reaching the fabric.
Behavioral Training Tips for Cats
Training your cat can be effective with patience:
- Scratching Posts: Position these near the chair to offer an alternative scratching spot.
- Clicker Training: Use this to reinforce non-scratching behavior with treats and positive reinforcement.
Alternative Solutions
Cat-Friendly Chair Materials
When purchasing new furniture, consider materials that are more resistant to cat scratches such as microfiber or synthetic fabrics, which are tougher and less appealing to cats.
Assessing New Versus Repair Costs
Sometimes, if a chair is frequently damaged, evaluating the cost of continual repairs versus buying a new, more durable chair might be more economical in the long run.
Conclusion
We’ve explored various methods to repair and protect your office chair from cat damage, from simple DIY fixes for scratches and tears to replacing parts for structural issues. Implementing strategies to deter your cat from using the chair as a scratch post, alongside considering cat-friendly materials for future furniture purchases, can significantly extend the life of your office chair. Addressing cat behavior and using protective measures is crucial not only for the longevity of your chair but also for maintaining a stress-free coexistence with your feline companion.
Frequently Asked Questions
Can an office chair be repaired?
Yes, an office chair can often be repaired, depending on the type and extent of the damage. Common fixes include replacing broken components, stitching up torn upholstery, or reinforcing loose parts.
How do you fix a scratch on a cat chair?
To fix a scratch on a chair caused by a cat, use a scratch repair kit appropriate for the material (leather or fabric). These kits usually contain fillers and colorants to conceal the scratches effectively.
How do you fix cat damaged fabric?
To repair cat-damaged fabric, you can either sew small tears with a needle and thread or apply a patch over larger damaged areas. Fabric glue can also be useful for securing the material in place.
How do you repair furniture damaged by cats?
Repairing furniture damaged by cats involves cleaning the area, using a repair kit to address scratches, or reupholstering if the damage is extensive. For wooden furniture, wood filler and touch-up paint can be used to fix scratches.
In this article, we’ll dive into the essentials of leather repair to help you restore your chair to its former glory.
Understanding Leather and Its Common Issues

Leather office chairs are a popular choice for their durability and visual appeal, but not all leather is created equal. Chairs can be upholstered in various types of leather, including genuine leather, bonded leather, and polyurethane (PU) leather.
Each type has its own set of strengths and vulnerabilities. Genuine leather, while robust and rich in texture, requires regular maintenance to prevent cracking and tearing.
Bonded leather, often more budget-friendly, is susceptible to peeling and wear over time due to its composite nature. PU leather offers a vegan alternative that mimics real leather’s aesthetics but may not hold up as well under intense daily use.
Damage to leather chairs typically arises from several sources. Daily wear and tear gradually degrade the material’s integrity, leading to tears. Environmental factors like dry air can cause leather to become brittle and crack, while improper use, such as sitting on the chair with sharp objects in back pockets, can puncture or tear the surface.
Preparing for Leather Repair
Before attempting to repair your torn leather office chair, gathering the right tools and materials is crucial. A standard leather repair kit should suffice for most tears and includes items such as adhesives, sub-patches, and colorants that match the chair’s original hue. Essential tools might also include scissors, a spatula, or a small brush.
Setting up an appropriate workspace is equally important. Choose a well-ventilated area to work in, as some adhesives and colorants can emit strong odors. Cover the working surface with a protective cloth or plastic sheet to avoid any accidental spills or stains. Ensuring that the space is well-lit will help you perform a more precise and aesthetically pleasing repair.
With the right approach, repairing a torn leather office chair can be a fulfilling project that not only saves money but also extends the life of your office furniture, maintaining the professional look and feel of your workspace. This guide should help you handle common issues and ensure your office chair looks good as new.
Related Post
- how to fix a peeling office chair
- how to fix ripped leather office chair
- can you repair cat office chair
Step-by-Step Guide to Repairing Torn Leather
Assessing the Damage
The first step in repairing a torn leather office chair is to thoroughly examine the tear. You’ll encounter different types of damage, such as surface scratches, deep tears, or punctures. Each type requires a specific repair strategy that aligns with the leather’s condition and the tear’s severity. Understanding the type of tear will guide you in selecting the appropriate repair method, ensuring the final result is both effective and visually appealing.
Cleaning and Preparing the Leather
Before you proceed with the actual repair, the area around the tear must be cleaned. This step ensures that the repair materials adhere properly and the finish remains consistent. Use a soft cloth and a gentle cleaner designed for leather to wipe down the area. After cleaning, carefully trim any frayed edges around the tear to prepare the leather for patching, creating a clean, smooth surface for the repair.
Internal Patching Technique
For a robust repair, particularly with deeper tears, an internal patch is recommended. Start by cutting a sub-patch that comfortably covers the tear from the inside. The material for the sub-patch should be flexible yet durable, typically a piece of leather or a strong fabric. Carefully insert the sub-patch under the tear, ensuring it lies flat and extends beyond the edges of the tear for secure adhesion.
Applying Adhesive
Choosing the right adhesive is critical for a successful repair. Opt for a leather adhesive that offers flexibility and a strong bond without leaving a stiff or bulky residue. Apply the adhesive sparingly to avoid seeping through and staining the leather surface. Use a small tool, like a spatula or toothpick, to spread the adhesive evenly under the edges of the tear, securing the sub-patch in place.
Reinforcing and Blending
Once the patch is in place and the adhesive has dried, check the edges of the repair to ensure they are smooth and well-integrated with the surrounding leather. If the color of the patch differs from the original material, consider applying a leather colorant. Choose a colorant that matches the chair’s color as closely as possible. Apply it gradually, blending it outwards to create a seamless transition that masks the repair.
By following these steps, you can effectively repair a tear in your leather office chair, restoring its appearance and functionality. This not only extends the life of your chair but also maintains the professional look of your office space.
Finishing Touches
After the repair is complete, it’s crucial to condition the leather. Conditioning not only restores moisture lost during the cleaning and repairing process but also enhances the leather’s flexibility, reducing the likelihood of future tears. Use a high-quality leather conditioner, applying it gently over the entire chair, focusing on the repaired area. This will help blend the repair into the rest of the chair and keep the leather supple.
Tips for Drying and Setting the Repaired Area
Allow the repaired area ample time to dry completely before using the chair. This typically takes several hours, depending on the adhesive and environmental conditions. Avoid direct heat or sunlight, which can cause the leather to warp or the adhesive to weaken. Instead, let the chair dry naturally in a well-ventilated space.
Maintaining Your Office Chair
Regular maintenance is key to prolonging the life of your leather office chair. Clean the leather gently with a suitable cleaner at regular intervals to prevent dirt buildup that can degrade the material. Keep the chair away from direct sunlight and heat sources to prevent drying and cracking. Regularly check for signs of wear and address them promptly before they develop into larger issues.
Do’s and Don’ts in Handling Leather Furniture
- Do: Use a soft cloth for cleaning and drying.
- Don’t: Use harsh chemicals or abrasive cleaners.
- Do: Keep sharp objects away from the chair.
- Don’t: Overload the chair or use it in ways it was not intended to be used.
Troubleshooting Common Repair Issues
Sometimes, despite careful repairs, issues can arise that may require additional attention:
Mismatched Color
If the colorant used does not perfectly match the original leather, apply additional layers, blending outward until the color is uniform. It may also be beneficial to treat the entire chair with the colorant for a consistent finish.
Stiffness in the Repaired Area
If the repaired area feels stiffer than the surrounding leather, additional conditioning may help. Apply leather conditioner more liberally, and massage the area to improve flexibility.
Adhesive Failure
Should the adhesive not hold, it may be necessary to reapply a different type of adhesive or ensure that the area is cleaner and free from oils before reapplying.
By addressing these common repair issues and following the maintenance tips provided, you can ensure your leather office chair remains both functional and stylish for years to come.
Conclusion
Timely repairs of leather office furniture are crucial not only for maintaining aesthetics but also for ensuring longevity. By addressing tears and wear promptly, you prevent minor issues from escalating into major damage, thereby saving on potential high replacement costs.
Regular maintenance, including cleaning, conditioning, and proper use, plays a pivotal role in preserving the pristine condition of your leather chairs.
Take the initiative to care for your office furniture with the steps outlined in this guide. Not only will this enhance the professional appearance of your workspace, but it will also create a comfortable and inviting atmosphere for everyone.
Frequently Asked Questions
How do you repair a leather office chair?
To repair a leather office chair, start by cleaning the leather with a mild soap and water solution. Then, apply a leather repair kit to address scratches or tears. Finish by conditioning the leather to restore moisture and flexibility.
How can I repair my leather chair at home?
Repairing a leather chair at home involves cleaning the leather thoroughly, using a leather repair compound for any damage, and then applying a leather conditioner to rejuvenate the material. It’s advisable to test products in an inconspicuous area first.
How do you repair a leather seat on a chair?
To repair a leather seat on a chair, clean the area first, then apply a specialized leather adhesive to any tears or cracks. Patch larger damages with a matching leather piece if necessary. Finally, condition the leather to ensure it remains supple.
Can you restore leather chairs?
Yes, you can restore leather chairs. Begin by thoroughly cleaning the leather. Use a leather restorer or conditioner to repair and rehydrate the material. For severe damage, consider a professional leather repair service to ensure the best results.
In this guide, we’ll explore practical steps and considerations for repairing these common damages.
Common Causes of Damage in Leather Office Chairs

Leather office chairs are prone to various types of damage, from accidental tears to wear and tear over time. One of the most frequent culprits is improper use, such as sitting on the chair with sharp objects in back pockets or excessive rubbing from desk edges.
Environmental factors also play a role; exposure to direct sunlight can dry out leather, making it brittle and more susceptible to cracking. Understanding these factors is crucial for preventing future damage and for making informed decisions when it comes to repairs.
Why Repairing Your Leather Office Chair is Crucial
Addressing rips and tears in your leather office chair promptly is essential for several reasons. First, it prevents the damage from worsening, which can lead to more costly repairs or even the need for a full replacement. Additionally, a well-maintained chair contributes to a professional ambiance in your office, which can positively influence clients’ perceptions and employee morale.
By repairing damage, you also maintain the comfort and ergonomic benefits of the chair, ensuring that it continues to provide proper support during use.
Understanding Leather and Its Care
Leather office chairs come in various types, each requiring specific care strategies. Genuine leather, made from animal hide, offers durability and comfort but needs regular conditioning to maintain its suppleness and prevent cracks. Bonded leather, which is made from scraps and polyurethane, is more susceptible to peeling and requires careful handling to extend its life.
Faux leather, a synthetic alternative, offers easier maintenance but may not breathe as well as genuine leather, affecting comfort during long sitting periods.
For all types of leather, basic care includes keeping the chair clean and free from dust and debris, using a soft cloth and approved leather cleaners. Avoid harsh chemicals that can strip the leather’s natural oils. Regular conditioning is also vital; a quality leather conditioner can keep the material soft and prevent cracking, which is essential for both appearance and durability.
Related Post
- how to fix a peeling office chair
- how to repair torn leather office chair
- can you repair cat office chair
Assessing the Damage
Before you dive into the process of fixing your ripped leather office chair, it’s crucial to thoroughly assess the damage. This initial evaluation will determine the feasibility of a DIY repair or if professional services are needed.
How to Examine the Extent of the Rip or Tear
Start by cleaning the area around the rip gently with a soft cloth and a suitable cleaner to remove any dust and debris. This ensures you have a clear view of the damage. Examine the tear’s length, depth, and location. Small, clean cuts or minor tears are typically manageable at home.
However, if the tear is jagged, extensive, or located in a highly visible or structurally integral part of the chair, professional assessment might be warranted.
Deciding Whether the Chair Can Be Repaired at Home or Needs Professional Attention
Consider the size and complexity of the damage. A rule of thumb is that if the tear is longer than a few inches, or if it involves the chair’s stitching or a seam, professional repair might be the best option to restore its aesthetic and functional integrity.
For smaller tears or wear, a home repair can be a quick and cost-effective solution.
Tools and Materials Needed
Having the right tools and materials is essential for a successful repair. Here’s a list to help you gather what you need:
List of Required Tools
- Leather Scissors: Sharp scissors designed for cutting leather will ensure a clean cut without further damaging the material.
- Tweezers: Useful for removing any loose threads or for positioning the sub-patch precisely under the tear.
Overview of Materials
- Leather Patches: Choose a leather patch that closely matches the color and texture of your chair’s leather. These patches can be cut to size to cover the damaged area neatly.
- Adhesive: A leather-specific adhesive will ensure a strong bond without damaging the leather. It’s important to choose an adhesive that dries clear and is flexible.
- Sub-patch Material: Typically made from a flexible fabric, sub-patch material is placed underneath the tear to reinforce the repair. This material should be durable yet thin enough not to create bulk under the patch.
With a clear understanding of the damage and the necessary tools and materials in hand, you can effectively address the repairs needed for your leather office chair, ensuring a longer lifespan and continued aesthetic appeal.
Step-by-Step Repair Guide
Fixing a ripped leather office chair can be approached through several methods depending on the extent and location of the damage. Here, we’ll outline the steps for internal and external patch methods, as well as a sewing method when applicable.
Preparing the Area
Proper preparation of the damaged area is crucial to ensure the repair holds over time and blends seamlessly with the surrounding leather.
- Cleaning the Damaged Area: Begin by gently cleaning the area with a soft cloth and a cleaner suitable for leather. This removes any oils, dust, or debris that could prevent the adhesive from bonding correctly.
- Trimming Any Frayed Edges: Use sharp leather scissors to carefully trim away any frayed edges around the tear. This helps in creating a clean, smooth surface that will make the repair less noticeable.
Internal Patch Method
For tears that do not go all the way through the leather or where minimal visibility of the repair is crucial, an internal patch is effective.
- Cutting the Sub-Patch to Size: Measure the tear and cut a piece of sub-patch material slightly larger than the tear. This ensures the entire damaged area is supported.
- Inserting and Positioning the Sub-Patch: Using tweezers, insert the sub-patch material underneath the tear. Position it so that it completely covers the underside of the tear.
- Securing the Sub-Patch with Adhesive: Apply a leather adhesive to the sub-patch and press it into place. Apply pressure to the area to ensure the adhesive bonds well. Allow it to dry according to the adhesive manufacturer’s instructions.
External Patch Method
An external patch is suitable for larger or more visible tears where adding a patch on the outside of the leather is acceptable.
- Choosing the Right Leather Patch: Select a leather patch that matches the chair’s leather in color and texture as closely as possible.
- Cutting the Patch to Size: Cut the leather patch so that it extends slightly beyond the edges of the tear in all directions.
- Applying the Patch with Adhesive: Place adhesive on the back of the patch and carefully position it over the tear. Smooth the patch down, starting from the center and moving outward to avoid air bubbles. Press firmly and allow it to dry.
Sewing Method (if applicable)
For rips where added strength is needed, or when dealing with high-stress areas, sewing can be an effective repair method.
- When and How to Use Stitching for Leather Repair: Stitching is recommended for tears along seams or where the leather is thick and can hold stitches without tearing further. Prepare the area by ensuring the edges of the tear are aligned neatly.
- Types of Stitches That Can Be Used: A cross-stitch can be particularly effective for leather repair because it holds the material firmly. Use a thick, durable thread, ideally in a color that matches the leather. Begin stitching from one end of the tear, working slowly to ensure the stitches are even and pulling the leather together tightly.
By following these detailed steps, you can effectively repair a ripped leather office chair, extending its life and maintaining its appearance and functionality.
Finishing Touches
Once the physical repair of your leather office chair is complete, applying finishing touches can significantly enhance the repair’s appearance and ensure the chair remains in good condition for longer.
- Applying Colorant or Dye to Match the Original Leather (if necessary): If the repair area stands out due to color discrepancies, using a leather colorant or dye can help. Choose a color that matches the original leather as closely as possible. Apply the dye with a small sponge or brush, blending it into the surrounding areas to avoid noticeable edges.
- Conditioning the Leather to Ensure Flexibility and Prevent Future Cracks: After the dye has dried, applying a leather conditioner is crucial. This step returns essential oils to the leather, maintaining its flexibility and preventing future dryness and cracks. Use a clean cloth to apply the conditioner in a thin, even layer.
Additional Tips and Tricks
To further improve the outcome of your repair and maintain your chair, consider the following tips and tricks:
- How to Disguise Repair Marks: Even with a well-executed repair, some marks may still be visible. One technique to help blend repair areas is to gently heat the surface with a hair dryer (on a low setting) after applying conditioner, which helps the leather absorb the conditioner more thoroughly and can reduce the visibility of marks.
- DIY Leather Repair Kit Recommendations: For those looking to handle future repairs themselves, investing in a quality DIY leather repair kit can be beneficial. Look for kits that include a variety of leather dyes, a selection of patches, adhesives, and a good leather conditioner. Some highly recommended kits include the Fortivo Leather and Vinyl Repair Kit and the Coconix Vinyl and Leather Repair Kit, both of which are well-suited for various leather repair needs and include comprehensive instructions.
By following these steps and utilizing these additional tips, you can achieve a professional-looking repair for your leather office chair, restoring its functionality and aesthetics. Regular maintenance, such as cleaning and conditioning the leather, will also play a vital role in extending the life of your chair and keeping it looking its best.
Preventative Measures
To ensure the longevity of your leather office chair, adopting regular maintenance routines and best practices for care is crucial.
- Regular Maintenance Tips for Leather Chairs: Regularly dust and vacuum your leather chair to prevent dirt buildup, which can grind into the leather and cause wear. Every few months, apply a high-quality leather conditioner to keep the leather supple and prevent cracks.
- Best Practices to Avoid Future Damage: Always use proper cleaning products designed specifically for leather. Harsh chemicals can degrade the leather’s integrity. Additionally, position your leather chair away from direct sunlight, which can fade and dry out the material. Also, avoid placing sharp objects on or near the chair to prevent accidental tears.
Conclusion
Understanding how to fix ripped leather office chairs and taking prompt action when damage occurs are vital for maintaining both their appearance and functionality.
Regular maintenance and proper handling can significantly extend the life of your chair. Encountering minor damages? Consider a DIY approach to repair your leather office chair.
Not only does this save money, but it also empowers you to take care of your office furniture, ensuring it continues to serve you well without the need for frequent replacements. Embrace these practices to enhance the durability and aesthetics of your workspace.
Frequently Asked Questions
Can ripped leather be repaired?
Yes, ripped leather can be repaired using various methods such as leather patches, adhesives, or a professional restoration service, depending on the extent of the damage and the desired finish.
Can a leather chair be repaired?
Absolutely, a leather chair can be repaired by reupholstering the damaged areas or using repair kits specifically designed for leather, which include compounds that blend well with the original material.
How do you cover a ripped leather chair?
To cover a ripped leather chair, you can use a leather repair kit, which typically includes a compound to fill the tear and dyes to match the existing leather color, or simply use a stylish throw or slipcover.
How to fix a ripped leather?
Fixing ripped leather usually involves cleaning the area, applying a leather adhesive, and pressing a matching leather patch over the tear. It’s important to ensure the repair blends seamlessly with the surrounding material.
What is the best glue for ripped leather?
The best glue for ripped leather is a flexible, waterproof leather adhesive designed specifically for leather repairs. This type of glue ensures a durable bond without stiffening the leather, maintaining its natural look and feel.

Navigating the journey of hip replacement recovery brings its own set of challenges and questions, paramount among them: “Can I use Lazyboy recliner chair after hip replacement?” The short answer is yes, but let’s delve into the nuances to understand why a La-Z-Boy recliner can be more than just a comfortable seat during your recovery period.
Hip replacement surgery, where a damaged hip joint is replaced with an artificial one, has become increasingly common, primarily due to advancements in medical technology and the aging population. This surgery aims to relieve pain and improve the quality of life for those suffering from arthritis or severe injury. However, the recovery journey post-surgery is crucial and can significantly influence the surgery’s success.
After a hip replacement, finding a comfortable and supportive seating option is not just about luxury; it’s necessary. Proper seating supports the healing process, helps manage pain, and reduces the risk of complications. This is where the question “Can I use LazyBoy recliner chair after hip replacement?” gains importance. The right chair can offer not just comfort but also the necessary support to aid in your recovery.
La-Z-Boy recliners are designed with ergonomics in mind, offering adjustable reclining positions, superior lumbar support, and easy-to-use mechanisms that minimize strain on your hips and the rest of your body. Their design can be particularly beneficial for someone in the throes of hip replacement recovery. But let’s break down the specifics of why and how.
Table of Contents
Understanding Hip Replacement Surgery
The Procedure and Its Prevalence
Hip replacement surgery involves replacing the hip joint’s damaged or worn-out parts with artificial components, known as a prosthesis. This procedure is not only prevalent but also highly successful, offering individuals suffering from debilitating hip pain a new lease on life. The reasons for undergoing a hip replacement can range from arthritis-related damage to injuries that have compromised the hip’s functionality.
Navigating Recovery Challenges
The recovery period post-hip replacement surgery is critical. It’s a time when the body heals, but it’s also when the patient gradually regains mobility. Common challenges include managing pain, preventing infection, and avoiding dislocation of the new hip joint. Mobility limitations can make simple daily activities feel daunting, underscoring the need for a safe, supportive recovery environment.
Professional Recommendations for Recovery
Healthcare professionals emphasize the importance of maintaining proper posture, avoiding certain leg movements to prevent dislocation, and managing pain effectively. A key piece of advice often given is the significance of choosing appropriate seating that supports these recovery objectives. Hence, the question “Can I use LazyBoy recliner chair after hip replacement?” is highly relevant. According to many experts, the answer is affirmative, thanks to the specific features of La-Z-Boy recliners that cater to the needs of individuals recovering from hip replacement surgery.
Why Seat Selection Matters Post-Surgery

When it comes to recovering from hip replacement surgery, the little things can make a big difference—especially when it comes to where you sit. It’s a question many patients ponder: “Can I use LazyBoy recliner chair after hip replacement?” Understanding the crucial role of proper seating in the recovery process can significantly impact your healing journey.
The Crucial Role of Proper Seating
Proper seating isn’t just about comfort; it’s about support and safety during your recovery. After hip replacement surgery, your body is vulnerable. The wrong seating choice can delay healing and potentially lead to complications like dislocations or misalignments. That’s why the question “Can I use LazyBoy recliner chair after hip replacement?” becomes so vital.
Navigating Potential Complications
Inappropriate seating—chairs that are too low, too soft, or lacking in support—can jeopardize your recovery. Straining to rise, sinking too deep into cushions, or sitting at an incorrect angle can all exert unwanted pressure on your new hip.
Ergonomic Considerations for Healing
Ergonomics plays a significant role in post-surgery recovery. Chairs that support ergonomic positioning help maintain proper alignment, distribute weight evenly, and reduce strain on the hip. This insight brings us back to the importance of selecting a seat like the La-Z-Boy recliner, designed with recovery in mind.
Related Post
- When can i sit in a recliner after hip replacement
- Can i sleep in a recliner after hip replacement
- Is a recliner good after hip replacement
- How to elevate recliner after hip replacement
Features of La-Z-Boy Recliners Beneficial for Hip Replacement Recovery
When you’re on the path to recovery after hip surgery, finding the right chair is like finding a piece of treasure. Let’s dive into why La-Z-Boy recliners might just be the gem you’re looking for.
Adjustable Recline Settings for Personalized Comfort
One of the top features of La-Z-Boy recliners is their adjustable recline settings. This allows you to find the perfect angle for your body, minimizing pressure on your hip and facilitating a comfortable, healing position. The ability to adjust your seat angle is crucial for hip protection and aids significantly in recovery.
Supportive Cushioning and Ergonomic Design
La-Z-Boy recliners are renowned for their supportive cushioning and ergonomic design. This combination is essential in reducing pressure points and ensuring that your body is supported correctly. It’s all about creating a healing environment for your hip, and the right cushioning plays a pivotal role.
Easy-to-Use Lever or Power Mechanisms
Ease of use is another factor that cannot be overlooked. The last thing you want during your recovery is to struggle with adjusting your chair. La-Z-Boy’s easy-to-use lever or power mechanisms mean you can adjust your position with minimal effort, reducing the risk of straining your hip.
Built-In Lumbar Support for Posture
Maintaining good posture is not just about looking poised; it’s about aligning your body for optimal recovery. La-Z-Boy recliners offer built-in lumbar support, ensuring your lower back is supported, which in turn helps maintain your hip in the correct alignment.
Variety in Models: Selecting the Right One
With a variety of models available, selecting the right La-Z-Boy recliner post-hip replacement surgery can seem daunting. However, focusing on key features—adjustable settings, ergonomic support, ease of use, and lumbar support—can guide you to the perfect choice for your recovery needs.
“Can I use LazyBoy recliner chair after hip replacement?” Absolutely. With its array of beneficial features tailored for recovery, a La-Z-Boy recliner is not just a seat; it’s a recovery tool. It offers personalized comfort, supports your body’s healing process, and provides the safety and support necessary during this critical time.
Professional Guidelines on Using Recliners After Hip Surgery

When it comes to recovery after hip replacement surgery, the question “Can I use LazyBoy recliner chair after hip replacement?” is often met with a chorus of professional advice from those in the know—orthopedic surgeons and physiotherapists. Their guidance sheds light on how a seemingly simple act of sitting down can be navigated to support recovery.
Expert Advice for Optimal Recovery
Orthopedic surgeons and physiotherapists agree: that the type of seating you choose after surgery can significantly impact your recovery journey. A La-Z-Boy recliner, with its adjustable settings and supportive design, often comes recommended. The professionals emphasize the importance of a chair that supports getting up and sitting down with minimal strain on the hip.
The Dos and Don’ts in the Recliner
There are clear dos and don’ts for using a recliner during recovery. First, ensure the chair is set at a height that keeps your knees slightly lower than your hips, reducing the risk of dislocation. Don’t choose a position that forces your hip into deep bending. And crucially, do use the chair’s features to stand up and sit down smoothly, avoiding jerky movements.
Tailoring Your Recliner for Safety and Comfort
Adjusting your recliner for optimal safety and comfort is key. Utilize the recliner’s adjustable settings to find a supportive, semi-reclined position that keeps your hip in a safe alignment. Ensuring the chair provides firm, even support across your body can help mitigate the risk of discomfort or injury.
Real-Life Experiences: Success Stories and Precautions
The narrative around the question “Can I use LazyBoy recliner chair after hip replacement?” becomes even more compelling when we dive into real-life stories. Those who’ve walked this path offer invaluable insights into the practical aspects of recliner use during recovery.
Testimonials of Recovery
Many individuals who’ve undergone hip replacement surgery share glowing reviews of their La-Z-Boy recliners. They speak of the chair not just as a piece of furniture but as a recovery companion that offered comfort and support when they needed it most. The ability to adjust the recliner to their preferred angle provided relief and aided in their rehabilitation journey.
Weighing the Benefits Against the Drawbacks
While the benefits of using a La-Z-Boy recliner post-hip replacement surgery are widely reported, it’s important to navigate the few drawbacks mentioned. Some individuals noted the challenge of finding the perfect adjustment initially. However, once mastered, the recliner became an indispensable part of their recovery.
Tips for Enhanced Comfort and Support
From the wealth of shared experiences, several tips emerge for those considering a La-Z-Boy recliner for their recovery. Experiment with the chair’s settings before surgery to familiarize yourself with its functions. Consider placing a firm pillow on the seat for additional hip support. Lastly, keep a small table nearby to keep essentials within easy reach, minimizing the need to stand frequently.
Conclusion
As we’ve navigated the ins and outs, the do’s and don’ts, and the real-life tales of comfort and recovery, one question guided our exploration: “Can I use LazyBoy recliner chair after hip replacement?” The answer, resonating through expert advice, ergonomic benefits, and heartfelt testimonials, is a resounding yes. The journey of recovery from hip replacement surgery is nuanced, with every detail holding the potential to impact the speed and quality of your healing. In this context, the choice of a La-Z-Boy recliner emerges not just as a comfortable option, but as a strategic ally in your path to regaining mobility and strength.
The benefits of using a La-Z-Boy recliner during hip replacement recovery are clear—adjustable settings for personalized comfort, ergonomic support for posture and alignment, and features designed to ease the strain of sitting and standing. These advantages align with the recovery needs outlined by healthcare professionals, offering a supportive environment conducive to healing.
For individuals at the crossroads of making this decision, the recommendation is to consider a La-Z-Boy recliner as a significant component of your recovery toolkit. However, it’s crucial to marry this consideration with professional advice. Consulting with your healthcare provider ensures that your specific recovery needs and potential restrictions are taken into account, making your journey back to health as smooth and supported as possible.
Frequently Asked Questions
Can you sit in Lazy Boy after hip replacement?
Yes, sitting in a La-Z-Boy after hip replacement is generally safe and can be beneficial due to the chair’s adjustable features and support, but always consult with your healthcare provider for personalized advice.
Can sitting in a recliner cause hip pain?
Sitting in a recliner can cause hip pain if the chair does not provide adequate support or if it encourages poor posture. Choosing a recliner with good lumbar support and adjustable features can help prevent hip pain.
What chairs are needed after hip replacement?
After hip replacement, chairs that are higher with firm seats and armrests are recommended. A recliner like La-Z-Boy, which allows for adjustable positions and supports the hip, can be a good choice.
Is a recliner OK after hip surgery?
A recliner is OK after hip surgery, especially models that offer adjustable positions and support. They can help keep you comfortable while preventing strain on your hip. Consult your doctor for specific recommendations.
How low can I sit after hip replacement?
Post-hip replacement, it’s advised to avoid sitting in very low chairs to prevent strain on the hip joint. Chairs where your knees remain lower than your hips are generally considered safe.
Julie D. Williams is a seasoned chair connoisseur with a decade in the furniture realm. She combines her keen eye for design and deep knowledge of ergonomics to provide readers with reviews and guides, ensuring comfort and style in every recommendation. Each piece is a fusion of aesthetics and function, tested and approved by Julie. A believer in the power of the perfect seat to transform spaces, she’s your go-to source for impeccable finds. When not reviewing chairs, Julie is on the hunt for vintage décor, weaving comfort and beauty into every aspect of life.

Ever pondered over the possibility, “Can I turn a regular recliner into a lift chair?” Well, you’re not alone. This question has sparked curiosity among many, especially for those looking to add a bit more convenience and support to their living room furniture without breaking the bank. Lift chairs, after all, are not just about comfort; they’re about independence, safety, and enhancing the quality of life for individuals facing mobility challenges.
In this dive into the world of recliners and lift chairs, we’ll explore the transformative journey from a regular recliner to a lift chair, the mechanics behind it, and the incredible benefits it can bring into the lives of its users. Stick around as we unfold the magic behind these chairs and how they might just be the solution you’re looking for.
Table of Contents
Understanding Lift Chairs
What Exactly Is a Lift Chair?
At its core, a lift chair sounds like something straight out of a sci-fi movie, doesn’t it? Imagine a comfortable recliner that not only allows you to kick back and relax but also gently assists you to a standing position with the push of a button. That’s a lift chair for you—a recliner with superpowers. But what makes it tick, and how does it differ from your everyday recliner?
The Mechanics Behind the Magic
Lift chairs come equipped with a powerful lifting system, usually operated by an electric motor. This mechanism is the heart of the lift chair, enabling it to smoothly transition from a reclined position to an almost standing posture, thereby assisting those who have difficulty getting up on their own. It’s like having a personal assistant hidden beneath the cushions, ready to offer a helping hand whenever needed.
Why Lift Chairs Are a Game-Changer
While regular recliners are great for relaxation, they don’t offer much beyond that, especially for individuals with specific needs. Lift chairs, on the other hand, are a beacon of independence for those with mobility challenges. They’re not just chairs; they’re tools that enhance safety by reducing the risk of falls during attempts to stand up. Additionally, for people recovering from surgery or those with chronic conditions like arthritis, a lift chair can be a pivotal part of living a more comfortable and autonomous life.
Regular Recliners vs. Lift Chairs

When pondering the question, “Can I turn a regular recliner into a lift chair?” it’s crucial to understand the ground we’re standing on. Let’s dive into the world of recliners and lift chairs, not just as furniture but as companions in our daily lives, offering comfort and support in ways we sometimes take for granted.
The Tale of Two Chairs
Imagine your regular recliner as a cozy nook, perfect for those lazy Sunday afternoons with a book or in front of the TV. It reclines, it rocks, it might even swivel, but when it’s time to stand up, it’s all on you. Here enters the lift chair, not just another seat in the room but a marvel of modern engineering designed to lend a hand, quite literally, by elevating you to a standing position with the push of a button.
The fundamental difference lies in their capability to assist. While your regular recliner asks for a bit of muscle to return to its upright position, a lift chair does the heavy lifting for you. This distinction is crucial for anyone facing mobility challenges. The regular recliner, with all its comfort, falls short of providing the support and assistance a lift chair offers.
The Limitations of Regular Recliners
Regular recliners, despite their comfort and versatility, have limitations, especially when compared to lift chairs. They lack the mechanical system needed to assist individuals in standing up, which can be a significant obstacle for users with reduced mobility. This is where the idea of turning a regular recliner into a lift chair becomes not just appealing but necessary for some.
Related Post
- How to keep recliner chair arm caddy on lift chair
- Will a lift chair mechanism fit any recliner
- Can you convert a recliner to a lift chair
The Conversion Process
So, you’re now wondering, “How exactly can I turn a regular recliner into a lift chair?” The process, while not overly complicated, does require some planning, a bit of DIY spirit, and the right tools and materials.
Overview of the Conversion Journey
Converting a regular recliner into a lift chair is akin to giving it a new lease on life, transforming it from a static piece of furniture into an active part of your daily routine. This journey from recliner to lift chair involves adding a lifting mechanism that can safely elevate and lower the chair.
Toolkit and Supplies
Before embarking on this transformation, you’ll need:
- A lifting mechanism, specifically designed for this purpose.
- A set of tools likely includes screwdrivers, wrenches, and possibly a drill.
- Electrical components, such as wiring and a power source, are compatible with the lifting mechanism.
- A healthy dose of patience and a sprinkle of DIY enthusiasm.
Step-by-Step Guide
1. Assessment and Preparation
Start by assessing your recliner to ensure it’s suitable for conversion. Check the frame’s integrity and the available space for installing the lifting mechanism.
2. Installation of the Lifting Mechanism
Carefully attach the lifting mechanism to the chair’s frame according to the manufacturer’s instructions. This step is crucial for the transformation, as the mechanism will be doing the heavy lifting—literally.
3. Electrical Wiring and Controls
Connect the lifting mechanism to the power source and install the controls in an accessible area. Ensure all electrical connections are secure and follow any guidelines provided with your kit.
4. Testing and Safety Checks
Before enjoying your newly converted lift chair, conduct thorough testing and safety checks. Make sure the chair operates smoothly and that all moving parts are secure.
In navigating the conversion from a regular recliner to a lift chair, we not only give ourselves a project but also open up a world of comfort and accessibility that might have been out of reach. This transformation not only enhances the functionality of a regular recliner but also empowers individuals, making their daily lives a bit easier and a lot more comfortable.
DIY Conversion Kits

The question, “Can I turn a regular recliner into a lift chair?” takes an intriguing turn when we delve into the world of DIY conversion kits. These kits promise to bridge the gap between the static comfort of recliners and the dynamic support of lift chairs. Let’s unpack what these kits offer, weigh their benefits against manual conversions, and point you toward some reputable options.
Unpacking DIY Conversion Kits
Imagine a box arriving at your doorstep, inside which lies the potential to transform your beloved recliner into a lift chair. That’s essentially what a DIY conversion kit is. Packed with all necessary components—motors, power supplies, remote controls, and sometimes even tools—these kits are designed to retrofit regular recliners with lifting mechanisms.
Weighing Pros and Cons
Pros:
- User-Friendly: Most kits come with detailed instructions, making the installation process manageable for those with minimal DIY experience.
- Cost-Effective: Purchasing a kit can be significantly less expensive than buying a new lift chair or opting for professional conversion services.
Cons:
- Compatibility Issues: There’s always a risk that the kit might not perfectly fit your recliner, leading to potential functionality or safety issues.
- DIY Challenges: If you’re not handy or lack confidence in your technical skills, the installation process can be daunting and potentially hazardous.
Kit Recommendations
When searching for a DIY conversion kit, look for options with positive reviews and clear, supportive instructions. Brands like “EasyLift” and “ReclinerTransform” have been noted for their reliability and customer support. However, it’s crucial to ensure the kit you choose is compatible with your recliner’s design and dimensions.
Professional Conversion Services
Sometimes, the journey from asking “Can I turn a regular recliner into a lift chair?” to achieving that reality is best navigated with professional help. Let’s explore when to consider this option, its advantages, and how to secure the services of a reputable provider.
When to Go Pro
Consider professional conversion services if:
- Your recliner has unique or complex mechanisms that might not be compatible with standard DIY kits.
- You’re not confident in your ability to safely complete the conversion.
- You value warranty protection and professional quality assurance for the modifications.
Benefits of Professional Help
- Expertise and Experience: Professionals bring a depth of knowledge that ensures the conversion is done right the first time.
- Safety and Reliability: With professional services, you get peace of mind knowing that your lift chair will function safely and reliably.
- Customization: Professionals can offer custom solutions tailored to your specific recliner and needs, going beyond the one-size-fits-all approach of DIY kits.
Finding the Right Provider
To find a trustworthy professional for your recliner-to-lift chair conversion, start by:
- Searching online for services in your area, paying close attention to reviews and testimonials.
- Asking for recommendations from medical professionals or community groups.
- Contact potential services to inquire about their experience with conversions, warranty offerings, and if they provide free estimates.
By considering your needs, skills, and the resources available to you, the process of turning a regular recliner into a lift chair becomes not just feasible but exciting. Whether you opt for a DIY kit or professional services, you’re on your way to enhancing comfort and mobility in your home.
Cost Analysis

Diving into the financials is a critical step when you’re circling the question, “Can I turn a regular recliner into a lift chair?” Whether you’re tightening the purse strings or ready to splurge for comfort, understanding the costs involved is crucial. Let’s crunch some numbers and see what makes sense for your wallet and your well-being.
Buying New vs. Converting
At first glance, purchasing a brand-new lift chair seems like a straightforward choice. However, when you start to compare prices, converting an existing recliner can appear as an appealing, budget-friendly alternative. A high-quality new lift chair can set you back anywhere from $600 to well over $1000, depending on the features and brand. On the flip side, a conversion kit might only cost a fraction of that.
Breaking Down DIY Conversion Costs
Embarking on a DIY project to convert your recliner involves several potential expenses:
- Conversion Kit: Prices vary widely, but let’s ballpark it at $200 to $500.
- Tools: If you don’t already have them, you might need to invest in some basic tools, adding perhaps another $50 to $100 to your budget.
- Unexpected Expenses: Always add a buffer for those unforeseen issues—let’s say another $50.
Assessing Cost-Effectiveness
When you tally up the costs, converting your recliner often emerges as a cost-effective alternative to buying a new one, especially if you’re attached to your current chair’s comfort and style. Plus, it’s an eco-friendly choice, giving a second life to a beloved piece of furniture.
Safety Considerations and Tips
“Safety first” isn’t just a catchy phrase; it’s a mantra to live by, especially when modifying furniture to meet new needs. As you ponder “Can I turn a regular recliner into a lift chair?” remember that ensuring the converted chair’s safety is paramount.
Prioritizing Safety in the Conversion Process
- Follow Instructions to the Letter: Whether you’re using a conversion kit or following a guide, precision is key.
- Quality Components: Opt for reputable brands and quality components to avoid malfunctions and ensure durability.
Ensuring a Safe and Reliable Chair
- Stability is Key: Make sure the lifting mechanism is securely attached to the chair’s frame.
- Electrical Safety: Pay careful attention to wiring. Ensure everything is correctly installed and insulated to prevent shocks.
Maintenance for Longevity
- Regular Checks: Periodically inspect the chair for wear and tear, especially the lifting mechanism and electrical components.
- Professional Help: If you’re ever unsure about the chair’s safety, consulting with a professional can provide peace of mind.
Conclusion
As we wrap up our exploration of “Can I turn a regular recliner into a lift chair?” it’s clear that with the right approach, converting a recliner can be a viable and rewarding project. This journey not only has the potential to save you money but also to provide you with a customized piece of furniture that meets your specific needs.
Whether this conversion is right for you depends on several factors: your budget, your DIY comfort level, and your specific needs. By carefully weighing these considerations and prioritizing safety and functionality, you can make an informed decision that enhances your living space and your life.
So, before you decide, take a moment to assess your abilities, your needs, and the resources at your disposal. With a bit of planning and effort, you could soon be enjoying the comfort and independence that a lift chair offers, all from the familiar embrace of your favorite recliner.
Frequently Asked Questions
Can a manual recliner be converted to power?
Yes, a manual recliner can be converted to a power recliner using a conversion kit. This process involves installing an electrical lifting mechanism and may require basic tools and electrical knowledge.
Can recliner chairs be raised?
Recliner chairs can indeed be raised. This can be accomplished by using furniture risers specifically designed for recliners or by attaching new, higher legs if the chair’s design allows it.
How do I make my recliner sit higher?
To make your recliner sit higher, consider using furniture risers or replacing the existing legs with taller ones. Both methods are straightforward and can effectively increase the chair’s height.
Is it better to get a power or manual recliner?
Choosing between a power or manual recliner depends on your needs. Power recliners offer ease of use with a button push, ideal for those with limited mobility. Manual recliners require more physical effort but are often less expensive.
Do power recliners use a lot of electricity?
Power recliners do not use a significant amount of electricity. They are designed for efficiency, consuming minimal power during operation and even less when on standby, making them cost-effective in terms of energy use.
Julie D. Williams is a seasoned chair connoisseur with a decade in the furniture realm. She combines her keen eye for design and deep knowledge of ergonomics to provide readers with reviews and guides, ensuring comfort and style in every recommendation. Each piece is a fusion of aesthetics and function, tested and approved by Julie. A believer in the power of the perfect seat to transform spaces, she’s your go-to source for impeccable finds. When not reviewing chairs, Julie is on the hunt for vintage décor, weaving comfort and beauty into every aspect of life.