
Ever found yourself shifting uncomfortably in your office chair, trying to find the right spot because the armrest feels less cushiony and more like a slab of stone? This guide dives deep into how to fix office chair armrest foam, ensuring that you can return to working in comfort without the distraction of deteriorating armrests.
Understanding the significance of a supportive office chair isn’t just about comfort—it affects productivity and overall health. In this article, we will cover everything from identifying the problems with your armrests to assessing the damage and deciding on the best course of action.
Recognizing the Tell-Tale Signs of Armrest Wear and Tear
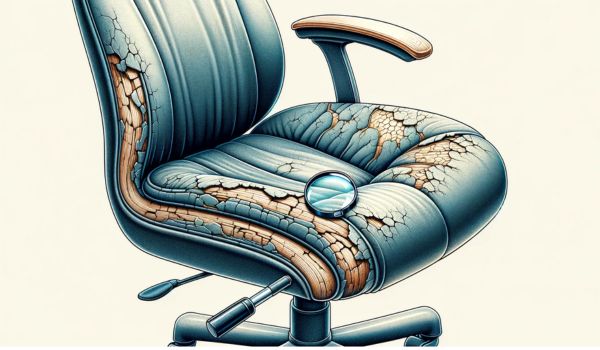
How do you know it’s time to fix your office chair armrest foam? The first step is identifying the problem, which often manifests through visible cracks or tears in the foam. If the armrests have lost their original shape or have started to flatten, causing your elbows and forearms to feel uncomfortable pressure points, these are clear indicators that the foam is no longer performing as it should.
But what causes these issues? It could be the regular wear and tear from daily use, exposure to sunlight or heat, or simply the use of poor-quality materials in the chair’s construction.
Assessing the Damage to Armrest Foam
After recognizing the issues, the next step in how to fix office chair armrest foam is to assess the damage thoroughly. This means examining whether the foam deterioration is just on the surface or if it has penetrated deeper into the armrest. Surface-level damage might be fixable with simple solutions like patching or adding a cover, while deep foam deterioration could require a more comprehensive approach, such as replacing the foam entirely.
Making this determination is crucial because it informs whether a repair will suffice or if a full replacement is necessary to restore the armrest to its original comfort level.
Deciding Between Repair or Replacement
Deciding whether to repair or replace the foam in your office chair armrests can seem daunting. However, understanding the extent of the damage and considering how much longer you intend to keep the chair can help make this decision easier. Minor issues might be addressable with DIY fixes, which we will explore in the following sections.
However, if the foam has severely deteriorated, replacing it might be the only way to ensure your chair can provide the support and comfort needed for optimal productivity.
Gathering Necessary Materials and Tools
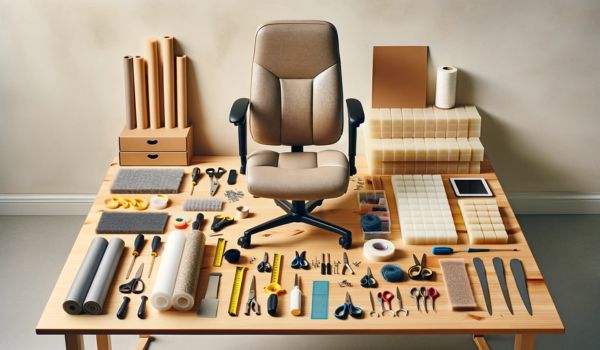
Before you can start the repair or replacement process, gathering all necessary materials and tools is crucial. Here’s what you’ll need to fix office chair armrest foam effectively:
- Replacement foam: Ensure you choose high-density foam for durability and comfort.
- Fabric or upholstery material: This will cover the new foam, giving your armrests a fresh, new look.
- Adhesive: Options include spray adhesive or glue, depending on your preference and the materials you’re working with.
- Optional: Additional foam padding or batting can be used for extra comfort and cushioning.
As for the tools required, make sure you have:
- Scissors to cut the fabric and foam.
- Staple gun for securing the fabric to the armrest.
- Screwdriver to detach the armrest from the chair.
- Measuring tape to ensure your foam and fabric are the correct size.
- Utility knife to precisely cut the replacement foam to size.
Related Post
Removing the Armrest
The first physical step in how to fix office chair armrest foam is removing the armrest from the chair. Follow these steps to ensure a safe and efficient removal:
- Identify the Screws or Attachments: Flip the chair to access the underside of the armrest. Look for any screws, bolts, or clips that hold the armrest in place.
- Safely Removing the Armrest: Using the appropriate screwdriver, carefully remove the screws or attachments. Keep all screws and attachments in a small container to avoid losing any pieces. Gently lift the armrest away from the chair frame.
With the armrest detached and all necessary materials and tools ready, you’re set to move on to repairing or replacing the office chair armrest foam. This will ensure that your chair not only looks good but also provides the necessary support and comfort for everyday use.
Removing the Old Foam
To ensure your repair is effective, you must thoroughly remove the old, deteriorated foam from the office chair armrest. Here’s a step-by-step guide on how to accomplish this:
- Using a Utility Knife or Scissors: Start by carefully cutting into the old foam. If the foam is glued down, use a utility knife to slice through it. Scissors are useful for peeling off the foam layers once they are loose.
- Cleaning the Surface: Once all the old foam is removed, clean the underlying surface of the armrest to remove any residual glue or debris. A clean surface will help the new foam adhere better.
Related Post
Cutting and Shaping New Foam
Once the old foam is removed and the surface is prepped, the next step in fixing your office chair armrest foam involves cutting and shaping the new foam:
- Measuring the Armrest for Correct Foam Dimensions: Use a measuring tape to measure the length, width, and desired thickness of the new foam. It’s essential to get accurate measurements to ensure the foam fits perfectly.
- Cutting Foam to Size: With your measurements in hand, mark the dimensions on your new foam. Use a utility knife for precise cuts. Ensure the blade is sharp to avoid tearing the foam.
- Techniques for Clean Cuts: For the cleanest cuts, make a shallow first pass with your knife to create a guideline, then make deeper cuts along this line until you’ve cut through the foam.
- Shaping the Foam for Ergonomic Comfort: If necessary, trim the edges of the foam to create a contoured shape that matches the original ergonomic design of the armrest.
Attaching the New Foam
The final step in how to fix office chair armrest foam is attaching the new foam securely:
- Applying Adhesive to Secure the Foam: Choose a suitable adhesive (spray adhesive works well for foam applications). Spray or apply the glue evenly on both the armrest surface and the bottom side of the new foam.
- Even Distribution of Adhesive: Make sure the adhesive covers the entire surface area to avoid unevenness or bubbling in the foam.
- Ensuring Strong Adhesion: Place the new foam onto the armrest, pressing down firmly and evenly. Allow the adhesive to cure according to the manufacturer’s instructions, ensuring a strong bond and preventing the foam from shifting during use.
By carefully following these steps to remove old foam, cut and shape new foam, and attach it securely, you will have successfully repaired the foam in your office chair armrest, restoring comfort and functionality to your workspace.
Covering the Foam with Fabric
Once your new foam is securely attached, the next step is to cover it with fabric or upholstery material. When selecting your fabric, consider durability and comfort, as the armrest will undergo frequent use and pressure. Choose a material that complements the aesthetic of your office chair while providing resilience and ease of maintenance. After selecting the fabric:
- Cutting Fabric to Size: Measure the dimensions of the armrest, adding extra fabric on all sides to allow for wrapping around the foam and under the armrest where it will be secured.
- Securing the Fabric Around the Foam: Lay the cut fabric flat and place the foam-covered armrest face down onto the fabric. Pull the fabric tightly over the edges, ensuring it is even and smooth.
- Using a Staple Gun for Tight and Secure Attachment: Secure the fabric to the underside of the armrest using a staple gun. Make sure the staples are spaced evenly and penetrate deeply to hold the fabric in place.
- Ensuring a Smooth, Wrinkle-Free Finish: As you staple, adjust the tension in the fabric to avoid wrinkles and ensure a smooth, professional-looking finish.
Reattaching the Armrest
With the fabric now securely in place, it’s time to reattach the armrest to the chair:
- Aligning Screw Holes: Carefully align the armrest with the screw holes on the chair frame. This may require slight adjustments as the new foam and fabric can shift the alignment.
- Securing Screws Tightly: Once aligned, reinsert and tighten the screws to secure the armrest back onto the chair. Ensure they are tight to prevent any wobbling or instability.
Final Adjustments and Tips
After reattaching the armrest, make some final adjustments to ensure everything is properly aligned and secure. Here are some tips for maintaining your office chair armrest foam:
- Regular Cleaning: Clean the armrest regularly to prevent dirt build-up that can degrade the fabric and foam.
- Avoiding Excessive Pressure or Weight: Do not exert excessive pressure on the armrests to prolong their life.
- Using Protective Covers: Consider using removable covers that can be washed and replaced, offering additional protection against wear and tear.
Conclusion
This comprehensive guide has walked you through the steps involved in fixing office chair armrest foam, from identifying and removing old foam to securing new fabric and reattaching the armrest. By tackling this repair, you not only extend the life of your office chair but also enhance your comfort, making long hours at your desk more enjoyable. Feel free to share your feedback or ask questions if you need further assistance with your office chair repairs. Your comfort at work is worth the effort!
Frequently Asked Questions
How to fix office chair armrest?
To fix an office chair armrest, tighten any loose screws or bolts with a screwdriver or Allen wrench. If the armrest is damaged, consider replacing it with a new one from the manufacturer.
What kind of glue to repair office chair?
For repairing office chairs, use a strong adhesive like epoxy or super glue. Ensure the surfaces are clean and dry before application for best results.
How to lock office chair armrest?
Some office chair armrests can be locked by adjusting a knob or lever usually found underneath the armrest. Check your chair’s manual for specific locking mechanisms.
How to raise office chair armrests?
To raise the armrests, locate the adjustment button or lever on the side or underneath the armrest. Press or lift it while pulling the armrest to the desired height.
How do you fix a broken chair arm?
To fix a broken chair arm, realign the broken parts and use wood glue or a suitable adhesive. Clamp the arm until the glue dries completely, then reinforce with screws if needed.
Why is my armrest loose?
A loose armrest typically results from worn-out screws or bolts. Tighten them with the appropriate tools. If they’re damaged, replace them with new hardware.

Julie D. Williams is a seasoned chair connoisseur with a decade in the furniture realm. She combines her keen eye for design and deep knowledge of ergonomics to provide readers with reviews and guides, ensuring comfort and style in every recommendation. Each piece is a fusion of aesthetics and function, tested and approved by Julie. A believer in the power of the perfect seat to transform spaces, she’s your go-to source for impeccable finds. When not reviewing chairs, Julie is on the hunt for vintage décor, weaving comfort and beauty into every aspect of life.