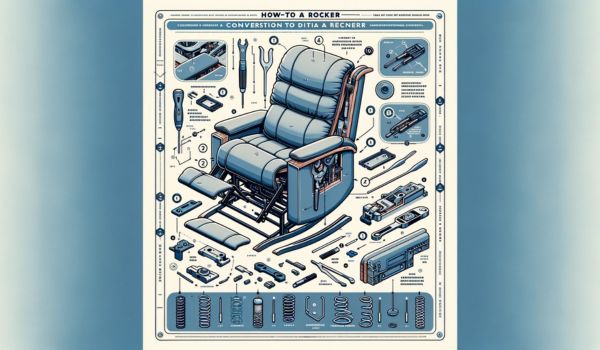
Have you ever wondered if you can make a recliner into a rocker? This idea might not be the first thing that comes to mind when you think about furniture modification, but it’s a fascinating project that can breathe new life into your old recliner.
Converting a recliner into a rocker offers not just a touch of novelty, but also a range of benefits, from enhanced relaxation to potential therapeutic advantages.
This article will delve into what it means to transform your recliner into a rocker, explore the importance of this conversion, and give you a sneak peek into the key steps involved.
What Does It Mean to Convert a Recliner Into a Rocker?
The concept of making a recliner into a rocker involves modifying the existing structure of a recliner chair to add a rocking mechanism. This allows the chair to rock back and forth, a feature not originally designed in standard recliners.
The conversion process varies depending on the type of recliner but generally includes the installation of a rocking base or retrofitting the chair with rocker springs.
The Benefits of Making Your Recliner into a Rocker
Why would you consider this conversion? First, rocking has been shown to reduce stress, aid in relaxation, and even improve sleep quality. For those with young children or grandchildren, a rocker-recliner could serve as the perfect comfort spot for soothing a child.
Moreover, it can become a cozy reading nook or a relaxing corner to unwind after a long day. The gentle rocking motion can also benefit elderly users by improving circulation and flexibility.
Previewing the Transformation Journey
In this article, we’ll guide you through several key phases to successfully make your recliner into a rocker. From assessing the suitability of your existing recliner and gathering the necessary tools and materials, to considering the space and mechanical compatibility—each step is crucial for a seamless transformation. Let’s start by evaluating your recliner.
Assessing Your Recliner for Conversion
Identifying Suitable Recliner Types
Not all recliners are ideal candidates for conversion into rockers. Typically, recliners with a simpler base structure are easier to modify. For instance, standard two-position recliners, which already have a simplistic mechanism, are often more suitable than more complex models like power recliners or those with built-in electronics.
Tools and Materials Needed
To make a recliner into a rocker, you will need a set of basic tools such as a screwdriver, a drill, possibly a saw, and depending on the type of conversion kit you choose, different fasteners and brackets.
The primary material you’ll need is a rocker conversion kit, which can be purchased online or from a furniture repair shop.
Initial Considerations: Space, Mechanics, and Design Compatibility
Before you start the conversion, assess the space where your rocker-recliner will go. Ensure there’s enough room for it to rock without hitting nearby furniture or walls. Mechanically, you’ll need to consider the current condition of your recliner’s frame and whether it can support a new type of motion. Design compatibility is also crucial; your new rocker should not only be functional but also aesthetically pleasing within its environment.
Related Post
- how to stop a recliner rocking chair from rocking
- how to fix a rocker recliner
- how to keep rocker recliner from sliding on wood floor
Understanding Rocker Mechanisms

Before you can make a recliner into a rocker, it’s essential to understand how rocker mechanisms function. A rocker mechanism allows a chair to move in an arched path, providing the soothing motion that makes rockers so beloved. Let’s explore the different types of rocker bases and discuss their advantages and disadvantages.
Types of Rocker Bases
- Traditional Rocker: This type features a simple pair of curved bands attached to the bottom of the chair legs. The bands rock back and forth on the floor. Traditional rockers are known for their classic aesthetic and gentle rocking motion.
- Glider Rocker: Unlike traditional rockers, gliders move forward and backward on a fixed track, offering a smoother, more controlled motion. They are particularly popular in nurseries and are known for their quiet operation.
- Swivel Rocker: Combining the features of a swivel chair and a rocker, this type offers the ability to rotate as well as rock. This is ideal for those who want flexibility in their seating orientation, making it a good choice for living rooms.
Pros and Cons of Each Type of Rocker Mechanism
- Traditional Rocker:
- Pros: Simple design, durable, provides classic rocking motion.
- Cons: May require more floor space to avoid scraping the floor, less stable than other types.
- Glider Rocker:
- Pros: Smooth, controlled motion, usually comes with locking mechanisms for safety.
- Cons: Mechanism can collect dust and debris, requiring regular maintenance.
- Swivel Rocker:
- Pros: Allows for rotational movement, versatile placement in a room.
- Cons: Mechanism complexity can increase the likelihood of repairs.
Preparation for Conversion
Making a recliner into a rocker involves not just technical know-how but also preparation and safety measures.
Safety Precautions and Preparation
Before beginning, ensure all tools are in good condition and you have protective gear such as gloves and goggles. Clear the work area of any obstacles or hazardous materials.
Space Requirements
Check that there is adequate room around the recliner for the new rocking motion. You’ll need to allow extra space behind and in front of the recliner to accommodate the arc of movement.
Disassembling the Recliner: Step-by-Step Guide
- Remove Cushions: Start by removing any cushions to expose the frame and mechanism.
- Detach the Back: Unscrew the back part of the recliner to separate it from the base.
- Expose the Mechanism: Remove any fabric or covering that hides the mechanism.
- Disconnect Existing Base: Carefully unscrew and remove the existing base that does not support rocking.
Related Post
how to stop a lazy boy rocker recliner from rocking
Choosing the Right Rocker Base
Selecting the appropriate rocker base is crucial for a successful conversion.
Criteria for Selecting a Suitable Rocker Base
- Stability: Ensure the base is sturdy and provides enough support for the size and weight of the recliner.
- Size: The base should match the footprint of your recliner to maintain balance.
- Quality of Materials: Choose a base made from durable materials that can withstand regular use.
Compatibility Issues
The rocker base must be compatible with the design and existing mechanism of your recliner. For instance, a heavier recliner might require a more robust base.
Recommendations for Different Recliner Types and Sizes
- Small Recliner: A traditional rocker base might be sufficient.
- Large Recliner: Consider a glider base for better stability and smoother motion.
- Recliners with Complex Mechanisms: A swivel rocker base can provide the needed versatility and support.
By following these guidelines, you can ensure that your project to make a recliner into a rocker not only enhances the functionality of your furniture but also contributes positively to your home’s comfort and aesthetics.
Installation of Rocker Base
Installing a rocker base is a critical step in transforming your recliner into a rocker. Here’s how to do it effectively:
Step-by-Step Instructions on Installing the Rocker Base
- Position the Rocker Base: Place the rocker base where the original base was located, ensuring it aligns perfectly with the recliner’s frame.
- Secure the Base: Using screws and brackets, securely attach the rocker base to the recliner’s frame. Make sure all connections are tight and the base is stable.
- Reattach the Back and Seat: Once the base is secured, reattach the back and seat of the recliner.
- Test the Rocking Motion: Gently test the rocking motion to ensure the base is functioning correctly and is securely attached.
Tools and Techniques for Secure Attachment
- Tools Needed: Screwdriver, wrench, possibly a drill.
- Techniques: Use locking washers for screws to prevent loosening over time. Apply wood glue to joints for additional stability (if applicable).
Adjustments and Alignments for Optimal Rocking Motion
- Leveling: Check that the recliner is level on the ground. Adjust the base as necessary to achieve balance.
- Tightness of Connections: Ensure all bolts and screws are tightened to the correct torque to prevent any wobbling.
Customization and Comfort Adjustments
Once your recliner is successfully converted into a rocker, you might want to customize it for enhanced comfort and aesthetics.
Customizing the Rocker for Personal Comfort and Aesthetics
- Choosing Fabric: Select a fabric that complements your room’s decor and is durable enough for frequent use.
- Paint or Stain: Consider painting or staining the wooden parts of the rocker to match other furniture or add a pop of color.
Adding or Modifying Cushions and Upholstery
- Cushions: Add extra padding or replace old cushions with high-density foam for improved comfort.
- Upholstery: Reupholster the recliner with new fabric if the old one is worn out or you desire a new look.
Adjusting Tension and Motion Settings
- Tension Adjustments: Modify the tension settings of the rocking mechanism to suit your preference for a harder or softer rock.
- Motion Limiters: Install motion limiters if you prefer to restrict the range of rocking.
Safety Checks and Final Touches
Ensuring the safety and durability of your newly converted rocker-recliner is paramount.
Comprehensive Safety Checks Post-Conversion
- Stability Test: Vigorously test the stability of the rocker to ensure it doesn’t tip over easily.
- Mechanism Check: Inspect all mechanical parts for proper installation and function.
Maintenance Tips to Ensure Longevity and Performance
- Regular Tightening: Periodically check and tighten all screws and bolts.
- Cleaning and Lubrication: Clean any tracks or moving parts regularly and lubricate them to ensure smooth motion.
Troubleshooting Common Issues After Conversion
- Squeaking Noises: If the rocker makes squeaking sounds, check for loose fittings and lubricate the joints.
- Uneven Rocking: If rocking is uneven, adjust the base to ensure it is perfectly horizontal.
By following these steps and guidelines, you can enjoy a newly converted rocker-recliner that not only adds comfort to your living space but also reflects your personal style and needs.
Alternative Solutions
While converting your existing recliner into a rocker is an intriguing DIY project, it’s worth considering pre-made rocker recliners as alternative solutions. Let’s compare the costs and weigh the pros and cons.
Overview of Pre-made Rocker Recliners
Pre-made rocker recliners are available in a variety of styles, colors, and mechanisms (such as traditional rockers, gliders, and swivel rockers). These models come fully assembled with the rocking function built-in, designed for durability and optimal comfort.
Cost Comparison Between DIY Conversion and Buying New
- DIY Conversion: The cost primarily includes the price of a rocker base kit and any additional tools or materials you might need. This can range from a few hundred dollars to more, depending on the complexity and quality of the base.
- Buying New: A new rocker recliner can cost anywhere from a few hundred to several thousand dollars, depending on the brand, materials, and features.
Pros and Cons of Alternative Solutions
- Pros of Buying New:
- Convenience: No assembly required; ready to use right out of the box.
- Warranty: Comes with a manufacturer’s warranty, providing peace of mind regarding defects.
- Modern Features: Often includes features like adjustable headrests, built-in USB ports, and high-tech fabric options.
- Cons of Buying New:
- Cost: Generally more expensive than converting an existing recliner.
- Environmental Impact: Buying new contributes to higher consumption of resources and production of waste.
Conclusion
Throughout this guide, we’ve explored the transformation of a recliner into a rocker, detailing each step from understanding the different mechanisms to installing the rocker base and ensuring safety.
The process offers a blend of practicality and personal satisfaction, as DIY enthusiasts can tailor their furniture to meet specific needs while engaging in a rewarding project.
Converting a recliner into a rocker not only revitalizes an old piece but also enhances comfort, making it a cherished spot in any home. Whether you opt for a DIY conversion or a pre-made alternative, the added functionality and comfort of a rocker recliner are invaluable.
Frequently Asked Questions
Can you turn a regular chair into a rocking chair?
Yes, it is possible to convert a regular chair into a rocking chair by attaching curved bands known as rockers to its legs. This requires some basic carpentry skills or a conversion kit.
Is there a way to make a rocker recliner not rock?
Yes, you can stop a rocker recliner from rocking by installing wedge braces under the frame or adjusting the tension spring to prevent motion.
Do recliners also rock?
Many recliners come with a rocking feature, allowing them to rock back and forth while providing the usual recline function, enhancing relaxation.
What is the most common problem with recliners?
The most common issues with recliners involve the reclining mechanism, such as broken springs or malfunctioning levers, which can .
What are the benefits of rocking recliner?
Rocking recliners offer the dual benefits of reclining and rocking, which can aid relaxation, improve circulation, and provide comfort, particularly beneficial for new parents and the elderly.