When it comes to nursery furniture, knowing how to take off back to nursery gliding rocker recliner is essential. This skill is not only practical for maintenance but also extends the life of your beloved furniture.
Nursery gliding rocker recliners are more than just seats; they are a haven for both parents and children. So, let’s dive into why understanding this process is so crucial and how you can master it.
Maintaining your nursery furniture ensures safety and longevity. The gliding rocker recliner, a staple in many nurseries, provides comfort and soothing motion that is invaluable for calming a baby. This article aims to guide you through the detailed process of removing the back of a nursery gliding rocker recliner, ensuring you can handle it with ease.
Understanding the Gliding Rocker Recliner
Before we get into the nitty-gritty of how to take off back to nursery gliding rocker recliner, let’s break down what this piece of furniture entails. Knowing its components will give you a better grasp of the removal process.
Components of a Gliding Rocker Recliner
- Frame: The skeleton of the recliner, usually made of wood or metal, supports the entire structure.
- Cushioning: Provides comfort and is often the first part to show wear and tear.
- Gliding Mechanism: Allows the chair to glide back and forth, creating a soothing motion.
- Reclining Mechanism: Lets you adjust the angle of the backrest for maximum comfort.
Common Reasons for Removing the Back
Understanding why you might need to remove the back of a nursery gliding rocker recliner can motivate you to learn this skill.
Cleaning and Maintenance: Over time, dust and dirt can accumulate in the crevices of your recliner. Removing the back allows for thorough cleaning, ensuring a hygienic environment for your baby.
Repair: If any part of the recliner is damaged, knowing how to take off back to nursery gliding rocker recliner can make repairs easier and more cost-effective.
Transportation: Moving house? Disassembling the recliner makes it more manageable and reduces the risk of damage during transit.
Replacement of Parts: Sometimes, specific parts wear out faster than others. Being able to remove the back allows for easy replacement, extending the life of your recliner.
Preparation
When it comes to understanding how to take off back to nursery gliding rocker recliner, preparation is key. Gathering the right tools and materials will make the process smoother and more efficient. You’ll need screwdrivers, wrenches, Allen keys, lubricant, and cleaning supplies.
Having these tools on hand ensures you won’t have to stop mid-task to find something essential.
Safety is paramount when working on furniture. Always use proper lifting techniques to avoid injury, and make sure the chair is stable before you begin. Protecting your hands and fingers is also crucial, so consider wearing gloves if necessary. By preparing adequately, you set yourself up for a successful and safe removal process.
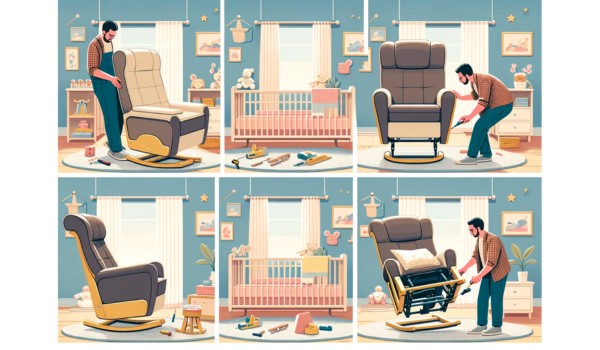
Step-by-Step Guide to Removing the Back
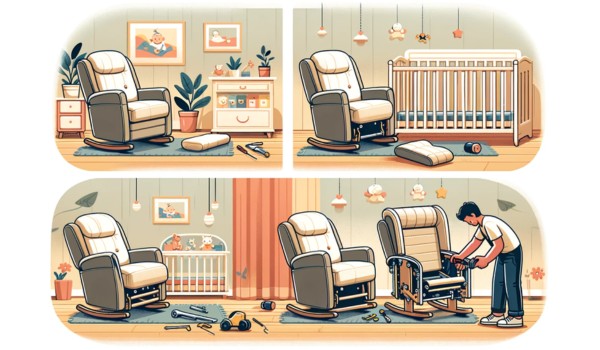
Understanding how to take off back to nursery gliding rocker recliner requires identifying the attachment points first. These are typically bolts and screws or sometimes clips and locks that hold the backrest in place. Knowing where these points are helps you approach the task methodically.
Identifying the Attachment Points
Most nursery gliding rocker recliners are secured by bolts and screws. These fasteners are usually found at the base where the backrest meets the seat. In some models, clips and locks are also used to provide additional stability. Identifying these points is the first step in the removal process.
Detailed Removal Process
Step 1: Locate and Remove the Bolts/Screws
The first actionable step in how to take off back to nursery gliding rocker recliner is to locate the bolts or screws. You will need a screwdriver or wrench, depending on the type of fasteners used. Check the specific locations where the backrest attaches to the frame.
Once identified, carefully unscrew or unbolt these fasteners, making sure to keep them safe for reassembly.
Step 2: Disengage the Locking Mechanism
Some recliners have additional locking mechanisms to secure the backrest. Understanding the type of locking mechanism in your recliner is crucial. These can vary from simple clips to more complex locks. Use the appropriate technique to disengage these locks, ensuring you don’t damage any components in the process.
Step 3: Carefully Lift Off the Back
With all fasteners and locks disengaged, the next step in how to take off back to nursery gliding rocker recliner is to lift off the backrest. Use proper lifting methods to avoid straining your back. Make sure to lift evenly to prevent damage to the frame or cushioning. This step requires patience and care to ensure everything remains intact.
Troubleshooting Common Issues
Even with careful preparation, you might encounter some common issues. Stuck or rusted bolts can be a challenge; applying a bit of lubricant can help loosen them. If you have difficulty disengaging locks, double-check for any missed fasteners or additional clips.
Misalignment issues can also arise, so ensure everything is properly lined up before attempting to lift off the backrest.
Cleaning and Maintenance
Once you’ve successfully mastered how to take off back to nursery gliding rocker recliner, it’s time to focus on cleaning and maintenance.
Keeping your rocker recliner in top condition ensures it remains a safe and comfortable place for both you and your baby.
Cleaning the Back and Frame
For cleaning, choose suitable products that are safe for both the fabric and the frame material. Mild soap solutions or specialized upholstery cleaners work well. For deep cleaning, gently scrub the fabric and frame using a soft brush or cloth.
Pay special attention to crevices where dust and grime accumulate. This thorough cleaning will help maintain the recliner’s appearance and hygiene.
Lubricating Moving Parts
Lubricating the moving parts is crucial to keep the gliding and reclining mechanisms operating smoothly. Use lubricants specifically designed for furniture, such as silicone spray or light machine oil. Apply the lubricant sparingly to the moving joints and mechanisms. This will reduce friction and prevent squeaking, ensuring a quieter and more pleasant gliding experience.
Inspecting for Damage or Wear
Regular inspection for damage or wear is essential. Look for signs of wear and tear, such as frayed fabric, loose screws, or worn-out cushioning. If you notice any significant damage, consider replacing the affected parts. Timely replacement of worn components can extend the life of your recliner and maintain its safety and functionality.
Reassembling the Gliding Rocker Recliner
After cleaning and maintenance, it’s time to reassemble your nursery gliding rocker recliner. Knowing how to take off back to nursery gliding rocker recliner is just half the battle; putting it back together correctly is equally important.
Aligning the Back with the Frame
Start by aligning the backrest with the frame. Ensuring proper alignment is crucial for smooth reattachment. It helps to have someone assist you in holding the backrest steady while you align it. This teamwork can make the process quicker and easier.
Securing the Back in Place
Once aligned, secure the backrest in place by reinstalling the bolts or screws you previously removed. Make sure each bolt or screw is tightened securely to avoid any wobbling. Ensure all locks and clips are engaged correctly. This step is vital for the stability and safety of the recliner.
Testing the Gliding and Reclining Functions
Finally, test the gliding and reclining functions to ensure everything operates smoothly. Check for any stiffness or unusual noises and adjust as needed. Proper testing will ensure your recliner is back to its optimal condition, ready to provide comfort once again.
Conclusion
In this guide, we’ve covered the essential steps on how to take off back to nursery gliding rocker recliner, from preparation to reassembly. Regular maintenance, including cleaning, lubricating, and inspecting for wear, keeps your recliner in top shape. Proper disassembly and reassembly ensure longevity and safety.
By following these steps, you can confidently maintain your nursery gliding rocker recliner, ensuring it remains a reliable and comfortable piece of furniture for you and your baby.
For more detailed guidance, additional resources are available to help you with specific issues or questions.
Frequently Asked Questions
How do you remove the back of a recliner living space?
To remove the back of a recliner, locate the release levers or clips on the back of the chair. Push or lift them to release the backrest, then pull it upwards to detach it from the chair base.
How to remove back of lift chair?
For a lift chair, first unplug it from the power source. Locate the locking levers or bolts on the back of the chair. Release these mechanisms, then carefully lift the backrest upwards to remove it from the base.
Do all recliners have a removable back?
Not all recliners have a removable back. Many modern recliners are designed with detachable backs for easy transport and assembly, but some older models may have fixed backs that are not designed to be removed.
How do I keep my recliner from sliding back?
To prevent your recliner from sliding back, place a non-slip mat or rubber pads under the legs. Alternatively, use furniture grippers or anchors that attach to the floor, ensuring the recliner stays in place during use.
How to remove the back off a Lazyboy recliner?
To remove the back of a Lazyboy recliner, tilt the recliner forward to access the back panel. Locate the locking levers or clips, release them, and then lift the backrest upwards to detach it from the base.
How do you remove recliner arms?
Removing recliner arms involves locating the screws or bolts securing the arms to the base. Use the appropriate tool to unscrew or unbolt them, then gently lift the arms away from the recliner frame.