Nursery gliding rocker recliners are more than just seats; they are a haven for both parents and children. So, let’s dive into why understanding this process is so crucial and how you can master it.
Maintaining your nursery furniture ensures safety and longevity. The gliding rocker recliner, a staple in many nurseries, provides comfort and soothing motion that is invaluable for calming a baby. This article aims to guide you through the detailed process of removing the back of a nursery gliding rocker recliner, ensuring you can handle it with ease.
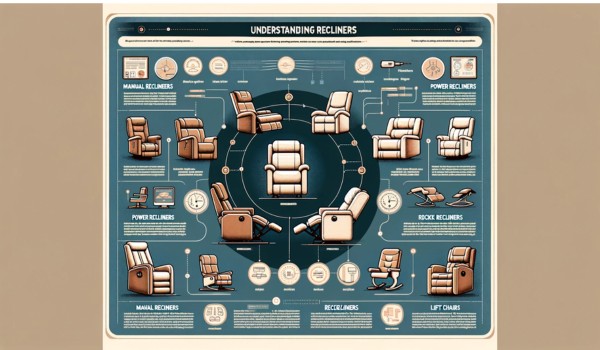
Understanding the Gliding Rocker Recliner
Before we get into the nitty-gritty of how to take off back to nursery gliding rocker recliner, let’s break down what this piece of furniture entails. Knowing its components will give you a better grasp of the removal process.
Components of a Gliding Rocker Recliner
- Frame: The skeleton of the recliner, usually made of wood or metal, supports the entire structure.
- Cushioning: Provides comfort and is often the first part to show wear and tear.
- Gliding Mechanism: Allows the chair to glide back and forth, creating a soothing motion.
- Reclining Mechanism: Lets you adjust the angle of the backrest for maximum comfort.
Common Reasons for Removing the Back
Understanding why you might need to remove the back of a nursery gliding rocker recliner can motivate you to learn this skill.
Cleaning and Maintenance: Over time, dust and dirt can accumulate in the crevices of your recliner. Removing the back allows for thorough cleaning, ensuring a hygienic environment for your baby.
Repair: If any part of the recliner is damaged, knowing how to take off back to nursery gliding rocker recliner can make repairs easier and more cost-effective.
Transportation: Moving house? Disassembling the recliner makes it more manageable and reduces the risk of damage during transit.
Replacement of Parts: Sometimes, specific parts wear out faster than others. Being able to remove the back allows for easy replacement, extending the life of your recliner.
Preparation
When it comes to understanding how to take off back to nursery gliding rocker recliner, preparation is key. Gathering the right tools and materials will make the process smoother and more efficient. You’ll need screwdrivers, wrenches, Allen keys, lubricant, and cleaning supplies.
Having these tools on hand ensures you won’t have to stop mid-task to find something essential.
Safety is paramount when working on furniture. Always use proper lifting techniques to avoid injury, and make sure the chair is stable before you begin. Protecting your hands and fingers is also crucial, so consider wearing gloves if necessary. By preparing adequately, you set yourself up for a successful and safe removal process.
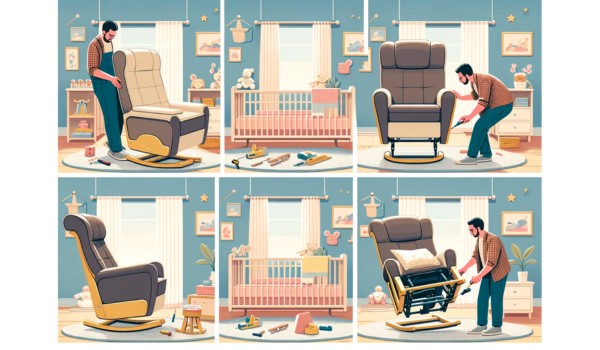
Step-by-Step Guide to Removing the Back
Understanding how to take off back to nursery gliding rocker recliner requires identifying the attachment points first. These are typically bolts and screws or sometimes clips and locks that hold the backrest in place. Knowing where these points are helps you approach the task methodically.
Identifying the Attachment Points
Most nursery gliding rocker recliners are secured by bolts and screws. These fasteners are usually found at the base where the backrest meets the seat. In some models, clips and locks are also used to provide additional stability. Identifying these points is the first step in the removal process.
Detailed Removal Process
Step 1: Locate and Remove the Bolts/Screws
The first actionable step in how to take off back to nursery gliding rocker recliner is to locate the bolts or screws. You will need a screwdriver or wrench, depending on the type of fasteners used. Check the specific locations where the backrest attaches to the frame.
Once identified, carefully unscrew or unbolt these fasteners, making sure to keep them safe for reassembly.
Step 2: Disengage the Locking Mechanism
Some recliners have additional locking mechanisms to secure the backrest. Understanding the type of locking mechanism in your recliner is crucial. These can vary from simple clips to more complex locks. Use the appropriate technique to disengage these locks, ensuring you don’t damage any components in the process.
Step 3: Carefully Lift Off the Back
With all fasteners and locks disengaged, the next step in how to take off back to nursery gliding rocker recliner is to lift off the backrest. Use proper lifting methods to avoid straining your back. Make sure to lift evenly to prevent damage to the frame or cushioning. This step requires patience and care to ensure everything remains intact.
Troubleshooting Common Issues
Even with careful preparation, you might encounter some common issues. Stuck or rusted bolts can be a challenge; applying a bit of lubricant can help loosen them. If you have difficulty disengaging locks, double-check for any missed fasteners or additional clips.
Misalignment issues can also arise, so ensure everything is properly lined up before attempting to lift off the backrest.
Cleaning and Maintenance
Once you’ve successfully mastered how to take off back to nursery gliding rocker recliner, it’s time to focus on cleaning and maintenance.
Keeping your rocker recliner in top condition ensures it remains a safe and comfortable place for both you and your baby.
Cleaning the Back and Frame
For cleaning, choose suitable products that are safe for both the fabric and the frame material. Mild soap solutions or specialized upholstery cleaners work well. For deep cleaning, gently scrub the fabric and frame using a soft brush or cloth.
Pay special attention to crevices where dust and grime accumulate. This thorough cleaning will help maintain the recliner’s appearance and hygiene.
Lubricating Moving Parts
Lubricating the moving parts is crucial to keep the gliding and reclining mechanisms operating smoothly. Use lubricants specifically designed for furniture, such as silicone spray or light machine oil. Apply the lubricant sparingly to the moving joints and mechanisms. This will reduce friction and prevent squeaking, ensuring a quieter and more pleasant gliding experience.
Inspecting for Damage or Wear
Regular inspection for damage or wear is essential. Look for signs of wear and tear, such as frayed fabric, loose screws, or worn-out cushioning. If you notice any significant damage, consider replacing the affected parts. Timely replacement of worn components can extend the life of your recliner and maintain its safety and functionality.
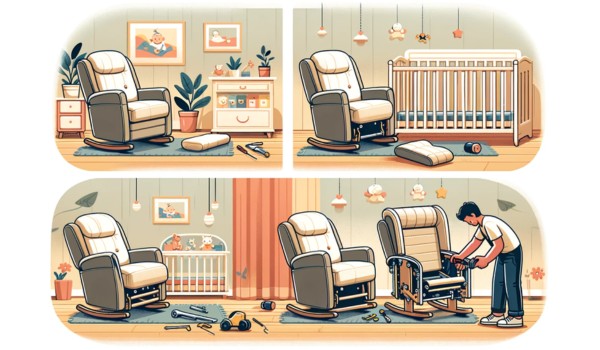
Reassembling the Gliding Rocker Recliner
After cleaning and maintenance, it’s time to reassemble your nursery gliding rocker recliner. Knowing how to take off back to nursery gliding rocker recliner is just half the battle; putting it back together correctly is equally important.
Aligning the Back with the Frame
Start by aligning the backrest with the frame. Ensuring proper alignment is crucial for smooth reattachment. It helps to have someone assist you in holding the backrest steady while you align it. This teamwork can make the process quicker and easier.
Securing the Back in Place
Once aligned, secure the backrest in place by reinstalling the bolts or screws you previously removed. Make sure each bolt or screw is tightened securely to avoid any wobbling. Ensure all locks and clips are engaged correctly. This step is vital for the stability and safety of the recliner.
Testing the Gliding and Reclining Functions
Finally, test the gliding and reclining functions to ensure everything operates smoothly. Check for any stiffness or unusual noises and adjust as needed. Proper testing will ensure your recliner is back to its optimal condition, ready to provide comfort once again.
Conclusion
In this guide, we’ve covered the essential steps on how to take off back to nursery gliding rocker recliner, from preparation to reassembly. Regular maintenance, including cleaning, lubricating, and inspecting for wear, keeps your recliner in top shape. Proper disassembly and reassembly ensure longevity and safety.
By following these steps, you can confidently maintain your nursery gliding rocker recliner, ensuring it remains a reliable and comfortable piece of furniture for you and your baby.
For more detailed guidance, additional resources are available to help you with specific issues or questions.
Frequently Asked Questions
How do you remove the back of a recliner living space?
To remove the back of a recliner, locate the release levers or clips on the back of the chair. Push or lift them to release the backrest, then pull it upwards to detach it from the chair base.
How to remove back of lift chair?
For a lift chair, first unplug it from the power source. Locate the locking levers or bolts on the back of the chair. Release these mechanisms, then carefully lift the backrest upwards to remove it from the base.
Do all recliners have a removable back?
Not all recliners have a removable back. Many modern recliners are designed with detachable backs for easy transport and assembly, but some older models may have fixed backs that are not designed to be removed.
How do I keep my recliner from sliding back?
To prevent your recliner from sliding back, place a non-slip mat or rubber pads under the legs. Alternatively, use furniture grippers or anchors that attach to the floor, ensuring the recliner stays in place during use.
How to remove the back off a Lazyboy recliner?
To remove the back of a Lazyboy recliner, tilt the recliner forward to access the back panel. Locate the locking levers or clips, release them, and then lift the backrest upwards to detach it from the base.
How do you remove recliner arms?
Removing recliner arms involves locating the screws or bolts securing the arms to the base. Use the appropriate tool to unscrew or unbolt them, then gently lift the arms away from the recliner frame.
Brookstone massage chairs are renowned for their quality and advanced features, making them a popular choice for home relaxation. However, even the best chairs can face problems over time. Whether it’s a mechanical issue or an electronic glitch, knowing how to fix a Brookstone massage chair ensures you can enjoy uninterrupted comfort. This guide aims to provide you with the knowledge needed to troubleshoot and repair your chair safely and effectively.
Safety Precautions
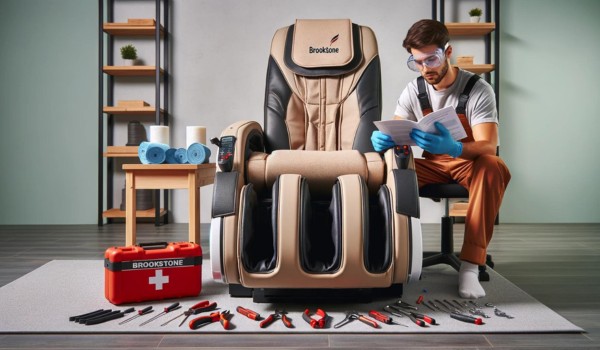
When it comes to repairing a Brookstone massage chair, safety should be your top priority. Repairing electrical and mechanical components can be hazardous if proper precautions aren’t taken. Ensuring you have the right tools and understanding the necessary steps can prevent accidents and further damage to your chair.
Importance of Safety When Repairing
Before diving into how to fix a Brookstone massage chair, it’s crucial to emphasize the importance of safety. Working with electrical components requires caution. Always unplug the chair before beginning any repairs to avoid electric shocks.
Necessary Tools and Equipment
Having the right tools at hand is essential. Basic tools like screwdrivers, pliers, and a multimeter for electrical testing are necessary. For more specific repairs, you might need replacement parts, which can often be ordered directly from Brookstone or authorized dealers.
Safety Gear and Preparation
Wearing appropriate safety gear is another critical aspect. Gloves and safety glasses protect you from sharp edges and unexpected electrical discharges. Additionally, working in a well-lit area with plenty of space can help prevent accidents. Ensure you have a clean, organized workspace before starting any repairs.
By understanding these safety precautions, you’re better prepared to handle the task at hand. With this foundation, you can confidently move forward in learning how to fix a Brookstone massage chair.
Common Issues and Troubleshooting
Understanding how to fix a Brookstone massage chair often starts with identifying common issues. Whether it’s a power problem, mechanical malfunction, control panel glitch, or upholstery wear, knowing the typical problems and their solutions can help you keep your chair in top condition.
Power Problems
One of the most frustrating issues is when the chair doesn’t turn on. This can be due to several reasons. First, check if the power cord is securely plugged into a working outlet. Sometimes, the simplest solutions are the most overlooked. If the chair still won’t power up, inspect the power supply. Intermittent power issues can often be traced back to a faulty power supply, which might need replacement.
Another aspect to consider is the internal fuse. If your chair has one, it might have blown and require replacement. Make sure to use a fuse that matches the chair’s specifications to avoid further damage.
Mechanical Issues
Mechanical problems are another common concern. If you hear unusual noises, it’s a sign that something might be wrong. These noises could come from malfunctioning rollers or motors. To fix this, you may need to open the chair and inspect the internal components. Look for any visible damage or wear on the rollers and motors.
Recline function problems can also arise, often due to issues with the motor or the chair’s frame. Lubricating the moving parts or adjusting the alignment might resolve these issues. If the problem persists, the motor may need replacement.
Control Panel Problems
A malfunctioning control panel can render your massage chair unusable. If the buttons are unresponsive, start by checking the connections between the control panel and the chair. Loose connections can often cause such issues. Display errors can be another headache. In this case, resetting the control panel might help. Refer to the user manual for specific reset instructions tailored to your Brookstone model.
Upholstery and Cushion Issues
Over time, the upholstery and cushions of your massage chair can show signs of wear and tear. Tears in the fabric not only look unsightly but can also affect the chair’s comfort and functionality. For minor tears, a patch kit might suffice, but larger damages could require professional repair or complete upholstery replacement.
Cushion replacement is another common maintenance task. Regular use can flatten the cushions, reducing the chair’s effectiveness. Replacing the cushions can restore the chair’s comfort and functionality. Cleaning and maintaining the upholstery are also crucial. Use appropriate cleaning agents recommended by Brookstone to avoid damaging the material. Regular maintenance can extend the life of the upholstery, keeping your chair looking and feeling new.
By addressing these common issues, you can ensure your massage chair remains a reliable source of relaxation. With a little effort and know-how, you can master how to fix a Brookstone massage chair, ensuring it provides comfort for years to come.
Detailed Fixes and Repairs
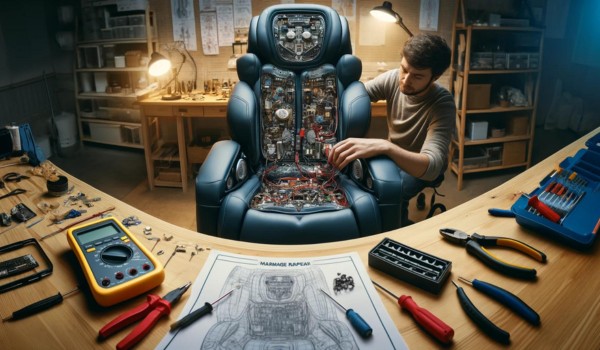
When it comes to detailed fixes and repairs for your Brookstone massage chair, knowing the specific steps can make a significant difference. Addressing power system repairs, mechanical component repairs, control panel repairs, and upholstery and cushion repairs can restore your chair to its optimal condition.
Power System Repairs
Starting with the power system, checking and replacing fuses is often the first step. If your chair isn’t powering on, a blown fuse could be the culprit. Locate the fuse compartment, typically found near the power cord entry point, and replace any blown fuses with ones that match the chair’s specifications.
Inspecting and repairing power cords is another critical aspect. Over time, power cords can become frayed or damaged. Carefully examine the cord for any visible signs of wear and tear. If you find any damage, replacing the power cord might be necessary to ensure safety and functionality.
Power board diagnostics involve checking the internal power board for any faults. Using a multimeter, you can test the board for continuity and voltage output. If the power board is malfunctioning, it might need professional repair or replacement.
Mechanical Component Repairs
For mechanical component repairs, roller track maintenance and replacement are essential. The rollers are responsible for the massage functions, and if they become worn out or misaligned, they need attention. Regularly inspect the roller tracks for any signs of wear and replace them if necessary.
Motor inspection and lubrication are also crucial. Over time, motors can become noisy or fail to operate smoothly. Lubricating the motor and its moving parts can reduce noise and improve performance. If the motor is damaged beyond repair, a replacement might be required.
Recline mechanism adjustments involve checking the chair’s recline function. If the chair doesn’t recline properly, inspect the mechanism for any obstructions or misalignments. Adjusting the alignment or lubricating the moving parts can often resolve these issues.
Control Panel Repairs
Control panel repairs can be tricky but are essential for full functionality. Replacing faulty buttons is a common fix. If certain buttons are unresponsive, they might be worn out or damaged. Carefully replace any malfunctioning buttons to restore control.
Control board inspection and repair require a detailed look at the control panel’s circuitry. Using a multimeter, test the control board for any faulty components. If you identify any issues, repairing or replacing the control board might be necessary.
Software resets and updates can resolve many control panel issues. Refer to your chair’s user manual for specific instructions on how to reset the control panel or update its software. This can often fix unresponsive buttons or display errors.
Upholstery and Cushion Repairs
For upholstery and cushion repairs, patch kits for tears are a quick and effective solution. Minor tears in the upholstery can be patched using a repair kit that matches the chair’s material. Follow the kit’s instructions carefully to ensure a seamless repair.
Foam replacement techniques involve removing the old, flattened foam and replacing it with new, high-density foam. This can restore the chair’s comfort and support. Make sure to measure the foam accurately to fit your chair’s dimensions.
Upholstery cleaning methods are essential for maintaining the chair’s appearance. Use cleaning agents recommended by Brookstone to avoid damaging the material. Regular cleaning can prevent stains and keep the upholstery looking new.
Preventative Maintenance
Preventative maintenance is key to extending the life of your Brookstone massage chair. Regular inspection tips include checking the chair for any signs of wear and tear, loose bolts, or malfunctioning components. Addressing these issues early can prevent more significant problems down the line.
Cleaning and care routines are vital. Regularly dusting the chair and using appropriate cleaning agents can maintain its appearance and hygiene. Pay special attention to high-contact areas like the armrests and headrest.
Lubrication schedules for moving parts ensure smooth operation. Regularly lubricate the chair’s moving components, such as the rollers and recline mechanism, to reduce friction and wear.
Proper usage guidelines to extend chair life include using the chair as intended and avoiding overloading it with excessive weight. Follow the manufacturer’s recommendations for usage and weight limits to ensure your chair remains in good condition.
By following these detailed fixes, repairs, and preventative maintenance tips, you can keep your Brookstone massage chair functioning optimally for years to come. Understanding how to fix a Brookstone massage chair and maintain it properly ensures you continue to enjoy its luxurious comfort without interruption.
When to Seek Professional Help
While knowing how to fix a Brookstone massage chair can save you time and money, there are times when professional assistance is necessary. Identifying complex issues, finding certified repair technicians, and understanding warranty considerations can help you decide when to seek expert help.
Identifying Complex Issues
Some problems are too complex to handle on your own. If you encounter issues like persistent electrical malfunctions, major mechanical failures, or extensive damage to the control panel, it’s best to call in a professional. These problems often require specialized tools and expertise to diagnose and repair correctly.
Finding Certified Repair Technicians
When seeking professional help, it’s crucial to find certified repair technicians. Brookstone usually provides a list of authorized service centers and technicians who are trained to handle their products. These professionals have the necessary experience and access to genuine parts, ensuring your chair is repaired to the highest standards.
Warranty Considerations and Repairs
Before attempting any repairs, check your chair’s warranty status. Performing unauthorized repairs can void the warranty, leaving you responsible for all costs. If your chair is still under warranty, contact Brookstone or the retailer for guidance. They can direct you to authorized repair services covered under your warranty terms.
Conclusion
Recap of key points: We’ve explored how to fix a Brookstone massage chair, covering everything from safety precautions to detailed repair methods and preventative maintenance. Maintaining your chair regularly ensures it remains a reliable source of relaxation.
Encouragement to maintain the chair regularly: Regular inspections, cleaning, and lubrication are essential for keeping your massage chair in top condition. By staying proactive, you can prevent minor issues from becoming major problems.
Final tips for ensuring long-term functionality: Always follow the manufacturer’s guidelines for usage and maintenance. When in doubt, seek professional help to avoid causing further damage. With proper care and attention, your Brookstone massage chair can provide years of comfort and relaxation.
Frequently Asked Questions
Can a massage chair be fixed?
Yes, a massage chair can often be fixed. Common issues include mechanical malfunctions or electronic problems, which can usually be addressed by a professional technician. Check your warranty for coverage and contact the manufacturer for authorized repair services.
How do I reset a Brookstone massage chair?
To reset a Brookstone massage chair, first unplug it from the power source for at least 30 seconds. Then, plug it back in and turn it on. Refer to the user manual for specific reset instructions if available.
Why won’t my massage chair work?
If your massage chair won’t work, check the power supply and ensure it is properly plugged in. Inspect for any blown fuses or tripped circuit breakers. If the problem persists, consult the user manual or contact customer support.
How to reset a massage chair?
To reset a massage chair, typically you need to turn it off and unplug it for a few minutes. Then, plug it back in and turn it on. Consult your chair’s user manual for specific reset procedures, as they can vary by model.
How many years does a massage chair last?
A massage chair typically lasts between 5 to 10 years, depending on the quality and frequency of use. Regular maintenance and proper care can extend the lifespan of the chair, ensuring it remains functional and comfortable.
How to service a massage chair?
To service a massage chair, regularly clean and inspect it for any visible damage. Lubricate moving parts as needed, and tighten any loose screws. For complex repairs or electronic issues, contact a professional technician or the manufacturer.
This article will explore the ins and outs of plugging in a power recliner, helping you make the most of this wonderful piece of furniture.
Understanding Power Recliners
Power recliners are modern marvels designed to enhance your relaxation experience. Unlike traditional recliners, they operate using a motorized system that allows you to adjust the position with the push of a button.
But where do you plug in a power recliner to enjoy these benefits? Let’s dive into the details.
Definition and Features of Power Recliners
A power recliner is a chair equipped with an electric motor that controls the recline mechanism. This means you can adjust the backrest and footrest without exerting any physical effort. Typically, power recliners come with a remote control or buttons on the side of the chair to make these adjustments.
Some advanced models even offer features like heat and massage functions. Understanding where to plug in a power recliner ensures you can use these features seamlessly.
Benefits of Using Power Recliners
Power recliners offer numerous benefits that contribute to their growing popularity. First and foremost, they provide superior comfort and support. The motorized adjustments allow for precise positioning, which can alleviate pressure points and improve circulation.
Additionally, power recliners are ideal for individuals with mobility issues, as they eliminate the need for manual effort. Knowing where to plug in a power recliner means you can enjoy these health benefits without any hassle.
Types of Power Recliners Available in the Market
There are various types of power recliners to suit different needs and preferences. Some common types include:
- Standard Power Recliners: These are basic models with motorized reclining and footrest functions.
- Lift Recliners: These models assist users in standing up, making them perfect for those with limited mobility.
- Massage Recliners: Equipped with massage and heat functions, these recliners offer therapeutic benefits.
- Wall-Hugger Recliners: Designed to save space, these recliners can be placed close to a wall and still fully recline.
Each type requires a power source, so understanding where to plug in a power recliner is essential for proper setup and operation.
Where Do You Plug In a Power Recliner?
Now, let’s address the main question: where do you plug in a power recliner? The process is straightforward but crucial for the chair’s functionality. Power recliners typically come with a power cord that needs to be plugged into an electrical outlet. Here’s a step-by-step guide to help you out:
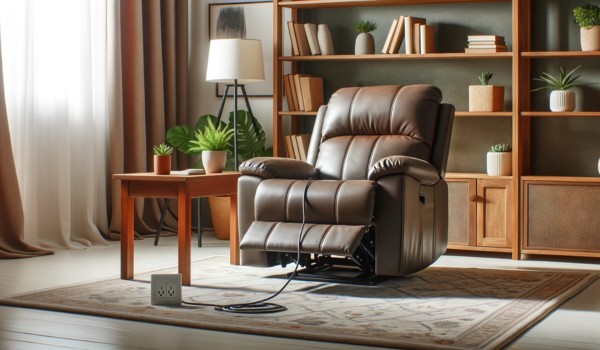
- Locate the Power Cord: Usually, the power cord is found at the back or underneath the recliner. It may be neatly tucked away to avoid tripping hazards.
- Check the Power Requirements: Ensure that the electrical outlet matches the power requirements specified in the recliner’s manual. Most power recliners in the US require a standard 110-120V outlet.
- Plug It In: Once you’ve located the cord and confirmed the outlet’s compatibility, plug the power cord into the outlet. Make sure the cord is not stretched too tight to prevent damage.
- Test the Recliner: After plugging it in, test the recliner by using the remote or buttons to ensure everything is functioning correctly.
Understanding where to plug in a power recliner and following these steps ensures you can enjoy all the features your recliner offers without any interruptions.
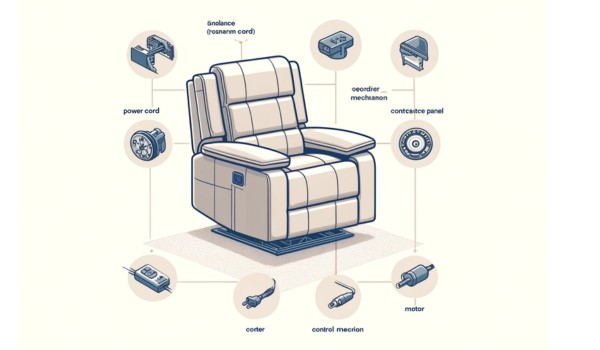
Components of a Power Recliner
Where do you plug in a power recliner? To answer this, it’s essential to understand the various electrical components that make up a power recliner. These components include the power adapter, battery pack, and various safety features.
Power recliners typically come with a power adapter that converts household electrical current into the appropriate voltage for the recliner. Some models also offer battery packs as a backup power source, allowing the recliner to function during power outages or in locations without easy access to an electrical outlet.
Safety is paramount when dealing with electrical components. Power recliners are designed with various safety features to protect users. These can include surge protectors within the power adapter, automatic shut-off features if the motor overheats, and secure connectors to prevent accidental disconnections. Understanding these components helps in knowing where to plug in a power recliner and ensures its safe operation.
Identifying the Power Connection Point
Where do you plug in a power recliner? Identifying the power connection point on your recliner is the next step. The power cord is usually located at the back or underneath the recliner. It is designed to be discreet and out of the way to maintain the chair’s aesthetic appeal and minimize tripping hazards.
Power cords and adapters can vary between models. Some recliners come with a detachable power cord, while others have a fixed cord. The adapters also differ, with some being a simple plug-in type and others featuring a more complex setup with transformers and converters. Visual guides in the recliner’s manual can assist in locating these power connection points. Common placements include the bottom rear of the chair or along the frame near the base.
Preparing to Plug in the Recliner
Before plugging in a power recliner, there are several safety precautions to consider. First, inspect the power cord and adapter for any signs of damage. Frayed wires or cracked adapters can pose significant safety risks and should be replaced immediately.
Ensure the electrical outlet you plan to use is suitable for the recliner. Check the voltage requirements specified in the user manual and confirm that the outlet provides the correct voltage. Grounded outlets are typically recommended for safety reasons, as they help prevent electrical shocks.
Safety precautions also include making sure the area around the outlet is dry and free of clutter. Avoid using extension cords or power strips, as these can increase the risk of electrical fires. If the outlet is hard to reach, consider having a professional install a dedicated outlet closer to the recliner’s location.
Knowing where to plug in a power recliner and preparing properly ensures that your recliner operates safely and efficiently. With these steps, you can enjoy all the comfort and convenience of your power recliner without any worries.
Steps to Plug in a Power Recliner
Where do you plug in a power recliner? Here’s a detailed step-by-step guide to ensure you do it correctly. First, position the recliner in your desired location, close to an electrical outlet. Locate the power cord, typically found at the back or underneath the recliner.
Next, inspect the power cord for any visible damage. If everything looks good, plug the power cord into the power adapter if it’s not already connected. Ensure the adapter is securely attached to the cord.
Now, plug the adapter into the electrical outlet. Make sure the cord isn’t stretched or pinched, as this could damage the wiring. Once plugged in, test the recliner by using the remote or control buttons to ensure it’s receiving power.
A few tips to ensure a secure connection include avoiding the use of extension cords and ensuring the outlet is not overloaded with other devices. Common mistakes to avoid are using damaged cords, not checking the outlet voltage, and placing the recliner too far from the outlet, causing the cord to stretch.
Alternative Power Sources
Where do you plug in a power recliner if there’s no immediate access to an outlet? One alternative is using battery packs. Battery-operated recliners provide flexibility, allowing you to place the recliner anywhere in the room without worrying about outlet proximity.
The advantages of battery-operated recliners include the freedom to position the chair anywhere and the ability to use the recliner during power outages. However, there are also disadvantages, such as the need to regularly recharge or replace the batteries, which can be an additional cost and maintenance task.
Installing a battery pack is straightforward. Most power recliners have a compartment for the battery pack, typically located at the base. Insert the batteries according to the manufacturer’s instructions and connect the pack to the recliner. Regular maintenance involves checking the battery levels and ensuring the connections are clean and secure.
Troubleshooting Common Issues
Where do you plug in a power recliner if it doesn’t work after connecting it? Start by checking the outlet to ensure it has power. You can test this by plugging in another device to see if it works. If the outlet is fine, inspect the power cord and adapter for any visible damage.
If the recliner still doesn’t work, check the connection points. Ensure that the power cord is securely connected to both the recliner and the adapter, and that the adapter is firmly plugged into the outlet. Sometimes, simply unplugging and replugging the components can resolve the issue.
Common electrical issues include blown fuses, tripped circuit breakers, or loose connections. If you’ve checked these and the recliner still doesn’t work, it might be time to seek professional help. A technician can diagnose and fix more complex problems, ensuring your recliner functions properly and safely.
By following these steps and understanding alternative power sources and troubleshooting tips, you can ensure your power recliner remains a comfortable and functional part of your home.
Maintenance and Care
Where do you plug in a power recliner to ensure it lasts for years? Regular maintenance of the power cord and adapter is crucial. Start by periodically inspecting the cord for signs of wear and tear. Look for frayed wires, exposed insulation, and other damage. If you spot any issues, replace the cord immediately to prevent electrical hazards.
To extend the lifespan of your power recliner, follow best practices such as keeping the recliner clean and free from dust. Dust can accumulate in the motor and electrical components, potentially causing malfunctions. Use a soft, dry cloth to clean the external parts of the recliner, and consider using a vacuum with a brush attachment for hard-to-reach areas.
Safety tips for long-term use include ensuring the recliner is not placed near heat sources or in areas with high humidity, as these conditions can damage the electrical components. Avoid overloading the power outlet by connecting too many devices to the same circuit. Regularly check the outlet to ensure it is functioning correctly and providing a stable power supply.
Conclusion
Where do you plug in a power recliner? This article has explored all aspects of plugging in and maintaining your power recliner, from identifying the power connection point to troubleshooting common issues.
Proper handling and regular maintenance are essential to keep your recliner functioning safely and efficiently. By following these guidelines, you can enjoy the comfort and convenience of your power recliner for many years.
Remember, a well-maintained power recliner not only enhances your relaxation but also ensures a safe and enjoyable experience.
Frequently Asked Questions
Do power recliners have to be plugged into an outlet?
Yes, power recliners need to be plugged into an outlet to operate. They rely on electricity to power their reclining and other motorized functions, ensuring smooth and effortless adjustments.
Is it safe to plug a power recliner into an extension cord?
It can be safe to use an extension cord for a power recliner, but it’s important to use a high-quality, heavy-duty cord. Ensure the extension cord matches the power requirements of the recliner to avoid overheating or electrical issues.
How do you hide the cords on a power recliner?
To hide the cords on a power recliner, you can use cord covers or concealers, run the cords along the baseboards, or hide them under rugs or furniture. Securing the cords with cable clips can also help keep them out of sight and organized.
How do you power a recliner without an outlet?
If an outlet is not available, you can power a recliner using a rechargeable battery pack designed for power recliners. These battery packs store enough charge to operate the recliner for several cycles before needing a recharge.
Do power recliners use a lot of electricity?
Power recliners do not use a significant amount of electricity. They typically consume power only when operating the reclining mechanism. When not in use, their energy consumption is minimal, making them an energy-efficient choice for seating.
What is the difference between a power recliner and an electric recliner?
There is no difference between a power recliner and an electric recliner; the terms are used interchangeably. Both refer to recliners that use electric motors to adjust the seating positions and provide additional features like massage or heating.
Understanding the manual operation of power recliners is not just a matter of convenience but can also be crucial in emergency situations.
Understanding Power Recliners
Power recliners are a modern marvel in home comfort. Unlike traditional manual recliners, power recliners come equipped with an electric motor that allows users to adjust the chair’s position with the push of a button. This feature makes them highly convenient and accessible, especially for individuals with mobility issues.
These recliners typically consist of several key components: a motor that controls the reclining mechanism, a remote control or built-in buttons for operation, and a power source, usually a plug-in power adapter or a battery pack.
The motor is the heart of the recliner, enabling smooth and effortless adjustments. The remote control adds an element of ease, allowing users to find their perfect seating position without having to get up.
One of the biggest advantages of power recliners over manual recliners is their ease of use. For individuals with limited strength or dexterity, power recliners eliminate the need for physical effort. Additionally, power recliners often come with advanced features such as massage functions, heat settings, and customizable seating positions, providing a level of comfort and luxury that manual recliners can’t match.
Scenarios Where Manual Operation is Necessary
When considering if you can use a power recliner manually, it’s important to identify scenarios where manual operation becomes essential. Here are a few common situations:
Power Outage Situations
Imagine you’re enjoying a relaxing evening in your power recliner, and suddenly, the power goes out. Without electricity, your recliner might seem unusable. In such cases, knowing whether your power recliner can be manually adjusted becomes crucial.
Some power recliners come with a battery backup system, but not all models have this feature.
Remote Control Malfunction
Remote controls can be a point of failure in power recliners. Whether the batteries die, the remote gets lost, or it simply stops working, a malfunctioning remote can leave you in a fixed position.
Understanding how to operate the recliner without relying on the remote control can help you avoid discomfort and inconvenience.
Motor or Electrical Issues
Motors and electrical components can sometimes fail. If the motor in your power recliner stops working, knowing how to manually adjust the chair can be a lifesaver. This situation can be especially problematic if the chair is stuck in an awkward or uncomfortable position.
Temporary Manual Adjustments for Comfort
Even when everything is working perfectly, there might be times when you need to make temporary manual adjustments. This could be for quick, minor adjustments that don’t require the precision of the motorized control or if you simply prefer to make manual tweaks for a moment.
Can You Use a Power Recliner Manually?
When addressing the question, “Can you use a power recliner manually?”, it is essential to consider the general limitations of power recliners. Power recliners are primarily designed for electric operation, meaning their core functionality relies on a motor and power source.
This reliance on electricity can pose significant limitations during power outages or mechanical failures, as these recliners are not inherently equipped for manual operation.
However, the necessity for manual adjustments in certain situations has led to the development of specific models with manual override features. These features are designed to provide an alternative method of operation when the power supply is unavailable or if there is a malfunction in the motor or remote control.
The manual override typically involves a lever or release mechanism that disengages the motor, allowing users to adjust the recliner by hand.
Highlighting popular brands and models can help in understanding which power recliners offer these manual override capabilities. For instance, La-Z-Boy includes battery backup systems and manual levers in some of their models, ensuring that users can still operate their recliners during power outages.
Ashley Furniture also integrates manual release options in certain power recliners, making it easy to adjust the chair even without electricity. Similarly, Catnapper provides power recliners with manual override features, ensuring flexibility and reliability in various situations.
The manual override in power recliners generally works through a straightforward process. First, locate the manual release mechanism, which is usually a lever or pull tab positioned under the chair or on the side panel. Engaging this lever disengages the motor mechanism, allowing for manual adjustments.
Once the motor is disengaged, the user can manually move the backrest and footrest to the desired position. In some models, there may be a locking mechanism to secure the recliner in place after making the manual adjustments.
Steps to Manually Operate a Power Recliner
When considering if you can use a power recliner manually, it’s crucial to understand the correct steps and safety measures. Here’s a comprehensive guide on how to manually operate a power recliner:
Safety Precautions Before Attempting Manual Operation
Before you begin, ensure your safety and the integrity of your recliner by following these precautions:
- Unplug the Recliner: Always unplug the recliner from the power source to avoid any risk of electric shock.
- Read the Manual: Consult the user manual specific to your recliner model for any manufacturer-specific instructions or warnings.
- Clear the Area: Ensure the area around the recliner is clear to prevent tripping or interference during the process.
Tools That Might Be Needed
Depending on your recliner model, you may need a few basic tools:
- Screwdrivers (Phillips and flathead)
- Allen wrenches
- Pliers
Detailed Step-by-Step Guide
Accessing the Motor Mechanism
- Position the Recliner: Tilt the recliner forward so you can access the underside of the chair.
- Locate the Motor: Find the motor and the associated components, which are typically located near the base of the recliner.
Disengaging the Motor (If Possible)
- Identify the Manual Release Lever: Look for a lever or pull tab designed for manual operation. This lever is usually marked in the user manual.
- Disengage the Motor: Pull the lever or tab to disengage the motor from the reclining mechanism. This step might require some force, but do it gently to avoid damaging any components.
Adjusting the Recliner Manually
- Adjust the Backrest: Once the motor is disengaged, manually push or pull the backrest to your desired position.
- Adjust the Footrest: Similarly, move the footrest to a comfortable position manually. You may need to apply steady pressure to adjust it correctly.
Re-engaging the Motor After Manual Adjustment
- Re-engage the Motor: Once you’ve manually adjusted the recliner, push the manual release lever or tab back to its original position to re-engage the motor.
- Test the Recliner: Plug the recliner back in and test the motor to ensure it works correctly and the recliner moves smoothly.
Troubleshooting Common Issues
Understanding common problems can help you decide when to attempt DIY fixes and when to call a professional.
Identifying Common Problems That Necessitate Manual Operation
- Power Outages: If there’s no electricity, you can’t use the motorized features.
- Remote Control Malfunctions: When the remote control fails or is lost.
- Motor Issues: If the motor stops working or makes unusual noises.
DIY Fixes for Minor Issues
- Remote Control Issues: Check and replace the batteries if needed. Ensure the remote is properly synced with the recliner.
- Loose Connections: Inspect the power connections and ensure all cables are securely plugged in.
- Obstructions: Check for any objects obstructing the reclining mechanism and remove them.
When to Call a Professional
- Persistent Motor Issues: If the motor continues to malfunction despite following manual adjustments.
- Complex Electrical Problems: For any issues involving electrical components beyond simple fixes.
- Warranty Concerns: If your recliner is still under warranty, contact the manufacturer or an authorized service provider to avoid voiding the warranty.
By following these steps and understanding the troubleshooting process, you can effectively manage your power recliner’s manual operation and address common issues confidently. This ensures that you maintain the comfort and functionality of your recliner even in challenging situations.
Pros and Cons of Manual Operation
When discussing the topic “can you use a power recliner manually,” it’s essential to weigh the pros and cons of having a manual override option.
One significant benefit of having a manual override option is the assurance of continued functionality during power outages. This feature ensures that you can still enjoy the comfort of your recliner even when the electricity is out.
Another advantage is the ability to bypass motor or remote control malfunctions, allowing you to adjust your chair manually without waiting for repairs. This can be particularly beneficial for individuals with limited mobility who rely heavily on their recliners for comfort and support.
However, there are potential risks and drawbacks to consider. Manual operation mechanisms can sometimes be challenging to access or operate, particularly for those with physical limitations.
Additionally, frequent manual adjustments may lead to wear and tear on the recliner’s components, potentially shortening its lifespan. There’s also the inconvenience factor; while a manual override is a handy feature, it lacks the ease and precision of motorized adjustments.
Comparing convenience and functionality, motorized recliners undoubtedly offer superior ease of use and a broader range of adjustments. However, the manual override serves as a crucial backup, ensuring that users are not left completely helpless in case of power or mechanical issues. Balancing these factors is key to maximizing the utility and lifespan of your power recliner.
Preventative Measures and Maintenance
To ensure the longevity and optimal performance of your power recliner, regular maintenance is essential. Here are some tips to keep both the power and manual functions in top condition:
Regular maintenance tips for power recliners include checking the motor and electrical components periodically. Ensure that all connections are secure and that there are no signs of wear or damage.
Cleaning the recliner regularly, especially around the moving parts, can prevent dirt and debris from causing malfunctions. Lubricate the mechanical parts as recommended by the manufacturer to ensure smooth operation.
To ensure the longevity of both power and manual functions, it’s crucial to use the recliner according to the manufacturer’s guidelines. Avoid exceeding the weight limit and refrain from forcing the recliner into positions manually if it’s designed for motorized use only. If your recliner has a battery backup, check and replace the batteries as needed to ensure they are always ready for use.
To avoid common problems, be proactive in addressing minor issues before they escalate. If you notice any unusual noises or resistance when adjusting the recliner, inspect it immediately to identify and fix the problem. Keep the remote control in a safe and accessible place to prevent loss or damage.
Regularly test the manual override mechanism to ensure it functions correctly when needed.
By incorporating these preventative measures and maintenance tips, you can significantly extend the lifespan of your power recliner and maintain its functionality. This proactive approach ensures that you are prepared for any situation where you might need to use the recliner manually, providing peace of mind and continuous comfort.
Alternatives to Manual Operation
While exploring whether you can use a power recliner manually is crucial, it’s also important to consider alternatives to manual operation. Investing in a backup power source, such as battery packs, can provide an immediate solution during power outages. Many modern power recliners come with optional battery backup systems that allow the chair to operate even without electricity.
Keeping spare remote controls is another practical measure. Since remote controls can be easily lost or damaged, having an extra one ensures that you can always control your recliner. Storing the spare remote in a known, safe place will save you from inconvenience when the primary remote is unavailable.
Professional repair services are a valuable resource for maintaining the functionality of your recliner. Regular servicing by qualified technicians can prevent and address mechanical and electrical issues before they become significant problems. It’s advisable to schedule periodic maintenance checks to ensure that all components of your recliner are in good working condition.
Conclusion
In conclusion, understanding if you can use a power recliner manually is vital for preparedness and convenience. While manual operation is possible in some models and can be a lifesaver during power outages or malfunctions, investing in alternatives like backup power sources, spare remote controls, and professional repair services can provide additional security and ease.
Regular maintenance and being prepared for potential issues ensure that your recliner remains a reliable source of comfort.
Considering these factors will enhance the overall longevity and functionality of your power recliner, ensuring you can enjoy its benefits without interruption.
Frequently Asked Questions
Is there a manual override for electric recliners?
Yes, some electric recliners come with a manual override feature, allowing you to adjust the chair manually in case of a power outage or malfunction. This feature ensures you can still use the recliner without electricity.
Do power recliners work without power?
No, power recliners require electricity to function. However, models with battery backup can operate temporarily during power outages. Without power or a backup battery, the recliner remains in its last position until power is restored.
What happens to an electric recliner if the power goes out?
If the power goes out, an electric recliner will stay in its current position. Some models have battery backup systems that allow limited use during an outage, but without this feature, the recliner won’t move until power is restored.
Which is better, a power or manual recliner?
The choice between a power and manual recliner depends on personal preference and needs. Power recliners offer convenience and ease of use with push-button controls, while manual recliners are typically more affordable and don’t require electricity.
Can you convert electric recliners to manual?
Converting electric recliners to manual operation is generally not feasible. The mechanisms are designed differently, and manual operation would require significant modifications. It’s advisable to choose the type that best suits your long-term needs.
Is there a manual release on power chairs?
Some power chairs have a manual release feature that allows you to recline or return the chair to its upright position without power. This feature is useful during power outages or if the motor fails, ensuring continued usability.
Power recliners, on the other hand, offer the luxury of adjusting your seat with just the push of a button. Let’s explore how you can make this transformation.
Understanding Recliners
Before diving into the conversion process, it’s essential to understand the different types of recliners and their components. Recliners come in two primary forms: manual and power.
Manual vs. Power Recliners
Manual recliners rely on a lever or push mechanism to recline. While they are straightforward and reliable, they require physical effort, which might not be ideal for everyone. Power recliners, however, are equipped with an electric motor and a control panel, allowing you to adjust your seating position effortlessly.
Key Components
- Manual Recliners: These typically include a lever, springs, and a reclining mechanism that operates through physical force.
- Power Recliners: These include an electric motor, control panel, wiring, and often a power supply.
Planning the Conversion
Converting a manual recliner into a power recliner involves a bit of planning and preparation. Here’s what you need to know.
Assessing Suitability
Not all manual recliners are suitable for conversion. Check if your recliner has enough space to accommodate the motor and wiring. The frame should be sturdy enough to support the additional components.
Tools and Materials
To begin the conversion, you’ll need a power recliner conversion kit, which includes the motor and control panel. You’ll also need basic tools like screwdrivers and wrenches, electrical components for wiring, and safety equipment such as gloves and safety glasses.
Conversion Kit
A power recliner conversion kit is essential. It typically includes the electric motor, control switch, and necessary wiring. Make sure the kit is compatible with your recliner model.
Basic Tools
Ensure you have the right tools:
- Screwdrivers and wrenches: For removing and attaching parts.
- Electrical components: Wires and connectors for setting up the motor.
- Safety equipment: Gloves and safety glasses to protect yourself during the process.
Safety First
Always prioritize safety. Wear gloves to protect your hands and safety glasses to shield your eyes from any debris.
Selecting the Right Power Recliner Kit
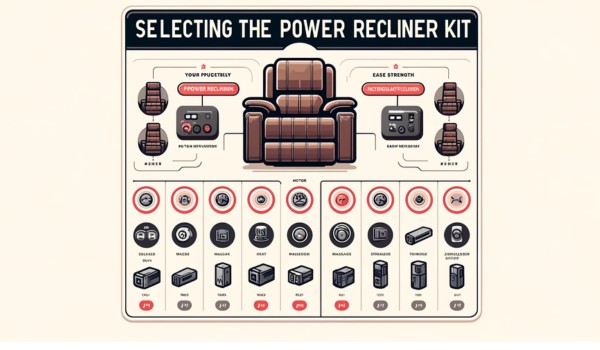
When it comes to converting your recliner, choosing the right power recliner kit is crucial. There are various types of conversion kits available, each catering to different needs and preferences.
First, let’s look at the types of power recliner conversion kits available. Basic motorized kits typically include the essential components needed to convert your manual recliner into a power one. These kits come with an electric motor and a control panel, allowing for basic reclining functions. On the other hand, advanced kits offer additional features such as massage and heat functionalities, providing an enhanced experience.
When selecting a kit, there are several factors to consider. Compatibility is paramount. Ensure that the kit you choose is compatible with your specific recliner model. This involves checking the dimensions and the space available for the motor and wiring. Budget is another critical consideration. Basic kits are usually more affordable, while advanced kits with extra features come at a higher cost. Lastly, think about the additional features and functionalities you desire. If you want a more luxurious experience, investing in a kit with massage and heat functions might be worthwhile.
Preparing for the Conversion
Preparation is key to a successful conversion. Before you begin, take some safety precautions and set up a suitable workspace. Make sure you have all the necessary tools and materials within reach, and wear protective gear such as gloves and safety glasses.
Start by disassembling your manual recliner. Begin with removing the backrest. This usually involves loosening a few screws and carefully lifting the backrest off. Next, detach the footrest and any other movable parts. Keep all screws and small components in a safe place to avoid losing them.
With the recliner disassembled, you’re ready to start the conversion process. Follow the steps outlined in the conversion kit’s instructions carefully to ensure a smooth and successful transformation.
Installing the Power Mechanism
Now that your recliner is disassembled, it’s time to install the power mechanism. This process requires careful attention to detail to ensure everything functions correctly.
Begin by positioning the motor in the designated space within the recliner frame. It’s important to place the motor securely to prevent any movement during operation. Once positioned, secure the motor to the recliner frame using the provided brackets and screws. Ensure it is tightly fastened to avoid any issues later.
Next, connect the motor to the footrest and backrest. This typically involves attaching specific rods or levers to the motor, which will control the reclining actions. Follow the instructions in your conversion kit carefully to make sure these connections are done correctly.
Wiring and electrical connections are the next step. Connect the motor’s wiring to the control panel or remote control, ensuring all wires are properly insulated and secured. Once the wiring is complete, connect the motor to the power source. This might involve plugging into a standard outlet or integrating a battery pack, depending on your kit.
Finally, integrate the control panel or remote control into the recliner. This control panel allows you to operate the reclining mechanism easily. Secure it in a convenient location, often on the side of the recliner, and ensure it is easily accessible.
Reassembling the Recliner
With the power mechanism installed, it’s time to reassemble your recliner. Start by reattaching the backrest, ensuring it aligns correctly with the frame. Secure it with the screws you set aside earlier. Follow the same process for the footrest and any other movable parts.
Ensure all components are securely fastened. Double-check all screws and connections to make sure nothing is loose. This step is crucial for both safety and functionality.
Finally, test the power mechanism for functionality. Plug in the recliner or activate the battery pack and use the control panel or remote to operate the reclining functions. Check that the footrest and backrest move smoothly and that all features, such as massage or heat (if included), are working correctly.
By following these steps, you’ve successfully transformed your manual recliner into a power recliner, enhancing both comfort and convenience. Enjoy your upgraded seating experience!
Troubleshooting and Adjustments
Once you’ve installed the power mechanism and reassembled your recliner, you might encounter some issues. Here’s how to troubleshoot and make necessary adjustments:
One common issue is the motor not working. If this happens, first check the power source. Ensure the recliner is plugged in properly, and if it’s battery-operated, check the battery charge. Next, inspect all wiring connections. Loose or improperly connected wires can prevent the motor from functioning. If the wiring is secure and the motor still doesn’t work, there might be an issue with the motor itself, and you may need to contact the manufacturer for assistance.
Control panel malfunctions are another frequent problem. If the control panel isn’t responding, check the connections between the control panel and the motor. Ensure all wires are connected correctly and securely. If the problem persists, the control panel might be faulty and may need to be replaced.
Mechanical adjustments might also be necessary. If the footrest or backrest doesn’t move smoothly, check the connections between the motor and these components. Adjust any rods or levers to ensure they are properly aligned and secured.
Fine-tuning the recliner is essential for comfort and smooth operation. Test the recliner and make minor adjustments to the motor’s positioning or the tension of the reclining mechanisms. This ensures the recliner operates smoothly and comfortably.
Safety Considerations
Electrical safety is paramount when converting a recliner to a power recliner. Always follow the manufacturer’s instructions for wiring and electrical connections. Use insulated tools and wear protective gear to prevent electrical shocks. Ensure that all electrical components are properly insulated and secure.
Regular maintenance and inspection are crucial for the longevity and safety of your power recliner. Periodically check the wiring, motor, and control panel for any signs of wear or damage. Tighten any loose screws and ensure that all components are functioning correctly.
Ensuring the stability and durability of the converted recliner is also important. Make sure that the recliner sits firmly on the ground and does not wobble. Check that all parts are securely fastened and that the recliner can support the user’s weight without any issues.
By addressing these troubleshooting steps and adhering to safety considerations, you can enjoy the benefits of your newly converted power recliner with peace of mind.
Additional Enhancements and Customizations
After successfully converting your manual recliner into a power recliner, you might consider adding some extra features to enhance your comfort and enjoyment. One popular addition is massage and heating elements. Many advanced conversion kits include these features, but you can also purchase separate kits to add them. These features can significantly enhance your relaxation experience, providing therapeutic benefits.
Upholstery and aesthetic upgrades are another way to customize your recliner. Consider reupholstering the chair with new fabric or leather to match your home decor. This not only refreshes the look of your recliner but can also add to its comfort.
Enhancing the recliner’s ergonomics is essential for long-term use. You can add additional padding or lumbar support to improve comfort. Adjustable headrests and footrests can also be installed to ensure that the recliner meets your personal comfort needs perfectly.
Conclusion
Converting a manual recliner into a power recliner is a rewarding DIY project that enhances comfort and convenience. By following a step-by-step process, you can enjoy the benefits of easy adjustments and added features like massage and heating. This upgrade not only improves your relaxation experience but also adds value to your furniture. Embark on this project with confidence, knowing that with careful planning and execution, you’ll achieve a fantastic result.
Frequently Asked Questions
Can you convert a manual recliner to power?
Yes, you can convert a manual recliner to a power recliner with a conversion kit. These kits include the necessary motor and controls, and installation usually requires basic tools and some DIY skills.
Can you convert a regular recliner to a lift recliner?
Converting a regular recliner to a lift recliner is possible with a lift mechanism kit. This involves installing a motorized lift base, allowing the recliner to assist users in standing up more easily.
How are recliners powered?
Recliners are powered by electric motors that control the reclining and lifting mechanisms. These motors are typically plugged into a standard electrical outlet or powered by a rechargeable battery pack.
How do you hook up a recliner to a power pack?
To hook up a recliner to a power pack, connect the recliner’s power cord to the power pack’s output socket. Ensure the power pack is charged or plugged into an outlet, then secure any loose wires to avoid tripping hazards.
Is it better to get a power or manual recliner?
Choosing between a power or manual recliner depends on your needs. Power recliners offer ease of use and additional features, while manual recliners are simpler, more affordable, and do not require an electrical source.
Do power recliners use a lot of electricity?
Power recliners use minimal electricity, similar to small household appliances. They are energy-efficient, consuming power only when adjusting positions, making them economical to use regularly.
Imagine the convenience of adjusting your recliner with just a button press. In this article, we’ll explore the ins and outs of this topic, from the basics of power recliners to the advantages of incorporating a remote control.
Understanding Power Recliners
Power recliners, unlike their manual counterparts, come equipped with motorized mechanisms that allow users to adjust their seating position effortlessly. These recliners often include features like adjustable headrests, lumbar support, and footrests, all operated via a built-in control panel or, in some cases, an additional remote control. But what if your current recliner doesn’t have a remote?
Can you add a remote to a power recliner, and how would that improve your comfort?
Definition and Basic Functionality
A power recliner operates through an electric motor that adjusts the chair’s position. This motor is controlled by a set of buttons typically located on the side of the recliner. These buttons enable you to recline back, elevate the footrest, or adjust the headrest to your desired position.
The beauty of a power recliner lies in its simplicity and ease of use, especially for those who may have difficulty operating a manual recliner due to physical limitations.
Common Features and Components
Power recliners come with a variety of features designed to maximize comfort and convenience. These features include:
- Adjustable Positions: You can find the perfect angle for reading, watching TV, or taking a nap.
- Built-in USB Ports: Many power recliners come with USB ports to keep your devices charged.
- Massage and Heat Functions: Some models offer therapeutic massage and heating options.
- Memory Settings: Save your favorite positions for quick and easy adjustment.
Types of Power Recliners
There are generally two types of recliners to consider: manual and motorized. Manual recliners require physical effort to adjust the seating position, which might be challenging for some users.
On the other hand, motorized recliners offer seamless adjustments through an electric motor, controlled by a built-in panel or remote control.
This brings us back to our key question: can you add a remote to a power recliner to enhance its functionality?
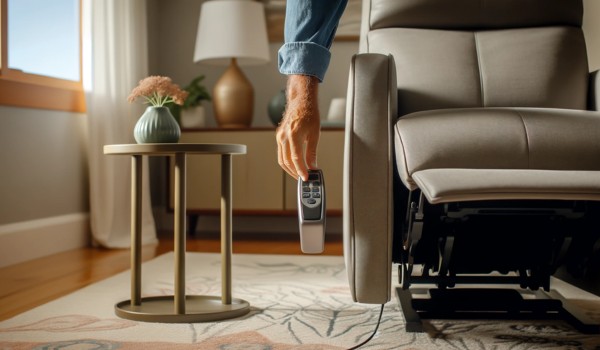
The Possibility of Adding a Remote
Adding a remote to a power recliner is not only possible but can also significantly enhance your seating experience. Imagine being able to control your recliner from a distance, without having to reach for the built-in buttons.
This upgrade can be particularly beneficial for individuals with limited mobility or those who simply prefer the convenience of a remote control.
Steps to Add a Remote
- Consult the Manufacturer: The first step is to check with the manufacturer of your power recliner. Some recliners are designed to be compatible with aftermarket remote controls.
- Purchase a Compatible Remote Kit: Once you’ve confirmed compatibility, purchase a remote control kit designed for your recliner model.
- Installation: Follow the installation instructions provided with the kit. This usually involves connecting the remote receiver to the recliner’s control box and synchronizing the remote.
Benefits of Adding a Remote
- Enhanced Convenience: Adjust your recliner without getting up.
- Improved Accessibility: Ideal for individuals with limited mobility.
- Customization: Many remotes offer additional features such as preset positions or programmable settings.
The Need for a Remote Control
In today’s fast-paced world, convenience is key, and when it comes to relaxation, nothing beats the ease of use provided by a remote control for your power recliner. Adding a remote control to your power recliner significantly enhances the user experience by allowing effortless adjustments without needing to reach for built-in buttons.
This feature is particularly beneficial for individuals with mobility issues, enabling them to change positions comfortably and independently.
The convenience of a remote control cannot be overstated. Imagine sinking into your favorite chair after a long day and being able to adjust your seating position to the perfect angle with just a button press.
This not only adds to the overall comfort but also enhances your relaxation experience. For people with mobility issues, a remote control can be a game-changer. It eliminates the need to struggle with manual adjustments or reach for controls, providing a seamless and enjoyable experience. Moreover, it can enhance the user experience by offering additional features such as memory settings, where you can save your preferred positions, or massage and heat functions that can be activated with ease.
Types of Remote Controls for Power Recliners
When considering adding a remote control to your power recliner, it’s essential to understand the different types available. Wired and wireless remotes are the two primary options. Wired remotes are connected directly to the recliner and are usually straightforward to install and use.
However, they limit mobility as you need to be within the length of the cord. Wireless remotes, on the other hand, offer greater flexibility and convenience, allowing you to control your recliner from anywhere in the room.
Universal remotes and manufacturer-specific remotes are another consideration. Universal remotes are designed to work with various recliner brands and models, making them a versatile option.
However, they might not offer the same level of functionality as manufacturer-specific remotes, which are tailored to work seamlessly with particular recliner models. These specific remotes often include advanced features and settings unique to the brand.
Smart remotes are the latest innovation in the realm of power recliner controls. These remotes often come with additional features such as Bluetooth connectivity and app control, allowing you to adjust your recliner settings from your smartphone or other smart devices.
This integration with technology not only adds a layer of convenience but also enhances the overall user experience by providing more control options and customization.
Compatibility Considerations
Before you embark on adding a remote control to your power recliner, it’s crucial to consider compatibility. Start by identifying the model and brand of your recliner. This information is typically found on a label under the seat or in the user manual.
Knowing this will help you determine which remotes are compatible with your specific model.
Once you have identified your recliner’s details, check the compatibility with different types of remotes. Not all remotes work with every recliner, so it’s essential to consult manufacturer guidelines and recommendations.
Manufacturers often provide a list of compatible remotes or offer their own branded remote controls that are guaranteed to work seamlessly with your recliner. This step is vital to ensure that the remote you choose will integrate properly and provide all the intended functionalities without any issues.
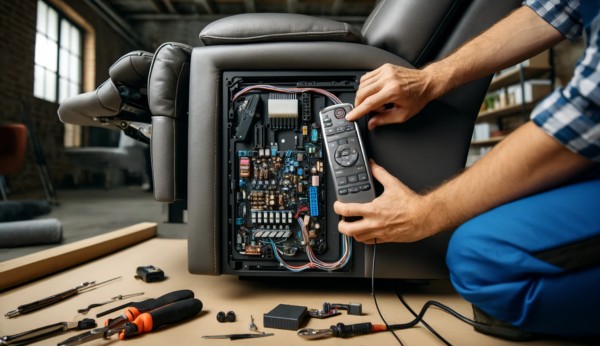
Installation Process
Adding a remote control to your power recliner involves a straightforward installation process that you can handle with some basic tools and a bit of patience. First, gather the necessary tools and materials, which typically include a screwdriver, the remote control kit, and possibly some zip ties to manage wires.
Start by unplugging your recliner from the power source to ensure safety. Next, locate the control box under your recliner, where the wired remote or control panel is connected.
Carefully disconnect the existing controls and attach the new remote receiver according to the instructions provided with your remote control kit. Ensure all connections are secure and reassemble any panels or covers you removed.
After installation, plug your recliner back in and test the remote to ensure it is functioning correctly. Following these steps will help you successfully add a remote control to your recliner, enhancing your comfort and convenience.
Troubleshooting Common Issues
Even with careful installation, you might encounter some common issues when adding a remote control to your power recliner. One frequent problem is pairing the remote with the receiver.
If the remote fails to pair, ensure that you followed the pairing instructions accurately and that there are no obstructions or interference between the remote and receiver.
Connectivity issues can also arise, particularly with wireless remotes. If the remote is not responding, check the battery levels and replace them if necessary. Ensure that the remote is within the effective range of the receiver and that there are no electronic devices causing interference.
Maintenance and care for your remote control are essential for long-term functionality. Regularly clean the remote to prevent dust buildup and replace batteries as needed. If any buttons become unresponsive, a gentle cleaning with a soft cloth or compressed air can often resolve the issue. By following these troubleshooting tips, you can keep your remote control in optimal working condition and enjoy the enhanced comfort it provides.
Cost and Budget Considerations
When considering the addition of a remote control to your power recliner, understanding the cost and budget implications is crucial. The price range for different types of remotes varies widely.
Basic wired remotes can be quite affordable, often starting around $20 to $30, while more advanced wireless or smart remotes with additional features can range from $50 to $150 or more.
Another cost factor to consider is installation. If you choose to hire a professional to install the remote control, labor costs can add significantly to the overall expense. Professional installation typically ranges from $50 to $100, depending on your location and the complexity of the installation.
Alternatively, opting for a DIY installation can save you money, provided you are comfortable with basic tools and following instructions.
Long-term savings and benefits also play a role in your decision. While the initial cost of adding a remote might seem high, the convenience and improved accessibility it provides can be well worth the investment. For those with mobility issues, the ability to adjust the recliner with ease can significantly enhance their quality of life.
User Reviews and Experiences
To gain a better understanding of the real-world impact of adding a remote control to a power recliner, looking at user reviews and experiences can be enlightening. Many users have shared their positive experiences, highlighting how the remote control has enhanced their comfort and convenience.
For instance, one user mentioned that adding a remote control made it much easier for their elderly parent to adjust the recliner without assistance, greatly improving their independence.
Common challenges faced by users include pairing difficulties and connectivity issues. However, these problems are often resolved with careful installation and adherence to the manufacturer’s instructions.
Success stories abound, with users expressing high satisfaction levels and noting that the remote control addition was a game-changer for their relaxation and comfort.
Alternatives to Adding a Remote
While adding a remote control is a popular option, there are other control alternatives worth considering. Smartphone apps are increasingly being used to control power recliners. These apps offer the convenience of adjusting your recliner using your phone, often with added features like preset positions and customization options.
Voice control is another innovative alternative, allowing users to adjust their recliners using voice commands through smart home systems like Amazon Alexa or Google Assistant.
Each alternative has its pros and cons. Smartphone apps provide a high level of convenience and customization but require a compatible device and sometimes a more complex setup.
Voice control offers hands-free operation but may not be as precise as a dedicated remote control.
Comparing these options with traditional remote controls, it’s clear that each has unique benefits and potential drawbacks. Ultimately, the best choice depends on your specific needs and preferences.
Conclusion
In summary, adding a remote to a power recliner can greatly enhance convenience, accessibility, and user experience. We’ve explored the compatibility considerations, installation process, and potential troubleshooting issues. Costs can vary, but the long-term benefits often justify the investment.
User reviews highlight both challenges and successes, while alternative control options like smartphone apps and voice control offer additional flexibility.
Ultimately, assessing your personal needs and preferences is crucial in making an informed decision. Enhancing your power recliner with a remote can significantly elevate your comfort and relaxation experience.
Frequently Asked Questions
Can you convert a recliner to a power recliner?
Yes, it is possible to convert a manual recliner to a power recliner. This typically involves installing a motor and necessary electrical components. It’s recommended to have a professional handle the conversion for safety and efficiency.
Can a lift mechanism be added to a recliner?
Yes, a lift mechanism can be added to certain types of recliners. This modification helps users with mobility issues to get in and out of the chair more easily. Consult with a professional to determine compatibility and installation requirements.
Can you make a power recliner manual?
Converting a power recliner to a manual one is generally not practical. Power recliners are designed with specific mechanisms that are not easily adaptable to manual operation. If a manual recliner is preferred, purchasing a new one might be the best option.
What is the difference between electric recliner and power recliner?
An electric recliner and a power recliner are essentially the same, both using motors to adjust the seating position. The terms are often used interchangeably to describe recliners operated by electrical power, offering ease of use and various positioning options.
Do power recliners use a lot of electricity?
Power recliners do not consume a significant amount of electricity. They typically use minimal power, especially when compared to other household appliances. The energy consumption mainly occurs during the adjustment of positions, which is usually brief.
Is it better to get a power or manual recliner?
The choice between a power or manual recliner depends on personal preference and needs. Power recliners offer convenience and are easier to operate, especially for those with mobility issues. Manual recliners are simpler, often less expensive, and do not require electricity.
In this article, we will dive deep into the reasons behind this problem, helping you understand the intricacies of Bluetooth connectivity and offering solutions to get your devices paired seamlessly.
Understanding the Basics
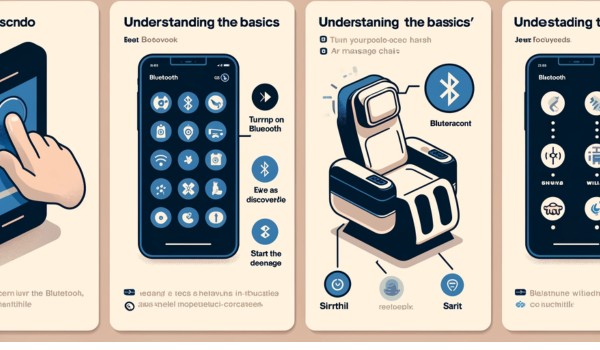
Before we can tackle the issue of why won’t my cell phone pair with my massage chair, it’s crucial to understand the fundamentals of Bluetooth technology. Bluetooth is a wireless technology standard used for exchanging data over short distances.
It allows devices like cell phones, headphones, and yes, even massage chairs, to communicate with each other without needing physical connections.
Bluetooth pairing involves creating a bond between two devices so they can communicate. This process usually requires both devices to be in pairing mode, enabling them to discover each other and establish a secure connection. Common devices that use Bluetooth include smartphones, speakers, smartwatches, and various smart home gadgets, including massage chairs.
Preliminary Checks
To address the issue of why won’t my cell phone pair with my massage chair, start with some preliminary checks. Ensure that both your cell phone and massage chair are powered on.
It might seem obvious, but sometimes, the simplest solutions are overlooked. Next, check the Bluetooth settings on your cell phone. Make sure Bluetooth is enabled and your device is discoverable.
Similarly, verify that your massage chair’s Bluetooth functionality is active. Some massage chairs have a dedicated button to activate Bluetooth pairing mode. Refer to your massage chair’s manual to locate this button and ensure it’s correctly set up for pairing.
Compatibility Issues
Why won’t my cell phone pair with my massage chair? Compatibility issues might be the culprit. Checking device compatibility is essential. Different devices may use different versions of Bluetooth, and not all versions are compatible with each other. Understanding Bluetooth versions and their compatibility is crucial.
For example, a device using Bluetooth 4.0 may have trouble pairing with a device using Bluetooth 2.1. Always check the specifications of both your cell phone and your massage chair to ensure they support compatible Bluetooth versions.
Operating system limitations can also play a role. Depending on whether you’re using iOS or Android, there might be specific requirements or restrictions. Some massage chair apps are only available for one operating system or may work better on one platform than the other. Make sure the app designed for your massage chair is compatible with your cell phone’s operating system.
Distance and Interference
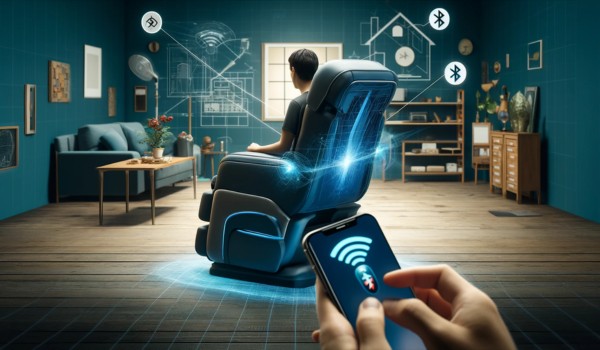
Why won’t my cell phone pair with my massage chair? The answer could lie in the distance and interference between your devices. Bluetooth technology typically works best within a short range. The optimal distance for Bluetooth pairing is usually within 30 feet, but walls and other obstructions can significantly reduce this range.
Try to pair your devices within close proximity to each other, without any large objects in between.
Interference from other electronic devices can also disrupt the Bluetooth signal. Common sources of interference include Wi-Fi networks, other Bluetooth devices, and even household appliances. To minimize interference, turn off other Bluetooth devices that are not in use, and try to pair your cell phone and massage chair away from Wi-Fi routers and other potential sources of electronic interference.
Related Post
- How to bluetooth pair sam’s club gaming massage chair
- How to connect bluetooth to shiatsu gaming massage chair
Technical Troubleshooting
When your cell phone won’t pair with your massage chair, technical troubleshooting can often resolve the issue. Start by restarting both devices. A simple reboot can refresh the system and clear minor glitches that may be affecting the Bluetooth connection. Ensure that both devices are discoverable. On your cell phone, check the Bluetooth settings to make sure it’s set to be visible to other devices. For the massage chair, consult the manual to confirm how to enable its discoverable mode.
Clearing previous pairings and re-pairing can also help. Go into your cell phone’s Bluetooth settings and remove the massage chair from the list of paired devices. Then, attempt to pair them again from scratch. Updating the software or firmware on both devices is another crucial step. Check for any available updates on your cell phone’s operating system and ensure your massage chair’s firmware is up to date. Manufacturers often release updates to improve compatibility and fix bugs.
Massage Chair Specific Troubleshooting
Sometimes the problem lies specifically with the massage chair. Consulting the massage chair’s manual can provide valuable insights. The manual may have troubleshooting tips specific to your model. If you can’t find the information you need, try resetting the massage chair’s Bluetooth module. This process varies by model, so refer to the manual or the manufacturer’s website for instructions.
If these steps don’t resolve the issue, contacting the manufacturer’s support team is a good next step. They can offer specialized advice and may provide solutions that aren’t covered in the manual. Technical support can help diagnose more complex problems and guide you through advanced troubleshooting steps.
By following these technical and specific troubleshooting steps, you can often resolve pairing issues and enjoy the full functionality of your massage chair.
Related Post
Cell Phone Specific Troubleshooting
When your cell phone won’t connect with your massage chair, focusing on the phone itself can help. Start by checking for software updates on the cell phone. An outdated operating system can cause compatibility issues. Updating to the latest version ensures that any bugs or issues are addressed.
Next, try resetting the network settings on your phone. This can often resolve issues related to Bluetooth connectivity. Be aware that this will reset Wi-Fi, mobile data, and Bluetooth settings, so you’ll need to reconnect to Wi-Fi networks and re-pair Bluetooth devices.
Ensure that your phone is not in a power-saving mode that limits Bluetooth functionality. Some power-saving modes restrict background processes and can interfere with Bluetooth connections. Disable power-saving mode and try pairing again.
Advanced Troubleshooting
If basic troubleshooting doesn’t work, advanced troubleshooting might be necessary. Try using a different cell phone to check connectivity with your massage chair. If the chair pairs with another phone, the issue likely lies with your original cell phone.
Similarly, pair your cell phone with a different Bluetooth device to isolate the issue. If your phone connects to other devices without problems, the massage chair might be the problem. Using Bluetooth diagnostic tools or apps can also help identify and resolve connectivity issues. These tools can provide detailed information about the Bluetooth connection and highlight any potential problems.
By thoroughly examining both the cell phone and the massage chair, and utilizing advanced troubleshooting techniques, you can identify and resolve issues that prevent successful pairing.
Common Errors and Their Solutions
When your cell phone won’t pair with your massage chair, you might encounter common error messages. Understanding these errors can help you find the right solutions.
- “Device Not Found” Error: This usually indicates that your cell phone can’t locate the massage chair. Ensure both devices are in pairing mode and within range. Restart both devices and try again.
- “Pairing Unsuccessful” Error: If you receive this error, it could be due to a temporary glitch or interference. Clear previous pairings from both devices and restart the pairing process. Make sure there are no other Bluetooth devices interfering.
- “Incorrect PIN or Passkey” Error: Some devices require a PIN or passkey to pair. Check the massage chair’s manual for the correct code, usually “0000” or “1234”. Enter this code when prompted.
By identifying these common errors and following these solutions, you can often resolve the connectivity issues preventing your devices from pairing.
Expert Tips
Maintaining a strong and reliable Bluetooth connection involves following some best practices and avoiding common pitfalls.
- Keep Devices Updated: Regularly update the software and firmware on both your cell phone and massage chair. Manufacturers release updates to improve compatibility and fix bugs.
- Optimal Distance: Ensure your devices are within the optimal range for Bluetooth connectivity, typically around 30 feet. Avoid physical obstructions like walls between the devices during pairing.
- Minimize Interference: Bluetooth signals can be disrupted by other electronic devices. Turn off nearby Bluetooth devices and Wi-Fi routers during the pairing process to minimize interference.
- Regularly Restart Devices: Occasionally restarting your cell phone and massage chair can help clear minor glitches and maintain a strong Bluetooth connection.
By following these expert tips, you can enhance the reliability of your Bluetooth connections and avoid common issues that prevent successful pairing.
When to Seek Professional Help
Sometimes, despite your best efforts, the issue of pairing your cell phone with your massage chair might be beyond basic troubleshooting. Recognizing when to seek professional help is important. If you’ve tried all the preliminary and advanced troubleshooting steps and still face issues, it might be time to consult a professional.
Look for professional repair services or support. The manufacturer’s support team can offer specialized advice and solutions. Additionally, authorized service centers can diagnose and fix hardware-related issues. Don’t hesitate to reach out to experts if the problem persists, as they can provide the necessary expertise to resolve complex connectivity problems.
Conclusion
In this article, we’ve explored why your cell phone might not pair with your massage chair, covering everything from basic checks to advanced troubleshooting. Following these steps can help you resolve most common connectivity issues. Remember to keep your devices updated, minimize interference, and use expert tips to maintain strong Bluetooth connections.
By diligently following these guidelines, you can ensure a successful and seamless Bluetooth pairing experience, enhancing your relaxation and wellness routine with your massage chair.
Frequently Asked Questions
How to connect phone to massage chair?
To connect your phone to a massage chair, turn on the chair’s Bluetooth function. Open your phone’s Bluetooth settings, search for available devices, and select the massage chair. Follow any on-screen prompts to complete the pairing process.
Why are some Bluetooth devices not detected?
Some Bluetooth devices may not be detected due to being out of range, not in pairing mode, or experiencing interference from other electronic devices. Ensure the device is close enough, in pairing mode, and away from potential sources of interference.
How to reset a massage chair?
To reset a massage chair, turn off the power and unplug it from the outlet. Wait for a few minutes, then plug it back in and turn it on. Some models may have a reset button; refer to the user manual for specific instructions.
What are the disadvantages of a massage chair?
Disadvantages of a massage chair can include high cost, large size requiring significant space, potential discomfort if not adjusted properly, and limited manual control compared to professional massages. Regular maintenance is also necessary to ensure long-term functionality.
How do I connect my phone to my seat Bluetooth?
To connect your phone to your seat’s Bluetooth, enable Bluetooth on your phone and put the seat in pairing mode. Search for available devices on your phone, select the seat, and follow the pairing instructions provided on your phone’s screen.
Can I use my phone during a massage?
Yes, you can use your phone during a massage, but it may reduce relaxation and effectiveness. It’s recommended to minimize distractions to fully enjoy the benefits of the massage. Some chairs also have pockets or holders for your phone.
Replacing the tablet holder on an Ogawa massage chair might seem daunting, but with the right tools and a step-by-step guide, you can do it yourself. Let’s dive into the process and ensure your massage chair remains as enjoyable as ever.
Tools and Materials Needed
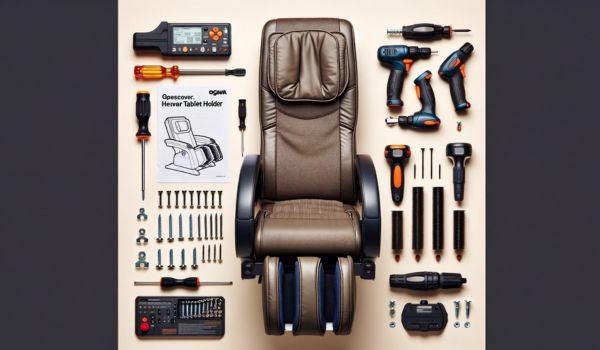
Before you start the replacement process, gather the necessary tools and materials. This ensures a smooth and efficient replacement. Here’s what you’ll need:
- Screwdriver: A standard Phillips or flat-head screwdriver, depending on your chair’s screws.
- Replacement Tablet Holder: Make sure it’s compatible with your specific Ogawa model.
- Safety Equipment: Gloves to protect your hands and safety glasses to shield your eyes.
- Additional Materials: A cleaning cloth to wipe down the area and lubricant if the holder mechanism is stiff.
Preparation
Before starting the replacement of the tablet holder on your Ogawa massage chair, it’s crucial to take a few preparatory steps to ensure safety and efficiency. First, power off and unplug the massage chair to avoid any electrical hazards. This step is essential to prevent any accidental shocks or damage to the chair’s electronic components.
Next, ensure you have a clean and spacious working area. A tidy space helps you keep track of small screws and parts, reducing the risk of losing any essential components during the replacement process.
Finally, take the time to read through the user manual for your specific Ogawa massage chair model. The manual often includes specific instructions or warnings that are vital for the replacement process. It might provide insights into the exact location of screws or any peculiarities in the attachment of the tablet holder.
Step-by-Step Guide to Replacing the Tablet Holder
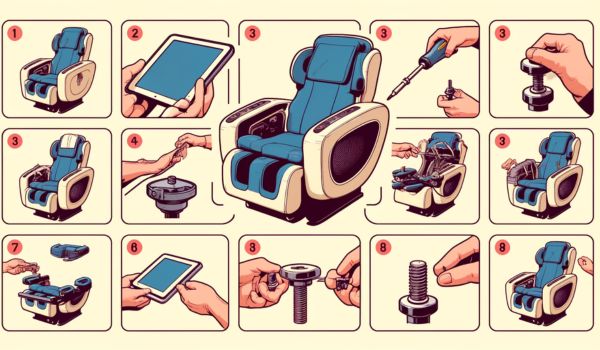
To replace the tablet holder on your Ogawa massage chair, follow these detailed steps for a seamless process.
Step 1: Remove the Old Tablet Holder
Begin by locating the tablet holder on your chair. Examine how it’s secured, typically with screws or clips. Using your screwdriver, remove these screws or clips carefully. Gently detach the holder from the chair, taking care not to damage any wiring or connectors. This step requires patience and precision to avoid any accidental harm to the chair’s structure or electronic components.
Step 2: Clean the Mounting Area
Once the old holder is removed, use a cleaning cloth to wipe down the mounting area, removing any dust and debris. This step is crucial for ensuring a clean surface for the new holder. Additionally, inspect the mounting area for any signs of damage or wear. Addressing any issues now will help in the secure attachment of the new holder and prolong the lifespan of your chair.
Step 3: Install the New Tablet Holder
Position the new tablet holder in place on the chair. Align it correctly with the mounting points. Secure it using the screws or clips you removed earlier, ensuring that it is firmly attached and properly aligned. Tighten the screws or clips adequately to prevent any wobbling or instability. Once installed, test the new holder by attaching your tablet to check for stability and ease of movement. Make any necessary adjustments to ensure it functions smoothly.
By following these steps, you can efficiently replace the tablet holder on your Ogawa massage chair, enhancing your overall massage experience.
Related Post
- How to bluetooth pair sam’s club gaming massage chair
- How to connect bluetooth to shiatsu gaming massage chair
Testing the New Tablet Holder and Troubleshooting Common Issues
After installing the new tablet holder on your Ogawa massage chair, it’s essential to ensure it functions correctly. Here’s how you can test it and troubleshoot any common issues that may arise.
Testing the New Tablet Holder
First, power on the massage chair. This step is crucial to ensure that all electronic components are functioning correctly and that the chair can be used safely with the new holder in place. Once the chair is powered on, test the stability and functionality of the new holder. Attach your tablet to the holder and check for stability, ensuring that it holds the tablet securely without any wobbling or instability.
Move the tablet around to check the holder’s range of motion and ease of use. If you find that the holder is not operating smoothly, make adjustments as necessary. This might involve loosening and repositioning the holder slightly before re-tightening the screws or clips to ensure a proper fit and operation.
Troubleshooting Common Issues
If you encounter any issues during the testing phase, here are some common problems and their solutions:
- Loose or Unstable Holder: If the holder feels loose or unstable, double-check the screws or clips. Ensure they are tightened properly. If the holder continues to wobble, it might be helpful to remove it and re-secure it more firmly.
- Misalignment: If the holder seems misaligned, it might not have been positioned correctly during installation. Loosen the screws or clips, reposition the holder to align it properly with the mounting points, and then re-secure it.
- Tablet Not Fitting Properly: If your tablet does not fit well in the new holder, verify that the holder is compatible with your tablet’s size and model. Sometimes, a replacement holder might be designed for specific tablet models. Ensure you have the correct holder for your tablet.
By thoroughly testing and troubleshooting, you can ensure that the new tablet holder on your Ogawa massage chair works perfectly, providing a seamless and enhanced massage experience.
Maintenance Tips for Longevity
To ensure the longevity of your new tablet holder on the Ogawa massage chair, regular maintenance is key. Regularly clean the holder and the surrounding area with a soft, dry cloth to remove dust and debris. This prevents buildup that can affect the holder’s functionality. Periodically check the holder for any signs of wear or damage, such as cracks or loose parts. Addressing these issues early can prevent more significant problems later on.
Handle the tablet holder with care when attaching or removing your tablet. Avoid applying excessive force, which can strain the holder and lead to damage. Using both hands to secure and remove the tablet can help distribute pressure evenly and reduce the risk of wear.
Related Post
Conclusion
Replacing the tablet holder on your Ogawa massage chair is a straightforward process that enhances your overall experience. With a fully functional tablet holder, you can enjoy uninterrupted access to controls and entertainment while you relax.
Regular maintenance will keep your holder in excellent condition, ensuring it serves you well for years to come. Keep your chair in top shape by performing these simple tasks and enjoy the continued benefits of your luxurious massage experience.
Frequently Asked Questions
Can a massage chair be fixed?
Yes, a massage chair can be fixed. Common issues such as motor problems, electronic malfunctions, or upholstery damage can often be repaired by a professional technician.
Is Ogawa made in China?
Ogawa massage chairs are manufactured in China. The company ensures high-quality production standards and incorporates advanced technology in its products.
How do you pack a massage chair?
To pack a massage chair, first, unplug and fold any extendable parts. Secure the chair with protective padding and place it in a sturdy box. Ensure all components are cushioned to prevent damage during transport.
Where is Ogawa massage chair from?
Ogawa is a Malaysian brand. The company designs its massage chairs with a focus on innovative features and user comfort, though manufacturing is primarily based in China.
How many years does a massage chair last?
A well-maintained massage chair can last between 10 to 15 years. Regular servicing and proper use can extend its lifespan, ensuring long-term functionality.
Is it good to use a massage chair every day?
Using a massage chair every day can be beneficial for relaxation and muscle tension relief. However, it’s important to use it according to the manufacturer’s guidelines to avoid overuse.
In this guide, we’ll dive deep into understanding how to connect Bluetooth to a Shiatsu gaming massage chair, why it matters, and how to get the most out of this fantastic feature.
Understanding Your Shiatsu Gaming Massage Chair
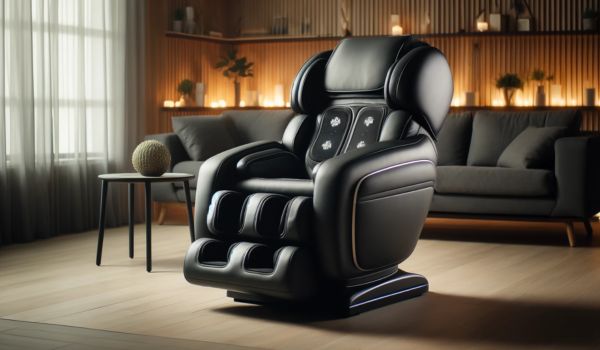
Shiatsu gaming massage chairs are the perfect blend of comfort and technology. They come packed with features designed to provide a comprehensive gaming and relaxation experience.
These chairs offer various massage settings, including kneading, rolling, and tapping, to help alleviate stress and improve circulation. But what truly sets them apart is their Bluetooth functionality, which can significantly enhance your chair’s usability.
Features of Shiatsu Gaming Massage Chairs
Shiatsu gaming massage chairs are equipped with multiple massage modes, adjustable intensity levels, and heating options. These features work together to deliver a personalized massage experience tailored to your needs.
Additionally, these chairs often include built-in speakers and Bluetooth connectivity, allowing you to immerse yourself fully in your favorite games or music.
Overview of the Bluetooth Functionality
Bluetooth functionality in a Shiatsu gaming massage chair lets you connect your chair to various smart devices, such as smartphones, tablets, or computers. This connection enables you to stream music, control the chair settings remotely, and even sync with gaming consoles for an integrated experience.
To enjoy these benefits, understanding how to connect Bluetooth to a Shiatsu gaming massage chair is crucial.
Common Issues and Troubleshooting Basics
Connecting Bluetooth to a Shiatsu gaming massage chair can sometimes be tricky. Common issues include difficulty pairing devices, poor connection quality, and occasional disconnections.
To troubleshoot these problems, ensure your chair is in pairing mode, your device’s Bluetooth is enabled, and there are no other devices interfering with the connection. If problems persist, consulting the chair’s user manual or contacting customer support may be necessary.
Related Post
- How to bluetooth pair sam’s club gaming massage chair
- How to connect bluetooth to osaki massage chair
Pre-Connection Preparations
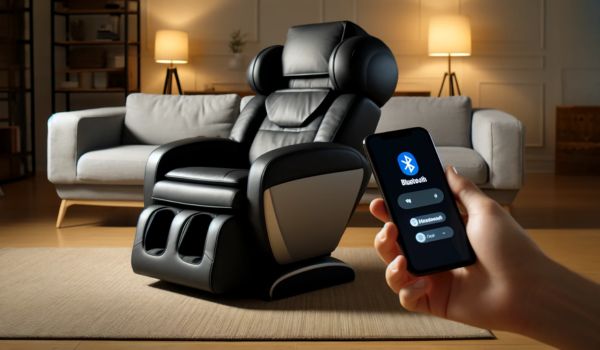
Before diving into the actual process of connecting Bluetooth to your Shiatsu gaming massage chair, it’s crucial to ensure everything is set up correctly. The first step is checking Bluetooth compatibility. Make sure your devices, such as smartphones or tablets, support the Bluetooth version compatible with your chair.
Most modern devices and Shiatsu gaming massage chairs use Bluetooth 4.0 or higher, but it’s always good to verify.
Next, ensure your chair is powered on and switched to Bluetooth mode. This is often indicated by a blinking light or a Bluetooth symbol on the chair’s control panel. Refer to your chair’s manual for specific instructions, as the activation process can vary between models.
Lastly, prepare your device. Make sure Bluetooth is enabled and your device is discoverable. This typically involves going to the settings menu, selecting Bluetooth, and turning it on. Your device will then begin searching for nearby Bluetooth signals, ready to pair with your Shiatsu gaming massage chair. By completing these pre-connection steps, you’ll pave the way for a smooth and successful Bluetooth setup.
Connecting Bluetooth on Different Devices
Connecting Bluetooth to a Shiatsu gaming massage chair varies slightly depending on the device you’re using. Here’s a comprehensive guide for iOS, Android, Windows, and Mac users.
Connecting to an iOS Device
For iPhone or iPad users, connecting Bluetooth to your Shiatsu gaming massage chair is straightforward. Begin by opening the Settings app and selecting Bluetooth. Ensure Bluetooth is turned on, and your device is in discovery mode.
Your chair should appear in the list of available devices. Tap on the chair’s name to initiate pairing. You might be prompted to enter a passcode, which is typically provided in your chair’s manual.
Once connected, you can enjoy seamless audio integration. If you encounter issues, ensure your iOS device and chair are within a reasonable distance and that no other Bluetooth devices are interfering. Restarting both devices can often resolve connectivity problems.
Connecting to an Android Device
Android users can follow a similar process. Open the Settings app and select Bluetooth. Turn on Bluetooth and ensure your device is discoverable. Your Shiatsu gaming massage chair should appear in the list of nearby devices. Tap on it to connect.
If a passcode is required, refer to your chair’s manual. To ensure a smooth connection, keep your device close to the chair and minimize interference from other electronics.
If issues arise, try restarting your device and the chair. Additionally, make sure your Android software is up to date, as updates often include Bluetooth connectivity improvements.
Connecting to a Windows PC
For Windows PC or laptop users, the process involves a few additional steps. Open the Settings menu and select Devices, then Bluetooth & other devices. Ensure Bluetooth is turned on.
Click “Add Bluetooth or other device” and select Bluetooth from the options. Your Shiatsu gaming massage chair should appear in the list. Click on it to connect.
If prompted for a passcode, refer to your chair’s manual. For a smooth connection, ensure your PC’s Bluetooth drivers are up to date. Restarting your computer and the chair can help resolve common issues. Additionally, check for any Windows updates that might improve Bluetooth functionality.
Connecting to a Mac
Mac users can connect to their Shiatsu gaming massage chair by opening System Preferences and selecting Bluetooth. Ensure Bluetooth is enabled. Your chair should appear in the list of available devices. Click on the chair’s name to connect.
If a passcode is needed, consult your chair’s manual. For the best connection, keep your Mac close to the chair and minimize electronic interference. If you face difficulties, restarting your Mac and the chair can be effective. Also, make sure your macOS is up to date to benefit from the latest Bluetooth enhancements.
By following these steps tailored to your specific device, you can easily connect Bluetooth to your Shiatsu gaming massage chair and enjoy an enhanced, integrated experience.
Using Bluetooth Features
Once you’ve successfully connected Bluetooth to your Shiatsu gaming massage chair, it’s time to explore and make the most of its features. Streaming music and audio through the chair’s built-in speakers can transform your relaxation or gaming sessions.
Simply open your preferred music app on your connected device and play your favorite tracks. The immersive sound quality from the chair’s speakers enhances your experience, making it more enjoyable and soothing.
In addition to streaming audio, some Shiatsu gaming massage chairs offer the ability to control various chair functions via Bluetooth.
You can adjust massage settings, change the intensity, or switch between different massage modes using a dedicated app on your smartphone or tablet. This level of control allows for a more personalized and convenient experience, enabling you to fine-tune your comfort without interrupting your relaxation.
Moreover, many Shiatsu gaming massage chairs come with specialized apps that provide enhanced functionality. These apps can offer features like custom massage programs, health tracking, and even integration with smart home systems. By using these apps, you can fully leverage the potential of your chair, tailoring it to meet your specific needs and preferences.
Related Post
- How to replace tablet holer on ogawa massage chair
- Why won’t my cell phone pair with my massage chair
Troubleshooting and Maintenance
Even with a high-quality Shiatsu gaming massage chair, you might encounter some Bluetooth connection issues. Common problems include the chair not appearing in the list of available devices, intermittent connectivity, or no audio streaming.
To solve these issues, ensure your chair and device are within range, and there are no obstacles or electronic interferences. Restart both the chair and your device to reset the connection.
If problems persist, try resetting the Bluetooth connection on the chair. This often involves holding down a specific button or combination of buttons, as detailed in your chair’s manual. Once reset, attempt to pair your device again.
Maintaining Bluetooth functionality for optimal performance involves regular updates to your device’s software and keeping the chair’s firmware current, if applicable. Clean the chair regularly to prevent dust build-up, which can interfere with the electronics. Additionally, avoid placing the chair near other electronic devices that might cause interference.
Conclusion
Connecting Bluetooth to your Shiatsu gaming massage chair offers numerous benefits, enhancing both your gaming and relaxation experiences. With easy control over music and chair functions, you’ll enjoy a seamless, integrated experience.
We encourage you to make the most of these features and elevate your comfort. If you have any feedback or further questions, feel free to reach out. Enjoy your enhanced Shiatsu gaming massage chair experience!
Frequently Asked Questions
How do I connect my massage chair to Bluetooth?
To connect your massage chair to Bluetooth, turn on the chair’s Bluetooth function, usually via the control panel or a dedicated button. Then, enable Bluetooth on your phone or device, search for the chair, and pair it.
How to connect to Ogawa Bluetooth?
To connect to Ogawa Bluetooth, first, power on your Ogawa massage chair and activate its Bluetooth. On your mobile device, go to the Bluetooth settings, search for “Ogawa,” and select it to pair. Follow any additional on-screen instructions.
How to connect Osaki Bluetooth?
For Osaki Bluetooth connection, start by turning on the Bluetooth function on your Osaki massage chair. On your smartphone or device, navigate to the Bluetooth settings, find the “Osaki” option, and select it to pair. Confirm the connection if prompted.
How does a Shiatsu massage chair work?
A Shiatsu massage chair uses rollers and airbags to mimic the techniques of Shiatsu massage, which involves applying pressure to specific points on the body. The chair’s rollers move in patterns to knead and press, relieving tension and promoting relaxation.
How do I connect my phone to my seat Bluetooth?
To connect your phone to your seat Bluetooth, ensure the seat’s Bluetooth is activated. Open your phone’s Bluetooth settings, search for the seat device, and tap to connect. Follow any prompts to complete the pairing process.
How do I connect Bluetooth accessories?
Connecting Bluetooth accessories involves turning on the accessory and ensuring it’s in pairing mode. On your device, enable Bluetooth, search for the accessory, and select it to pair. Follow any on-screen instructions to finalize the connection.
Imagine relaxing in your gaming massage chair, enjoying your favorite tunes or connecting it seamlessly with your gaming console. Sounds great, right? Let’s dive into the details of how to make this possible.
Understanding the Sam’s Club Gaming Massage Chair

The Sam’s Club Gaming Massage Chair is not just any ordinary chair. It’s a blend of comfort and technology, designed to elevate your gaming and relaxation experience.
This chair comes packed with features that make it a must-have for any gamer or anyone looking to add a touch of luxury to their home.
Features of the Sam’s Club Gaming Massage Chair
Built-in Bluetooth Speakers: One of the standout features of the Sam’s Club Gaming Massage Chair is its built-in Bluetooth speakers. These speakers allow you to enjoy high-quality audio without the hassle of wires.
Whether you’re playing a game, listening to music, or watching a movie, the immersive sound enhances your overall experience.
Massage Functions: The chair is equipped with advanced massage functions that can help relieve stress and tension. With various settings, you can customize your massage to suit your needs, making it perfect for relaxing after a long day or an intense gaming session.
Gaming Support: Designed with gamers in mind, this chair offers ergonomic support to keep you comfortable during extended gaming sessions. The design helps reduce strain on your back and neck, allowing you to focus more on your game and less on discomfort.
Benefits of Bluetooth Connectivity
Wireless Audio Streaming: The Bluetooth functionality of the Sam’s Club Gaming Massage Chair allows for seamless wireless audio streaming. This means you can connect your chair to your smartphone, tablet, or gaming console and enjoy high-quality audio without any cables getting in the way.
Syncing with Gaming Devices: By pairing the chair with your gaming devices, you can fully immerse yourself in the gaming world. The sound effects and music from your games will come to life, providing a more engaging and realistic experience.
Remote Control via Smartphone Apps: Another significant advantage of Bluetooth connectivity is the ability to control the chair using your smartphone. Various apps allow you to adjust the massage settings, change the volume, and even set timers, all from the convenience of your mobile device.
Related Post
- How to connect bluetooth to osaki massage chair
- How to connect bluetooth to shiatsu gaming massage chair
Preparing for Bluetooth Pairing
Before you dive into learning how to Bluetooth pair Sam’s Club Gaming Massage Chair, it’s important to ensure everything is set up correctly. This preparation will make the pairing process smooth and hassle-free.
Ensure the Chair is Properly Assembled
First things first, make sure your Sam’s Club Gaming Massage Chair is properly assembled. Follow the manufacturer’s instructions carefully to ensure all parts are securely in place. This not only guarantees a comfortable and safe experience but also ensures all features, including Bluetooth connectivity, function correctly.
Check the Power Supply and Ensure the Chair is Turned On
Once your chair is assembled, check the power supply. Make sure it’s plugged into a working outlet and that the chair is turned on. Look for an indicator light or any sign that shows the chair is receiving power. If the chair isn’t powered on, the Bluetooth function won’t be available.
Locate the Bluetooth Button on the Chair
Next, locate the Bluetooth button on your Sam’s Club Gaming Massage Chair. This button is typically found on the chair’s control panel, which might be on the side or the armrest. Familiarize yourself with its location, as you’ll need to activate it for pairing.
Ensure the Device You Want to Pair Has Bluetooth Enabled
Finally, ensure the device you want to pair with the chair, whether it’s a smartphone, tablet, or gaming console, has Bluetooth enabled. Go to the settings menu of your device, find the Bluetooth option, and switch it on. Your device should be in discoverable mode to connect with the chair.
By following these preparatory steps, you’ll be ready to successfully Bluetooth pair Sam’s Club Gaming Massage Chair. This preparation ensures that both your chair and device are ready for a seamless connection, setting the stage for an enhanced and enjoyable experience.
Step-by-Step Bluetooth Pairing Process

Getting your Sam’s Club Gaming Massage Chair connected via Bluetooth is straightforward. Follow these steps to ensure a successful pairing and enjoy all the benefits of your chair’s advanced features.
Step 1: Activating Bluetooth on the Chair
To start, you need to activate Bluetooth on your Sam’s Club Gaming Massage Chair. Locate the Bluetooth button on the control panel of your chair. Press and hold this button until you see an indicator that Bluetooth is active. This might be a blinking light or a sound cue, signaling that the chair is now discoverable and ready to pair with other devices.
Step 2: Activating Bluetooth on Your Device
Next, you’ll need to activate Bluetooth on your smartphone, tablet, or gaming console. Here’s how to do it on different devices:
- iOS Devices: Go to Settings > Bluetooth, and toggle the switch to turn Bluetooth on.
- Android Devices: Navigate to Settings > Connections > Bluetooth, and turn it on.
- Windows Devices: Open Settings > Devices > Bluetooth & other devices, and switch Bluetooth on.
Ensure your device remains discoverable so it can find and connect to your massage chair.
Step 3: Pairing the Devices
With Bluetooth enabled on both your chair and your device, it’s time to pair them. On your smartphone or tablet, open the Bluetooth settings menu where you turned Bluetooth on. The device will start searching for available Bluetooth devices nearby. Look for the Sam’s Club Gaming Massage Chair in the list of available devices. It might appear as “Sam’s Club Massage Chair” or a similar name. Select the chair from the list to initiate the pairing process.
Step 4: Confirming the Pairing
After selecting the chair, you may see a confirmation message on your device, asking if you want to pair with the chair. Confirm the pairing. You might also hear a sound or see a message on the chair indicating a successful connection. To ensure everything is working correctly, test the connection with a simple audio playback. Play some music or a video on your device, and the sound should come through the chair’s built-in Bluetooth speakers.
Related Post
- How to replace tablet holer on ogawa massage chair
- Why won’t my cell phone pair with my massage chair
Troubleshooting Common Issues
Even when you know how to Bluetooth pair Sam’s Club Gaming Massage Chair, you might encounter some common issues. Here are some problems you might face and their solutions.
Device Not Found
If your device can’t find the chair, ensure the chair’s Bluetooth is activated and in pairing mode. Check that your device’s Bluetooth is on and in discoverable mode. Restart both your device and the chair to refresh their Bluetooth settings.
Connection Drops
If the connection drops frequently, ensure both devices are within the optimal range, usually about 30 feet. Remove any obstacles between the chair and your device. Check if other Bluetooth devices might be causing interference and turn them off if necessary.
Poor Audio Quality
Poor audio quality can be frustrating. Make sure there are no obstructions between the chair and your device. Keep other electronic devices that might cause interference away. Ensure your device and the chair’s firmware are up to date, as updates can resolve compatibility issues.
Steps to Reset the Bluetooth Connection
If all else fails, resetting the Bluetooth connection can help. Turn off the chair and your device’s Bluetooth. Wait for a few seconds, then turn them back on and attempt to pair again. If necessary, refer to the chair’s manual for specific reset instructions.
When to Contact Customer Support
If you’ve tried all the troubleshooting steps and still face issues, it might be time to contact customer support. They can provide detailed assistance and may help identify any hardware issues.
Optimizing Your Bluetooth Experience
Knowing how to Bluetooth pair Sam’s Club Gaming Massage Chair is just the start. Here are some tips to maintain a stable connection and make the most of your chair’s features.
Keeping Devices Within Range
To maintain a stable Bluetooth connection, always keep your device within the recommended range of your chair. Typically, Bluetooth works best within a 30-foot radius. Avoid placing your device behind thick walls or large objects that could block the signal.
Minimizing Interference
Bluetooth signals can be disrupted by other electronic devices. Try to minimize the use of other Bluetooth devices nearby. Keep your router, microwave, and other potential sources of interference away from the chair and your device.
Using the Chair’s Features Effectively via Bluetooth
Make the most of your Bluetooth connection by fully utilizing your chair’s features.
Playing Music: Connect your device to the chair and enjoy your favorite music wirelessly. The built-in speakers provide a rich audio experience, perfect for relaxation or enhancing your gaming sessions.
Integrating with Gaming Consoles: Sync the chair with your gaming console for an immersive experience. The Bluetooth connection ensures that the sound effects and music from your games come through the chair’s speakers, adding to the realism.
Using Massage Functions via a Smartphone App: Many massage chairs come with companion apps that allow you to control various settings directly from your smartphone. Adjust the massage intensity, select different massage modes, and set timers without having to reach for the chair’s control panel.
By following these tips, you can optimize your experience with the Sam’s Club Gaming Massage Chair, ensuring you get the most out of its Bluetooth capabilities. Enjoy the perfect blend of technology and comfort, and transform your gaming or relaxation sessions into a premium experience.
Conclusion
Mastering how to Bluetooth pair Sam’s Club Gaming Massage Chair is simple with the right steps. From activating Bluetooth on both your chair and device to troubleshooting common issues, you’re now equipped to enjoy all its features. Relish in wireless audio, immersive gaming, and convenient massage controls via your smartphone. Don’t hesitate to dive into the full experience this chair offers. If you have any comments or questions, feel free to leave them below for further assistance. Enjoy the ultimate blend of comfort and technology!
Frequently Asked Questions
How do I connect my massage chair to Bluetooth?
To connect your massage chair to Bluetooth, first ensure the chair is powered on. Then, activate Bluetooth on your device and search for available connections. Select your massage chair from the list and follow any on-screen prompts to complete the pairing process.
How to connect Bluetooth to Ogawa massage chair?
For an Ogawa massage chair, power it on and enable Bluetooth on your device. Search for nearby Bluetooth devices, find the Ogawa chair, and select it. Follow the pairing instructions displayed on your device to complete the connection.
How to connect Osaki Bluetooth?
To connect to Osaki Bluetooth, turn on the chair and enable Bluetooth on your smartphone or tablet. Locate the Osaki device in the list of available Bluetooth devices and select it. Follow any pairing instructions provided to establish the connection.
How do I reset a massage chair?
To reset a massage chair, refer to the user manual for specific instructions. Generally, you may need to turn off the chair, unplug it, wait for a few minutes, and then plug it back in and turn it on. This should reset the chair to its default settings.
How do I connect my phone to my seat Bluetooth?
To connect your phone to your seat’s Bluetooth, power on the seat and ensure Bluetooth is enabled on your phone. Search for available Bluetooth devices, select your seat from the list, and follow any pairing prompts that appear on your phone’s screen.
How do I connect my Bluetooth to my rocker chair?
First, power on your rocker chair and activate Bluetooth on your device. Search for available Bluetooth devices and select your rocker chair from the list. Follow any on-screen instructions to complete the Bluetooth pairing process.